ARandomCitizen (talk | contribs) mNo edit summary |
AlternateRT (talk | contribs) (Moved category into template) |
||
| (27 intermediate revisions by 12 users not shown) | |||
| Line 1: | Line 1: | ||
| + | {{Stub|reason=Lore section is missing multiple lore rooms}}{{Spoiler}} |
||
| − | {{Spoiler}} |
||
{{Quotes |
{{Quotes |
||
| This is where most of the experiments to find a cure... failed. |
| This is where most of the experiments to find a cure... failed. |
||
| Line 8: | Line 8: | ||
{{BiomeInfobox |
{{BiomeInfobox |
||
| − | | name = Astrolab |
+ | | name = Astrolab |
| − | | image = Astrolab.png |
+ | | image = Astrolab.png |
| − | | stage = |
+ | | stage = 7 |
| − | | location = On top of the [[High Peak Castle]] |
+ | | location = On top of the [[High Peak Castle]] |
| + | | soundtrack = Astrolab |
||
| − | | entrance = [[Throne Room]] |
||
| − | | |
+ | | entrance_0 = [[Throne Room]] |
| + | | exit_0 = [[Observatory]] |
||
| ⚫ | |||
| ⚫ | |||
| − | | enemy_tier = 44 |
||
| + | | scroll_frags_3 = |
||
| − | | gear_level = 10 |
||
| + | | scroll_frags_4 = |
||
| ⚫ | |||
| + | | gear_level_0 = VII |
||
| ⚫ | |||
| + | | gear_level_1 = VII |
||
| − | | food_shop = Yes |
||
| + | | gear_level_2 = VII |
||
| − | | cursed_chests = |
||
| + | | gear_level_3 = VIII |
||
| ⚫ | |||
| + | | gear_level_4 = X |
||
| ⚫ | |||
| ⚫ | |||
| ⚫ | |||
| + | | enemy_tier_0 = 24-27 |
||
| ⚫ | |||
| + | | enemy_tier_1 = 31-32 |
||
| ⚫ | |||
| + | | enemy_tier_2 = 37-38 |
||
| − | | boss = |
||
| + | | enemy_tier_3 = 37-38 |
||
| ⚫ | |||
| + | | enemy_tier_4 = 37-46 |
||
| ⚫ | |||
| + | | enemy_hp_tiers_0 = Base |
||
| + | | enemy_hp_tiers_1 = 31-32 |
||
| + | | enemy_hp_tiers_2 = 37-38 |
||
| + | | enemy_hp_tiers_3 = 46-48 |
||
| + | | enemy_hp_tiers_4 = 46-48 |
||
| ⚫ | |||
| ⚫ | |||
| + | | cursed_chests_0 = 0% |
||
| + | | BSC_door_1 = |
||
| + | | BSC_door_2 = |
||
| + | | BSC_door_3 = |
||
| + | | BSC_door_4 = |
||
| ⚫ | |||
| ⚫ | |||
| + | | shops = |
||
| + | | untouchable_door = |
||
| ⚫ | |||
| ⚫ | |||
| + | | boss = |
||
| ⚫ | |||
| ⚫ | |||
}} |
}} |
||
| − | [[File:Astrolab Flag.png|left|]] |
+ | <div style="display:table;">[[File:Astrolab Flag.png|left|link=]] |
| − | The '''Astrolab''' is a special level accessible after the [[Throne Room]] only when playing with 5 [[Boss Stem Cell |
+ | The '''Astrolab''' is a special level accessible after the [[Throne Room]] only when playing with 5 [[Boss Stem Cell]]s active. It is exclusive to the ''[[Rise of the Giant DLC]]''. |
The Astrolab is the main laboratory used by the [[Alchemist]] for his experiments with curing the Malaise. This [[biome]] is particular in that it consists of a succession of floating platforms and structures with ladders connecting them, which the Beheaded must climb to reach the exit leading to the [[Observatory]]. If the player falls in the gap between platforms, they drop down far below and take a lot of damage thanks to the extreme enemy level scaling in this biome. |
The Astrolab is the main laboratory used by the [[Alchemist]] for his experiments with curing the Malaise. This [[biome]] is particular in that it consists of a succession of floating platforms and structures with ladders connecting them, which the Beheaded must climb to reach the exit leading to the [[Observatory]]. If the player falls in the gap between platforms, they drop down far below and take a lot of damage thanks to the extreme enemy level scaling in this biome. |
||
| − | On the walls of the Astrolab rooms, one can see scientific drawings and schemes alluding to the [[Alchemist |
+ | On the walls of the Astrolab rooms, one can see scientific drawings and schemes alluding to the [[Alchemist|Alchemist's]] experiments with the [[Malaise]] and [[Cells]], as well as plans to brew the [[Malaise#Treatment|Panacea]]. |
| − | In order to reach the exit, the [[Beheaded]] needs to collect a series of keys by beating Elite enemies. An Elite [[Failed Experiment]] and an Elite [[Slammer]] drop the Elevator and Allen keys, respectively, which can be used to reach a room where two Elite [[Slammer |
+ | In order to reach the exit, the [[Beheaded]] needs to collect a series of keys by beating Elite enemies. An Elite [[Failed Experiment]] and an Elite [[Slammer]] drop the Elevator and Allen keys, respectively, which can be used to reach a room where two Elite [[Slammer]]s are waiting. Upon defeating them, the player finds two Guardian's keys, which open the doors to the [[Observatory]].</div> |
== General information == |
== General information == |
||
=== Access and exit === |
=== Access and exit === |
||
| − | The Astrolab can only be accessed from the [[Throne Room]] when playing with 5 [[ |
+ | The Astrolab can only be accessed from the [[Throne Room]] when playing with 5 [[BSC]] active. Its only exit leads to the [[Observatory]]. |
=== Level characteristics === |
=== Level characteristics === |
||
| Line 83: | Line 104: | ||
==== Chests and loot ==== |
==== Chests and loot ==== |
||
| − | * 1 [[Chests|Treasure chest]] |
+ | * 1 [[Chests|Treasure chest]] |
==== Shops ==== |
==== Shops ==== |
||
| + | * 1 Weapon Shop or Skill Shop |
||
| − | * 1 weapon shop |
||
| − | * 1 Food |
+ | * 1 Food Shop |
== Exclusive blueprints == |
== Exclusive blueprints == |
||
| − | The Astrolab is home to two unique enemies that cannot be found in any other location of the island: the [[Magistrate of Death]] and the [[Defender]]. Those two enemies carry exclusive blueprints, respectively for the |
+ | The Astrolab is home to two unique enemies that cannot be found in any other location of the island: the [[Magistrate of Death]] and the [[Defender]]. Those two enemies carry exclusive blueprints, respectively for the {{Item|Hemorrhage}} and the {{Item|Thunder Shield}}. In addition, a hidden tower located under a corridor<ref>https://gfycat.com/SnoopyFavoriteKomododragon</ref> contains the [[Pickups#Keys|Apex Key]] behind a series of traps, which can be used to retrieve the blueprint for the {{Item|Sonic Carbine}} (see Gallery). |
== Enemies == |
== Enemies == |
||
| − | In addition to the unique enemies [[Defender]], [[Magistrate of Death]], and [[Librarian]], the Astrolab is home to [[Failed Experiment |
+ | In addition to the unique enemies [[Defender]]s, [[Magistrate of Death|Magistrates of Death]], and [[Librarian]]s, the Astrolab is home to [[Failed Experiment]]s, [[Slammer]]s and [[Bomber]]s. |
The table below lists which enemies are present in the Astrolab and which blueprints each may drop. |
The table below lists which enemies are present in the Astrolab and which blueprints each may drop. |
||
| Line 116: | Line 137: | ||
|- |
|- |
||
|[[Failed Experiment]] |
|[[Failed Experiment]] |
||
| − | | style="background-color:#0c0c0b; text-align: center;" |[[Mutations# |
+ | | style="background-color:#0c0c0b; text-align: center;" |[[Mutations#Survival Mutations|Berserker]] |
|} |
|} |
||
== Lore == |
== Lore == |
||
| − | === Crow |
+ | === Crow experiment room === |
| − | A room filled with empty crow cages hanging from the ceiling and a broken vat with a tap and a half filled filled flask standing beneath it. There is a desk with a grimoire of the |
+ | A room filled with empty crow cages hanging from the ceiling and a broken vat with a tap and a half filled filled flask standing beneath it. There is a desk with a grimoire of the [[Alchemist]]. This room is likely the explanation behind the existence of [[Slammer]]s. |
==== Research notebook ==== |
==== Research notebook ==== |
||
"''Against all odds, this solution created mutations in the infected crows instead of curing them.''" |
"''Against all odds, this solution created mutations in the infected crows instead of curing them.''" |
||
| Line 144: | Line 165: | ||
== Trivia == |
== Trivia == |
||
| − | * Although |
+ | * Although not through normal gameplay, it would be possible to access the Astrolab with 4-0 BSC active: the level is present in the .json files for all the difficulties. |
== Gallery == |
== Gallery == |
||
| Line 153: | Line 174: | ||
File:Astrolab4.jpg|The Apex key, in a tower full of traps and lava. |
File:Astrolab4.jpg|The Apex key, in a tower full of traps and lava. |
||
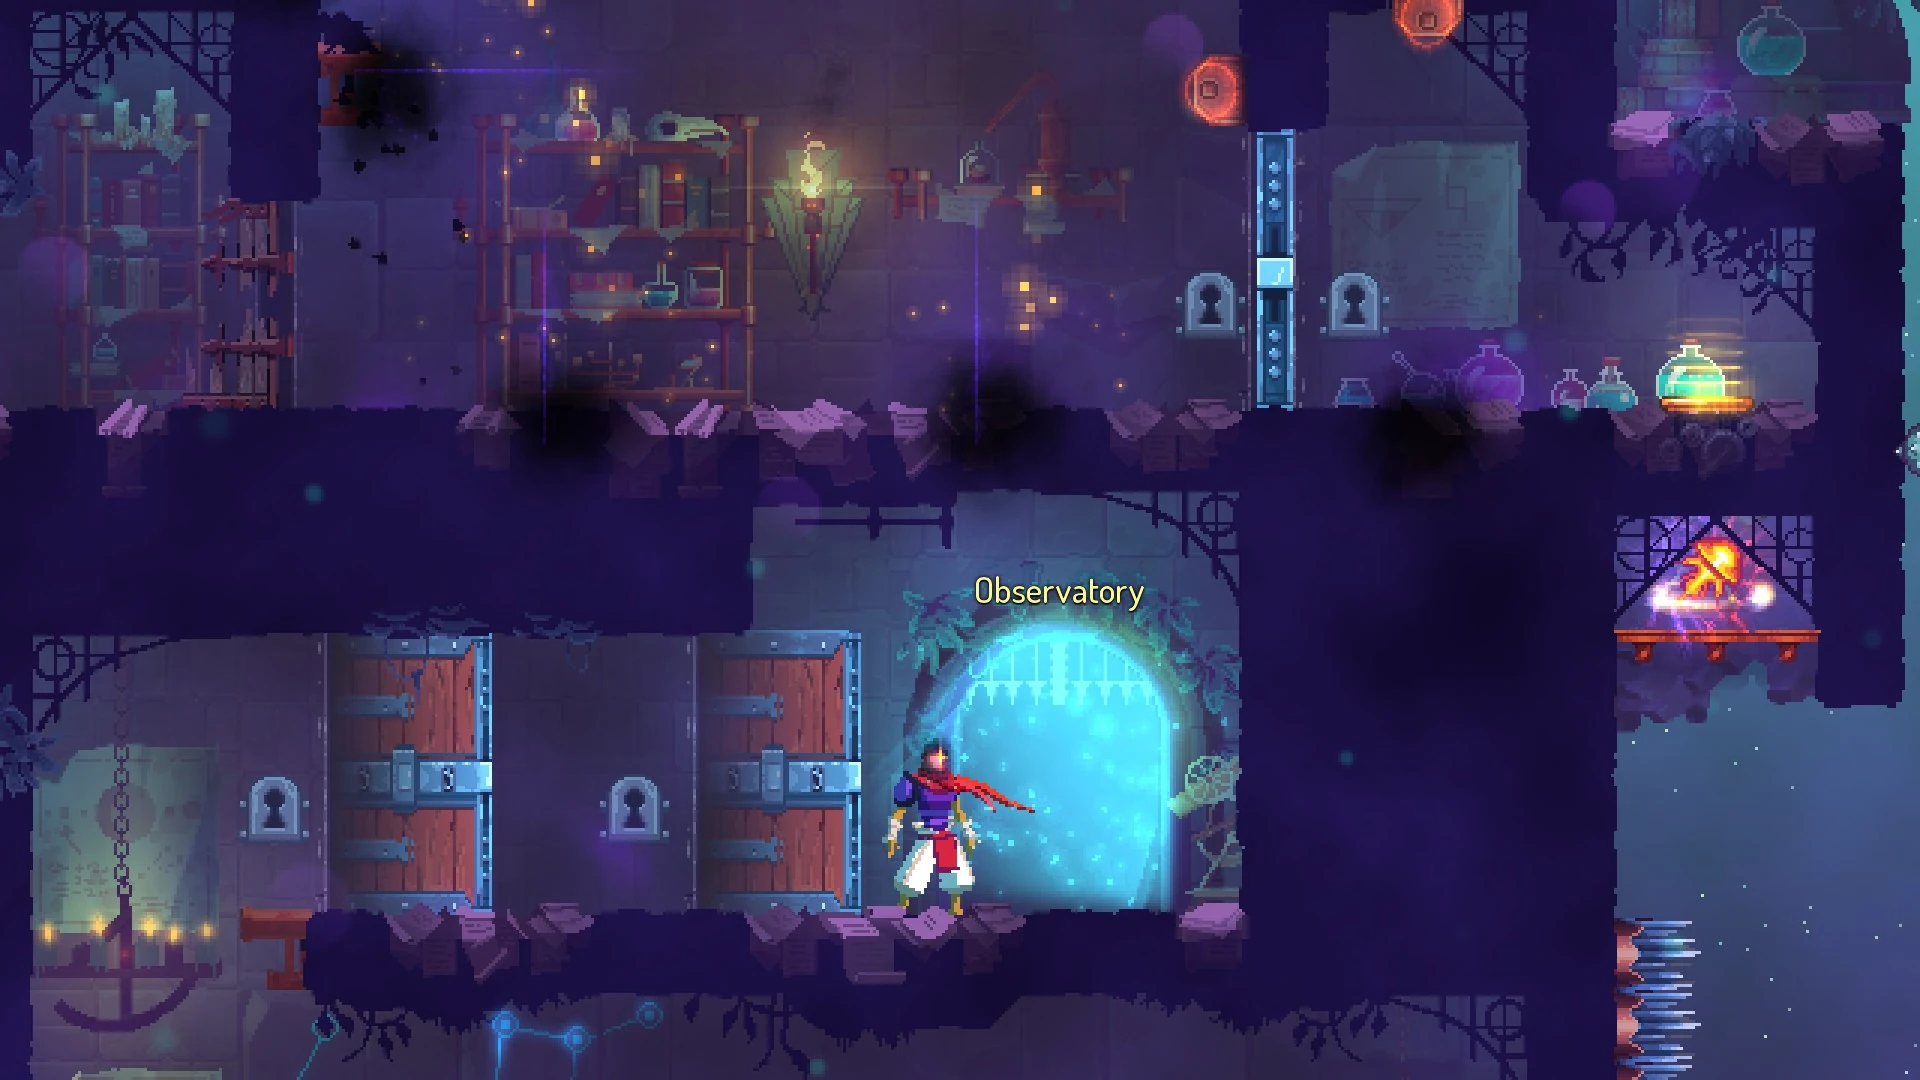
File:Astrolab3.jpg|The exit to the Observatory, with the door for the Apex key above, leading to the Sonic Carbine blueprint (here, an item instead). |
File:Astrolab3.jpg|The exit to the Observatory, with the door for the Apex key above, leading to the Sonic Carbine blueprint (here, an item instead). |
||
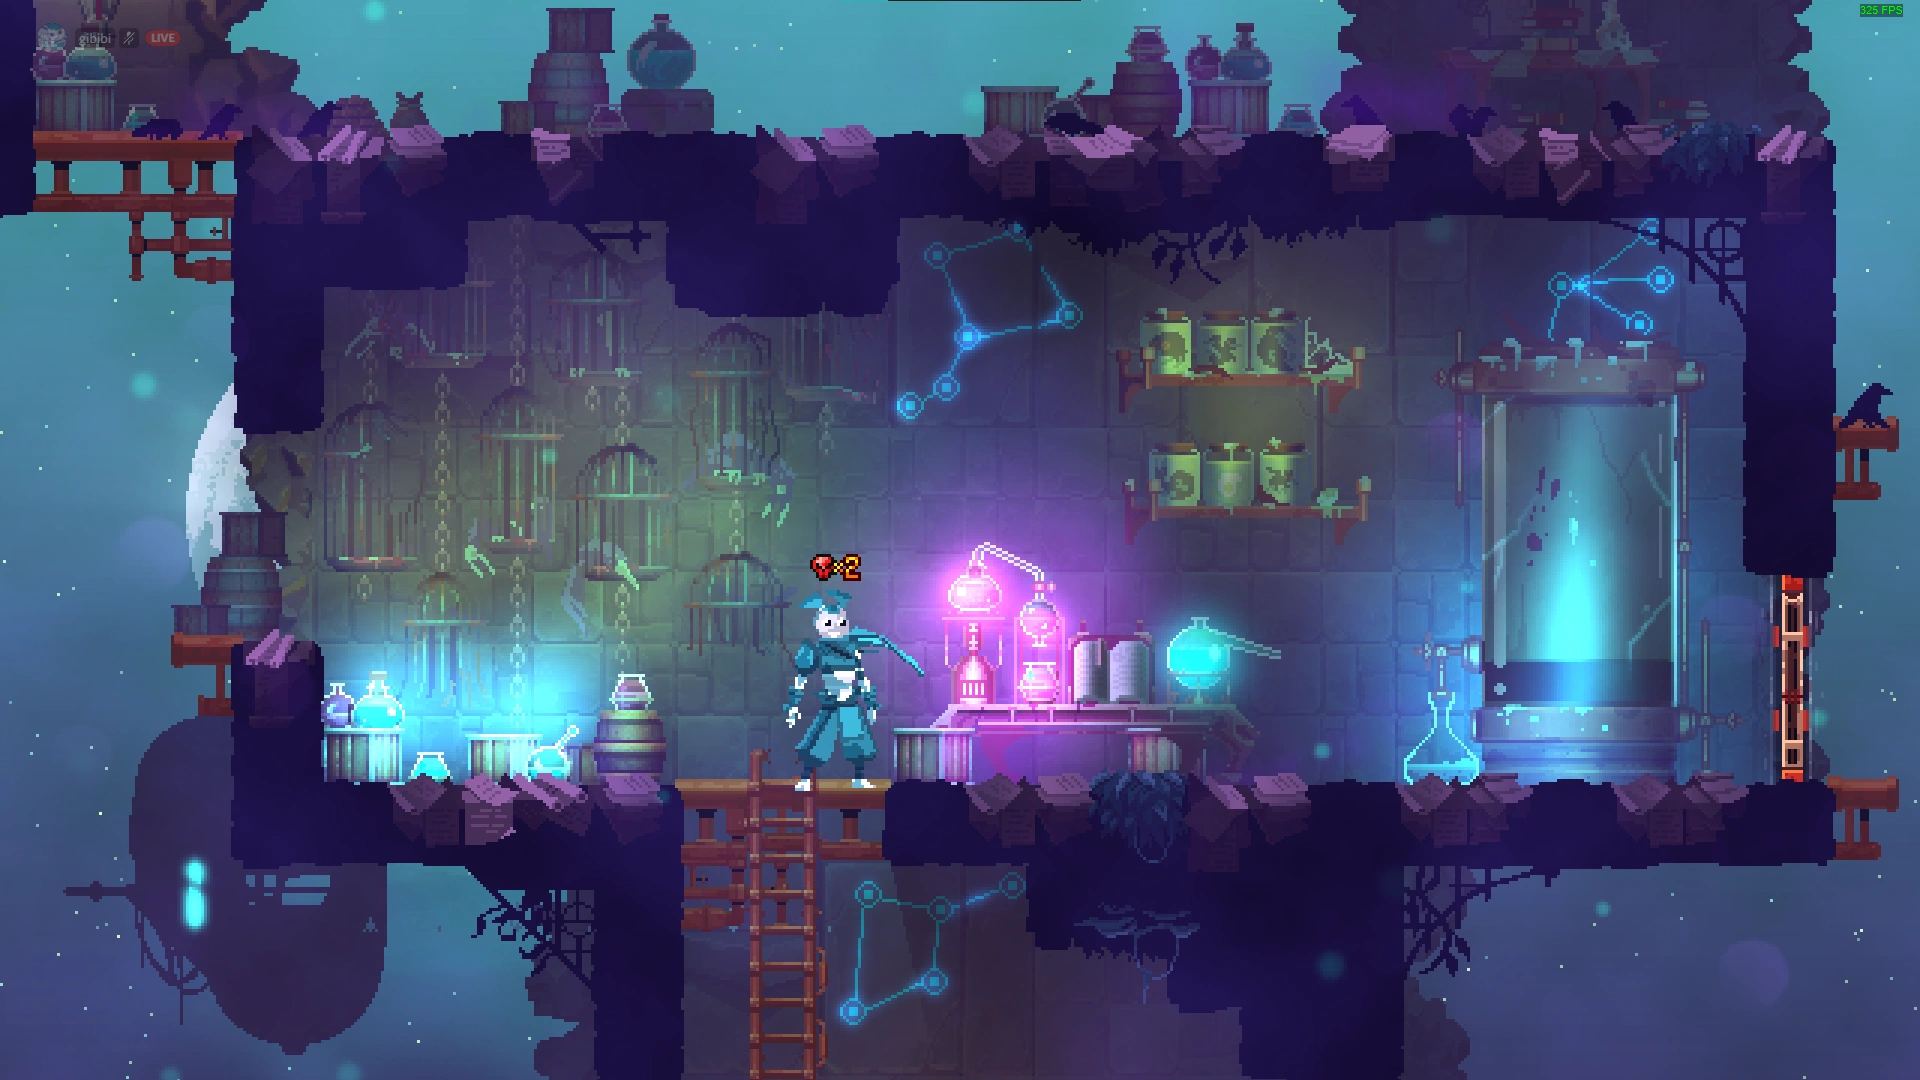
| + | File:AstrolabCrowLore.png|Room mentioning experiments done on crows to cure malaise but which backfired, creating the [[Slammer]]s. |
||
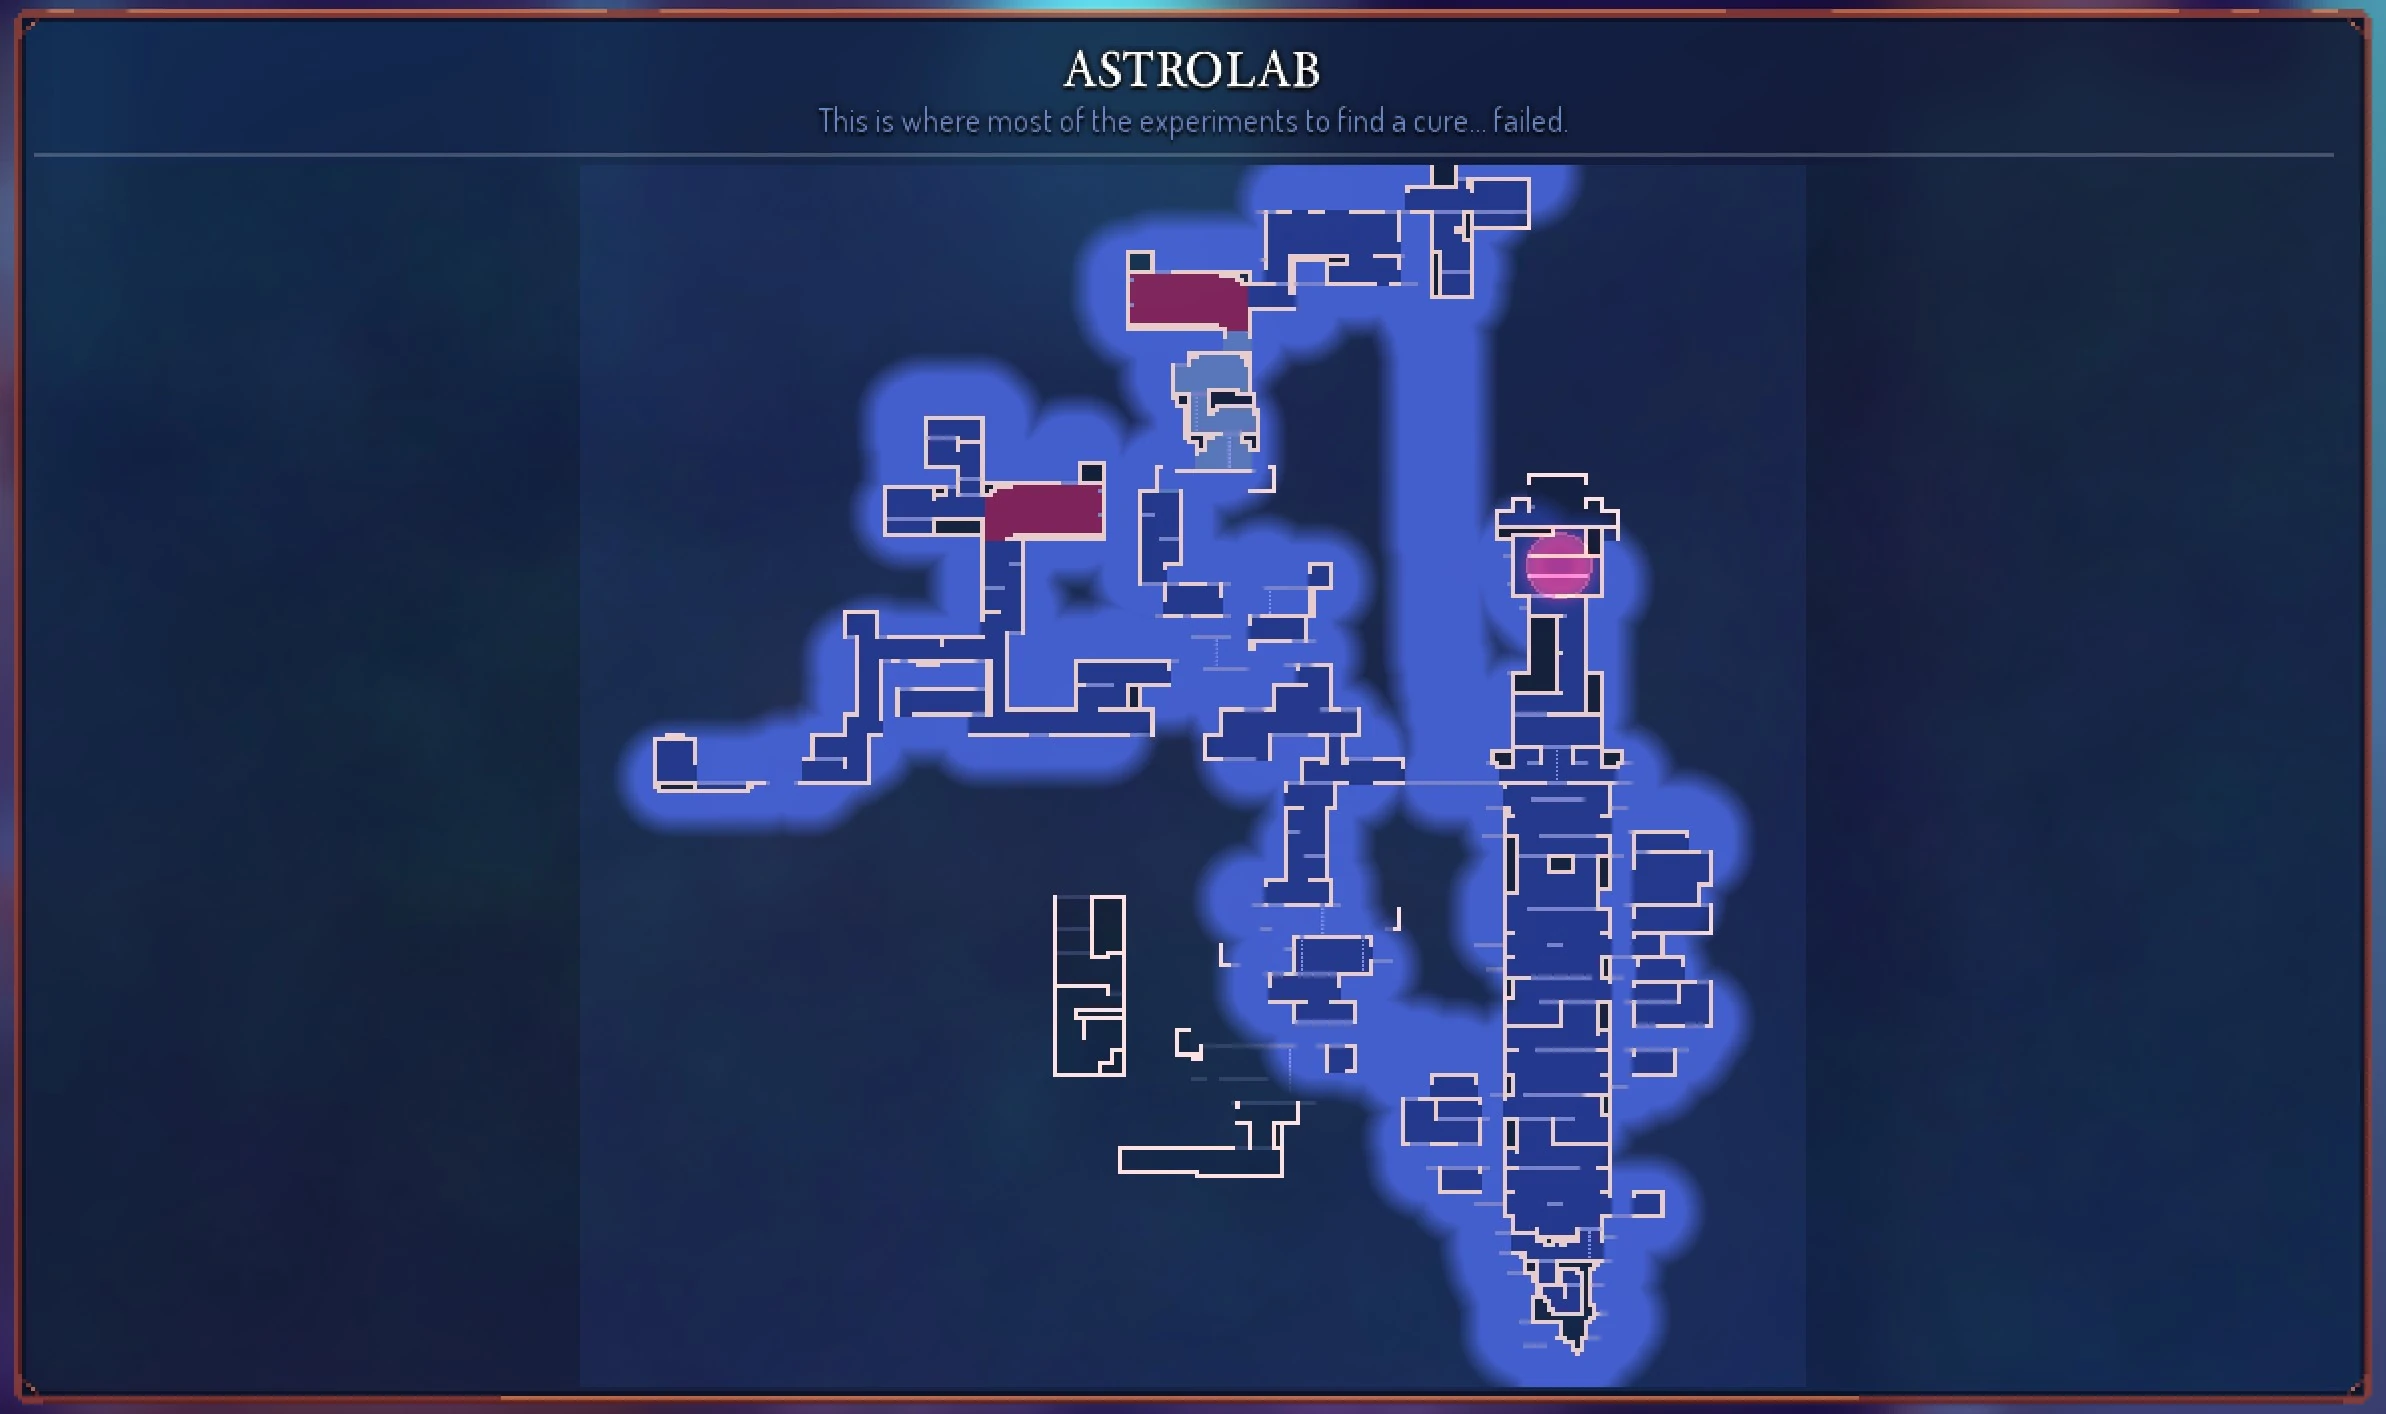
| + | File:Astrolab full map.jpg|Fully explored map of Astrolab showing general generation of the level. |
||
</gallery> |
</gallery> |
||
Revision as of 20:56, 21 May 2021
This article is a stub. You can help Dead Cells Wiki by expanding it.
|
- Reason: Lore section is missing multiple lore rooms
| This article contains spoilers regarding the true ending of the game. Discretion is advised. |
The Astrolab is a special level accessible after the Throne Room only when playing with 5 Boss Stem Cells active. It is exclusive to the Rise of the Giant DLC.
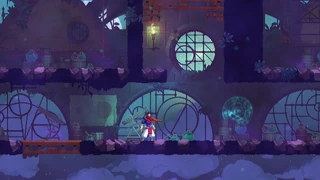
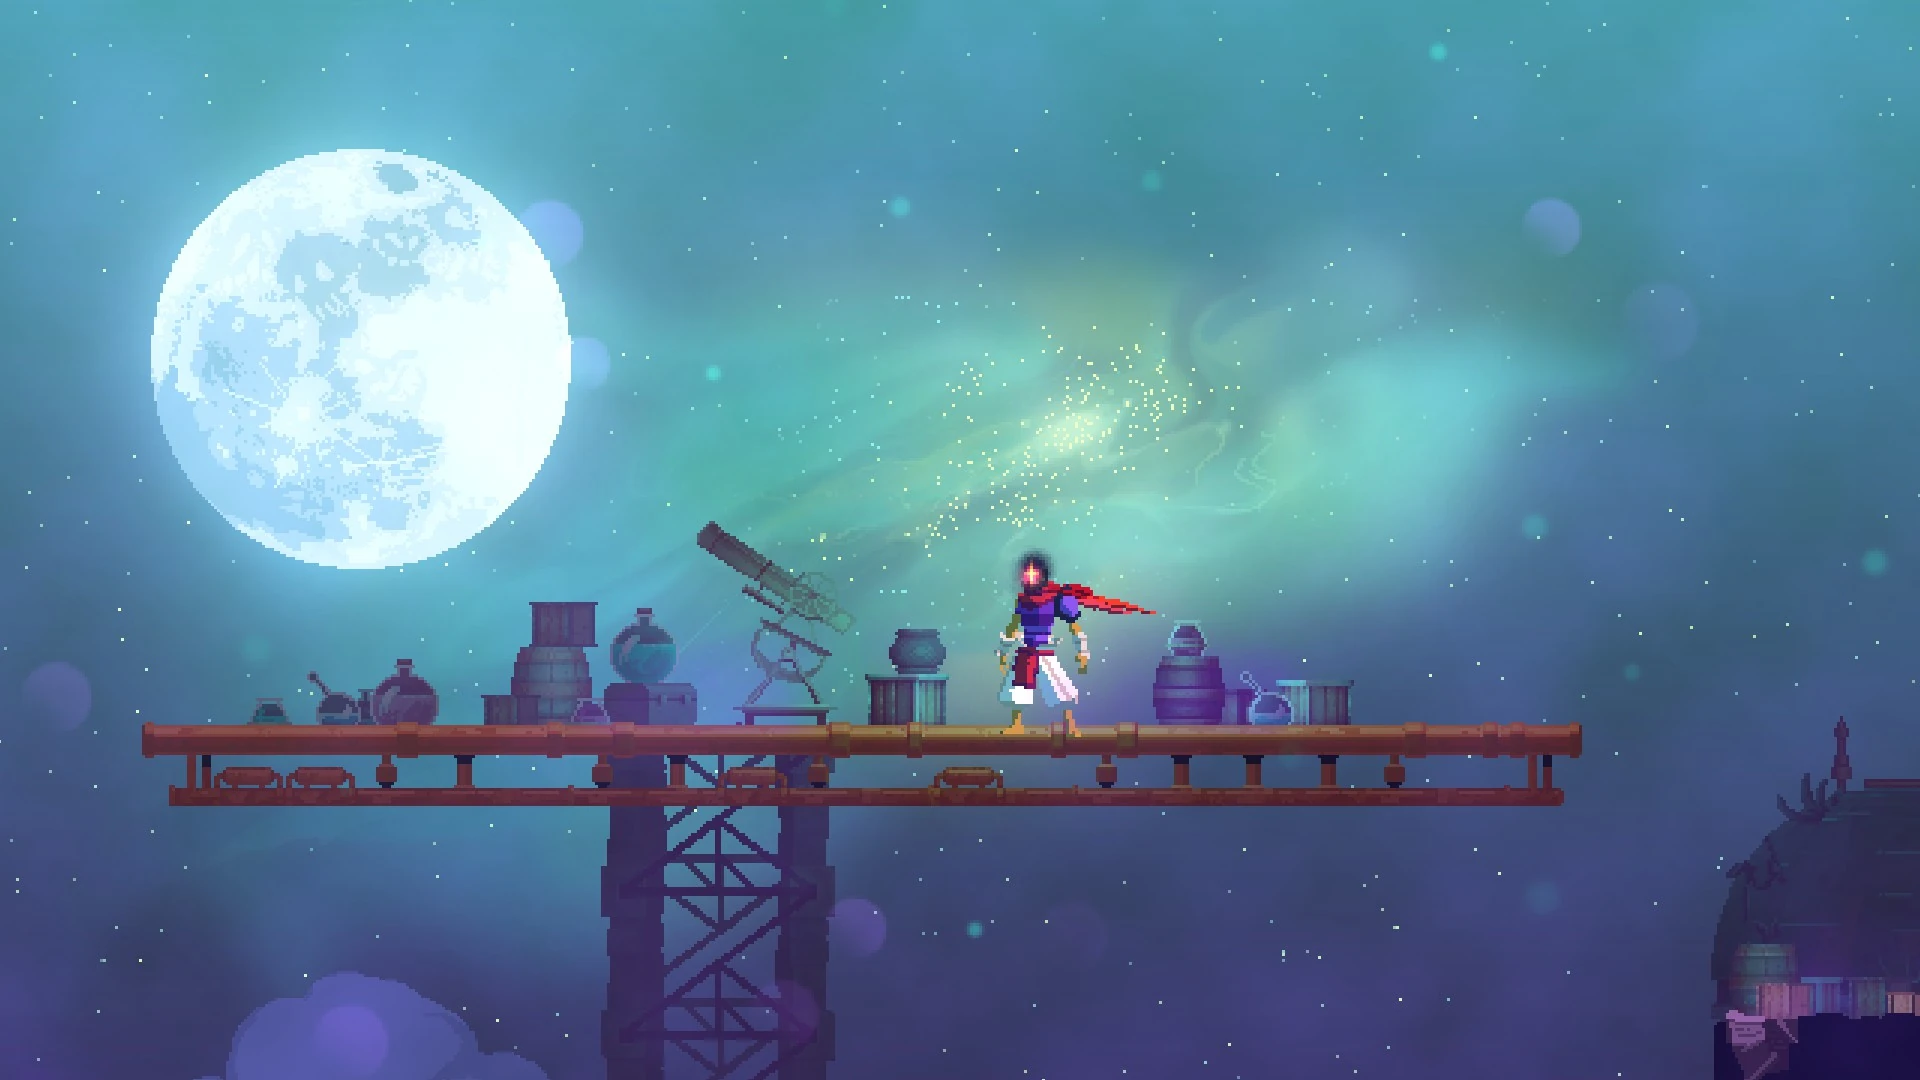
The Astrolab is the main laboratory used by the Alchemist for his experiments with curing the Malaise. This biome is particular in that it consists of a succession of floating platforms and structures with ladders connecting them, which the Beheaded must climb to reach the exit leading to the Observatory. If the player falls in the gap between platforms, they drop down far below and take a lot of damage thanks to the extreme enemy level scaling in this biome.
On the walls of the Astrolab rooms, one can see scientific drawings and schemes alluding to the Alchemist's experiments with the Malaise and Cells, as well as plans to brew the Panacea.
In order to reach the exit, the Beheaded needs to collect a series of keys by beating Elite enemies. An Elite Failed Experiment and an Elite Slammer drop the Elevator and Allen keys, respectively, which can be used to reach a room where two Elite Slammers are waiting. Upon defeating them, the player finds two Guardian's keys, which open the doors to the Observatory.General information
Access and exit
The Astrolab can only be accessed from the Throne Room when playing with 5 BSC active. Its only exit leads to the Observatory.
Level characteristics
Scrolls
The Astrolab contains 2 Dual-stat scrolls.
Enemy tier and gear level scaling
In the table below, you will find the gear level and enemy tier of the Astrolab based on difficulty. Even though the Astrolab can only be accessed on Hell difficulty there are enemy tiers set for lower difficulties.
| Difficulty | Normal | Hard | Very Hard | Expert | Nightmare/Hell |
|---|---|---|---|---|---|
| Gear level | VII | VII | VII | VIII | X |
| Enemy lvl tier | 24 - 27 | 31 - 32 | 37 - 38 | 37 - 38 | 37 - 46 |
| Enemy Health tier | Base | 31 - 32 | 37 - 38 | 46 - 48 | 46 - 48 |
Chests and loot
Shops
- 1 Weapon Shop or Skill Shop
- 1 Food Shop
Exclusive blueprints
The Astrolab is home to two unique enemies that cannot be found in any other location of the island: the Magistrate of Death and the Defender. Those two enemies carry exclusive blueprints, respectively for the ![]() Hemorrhage and the
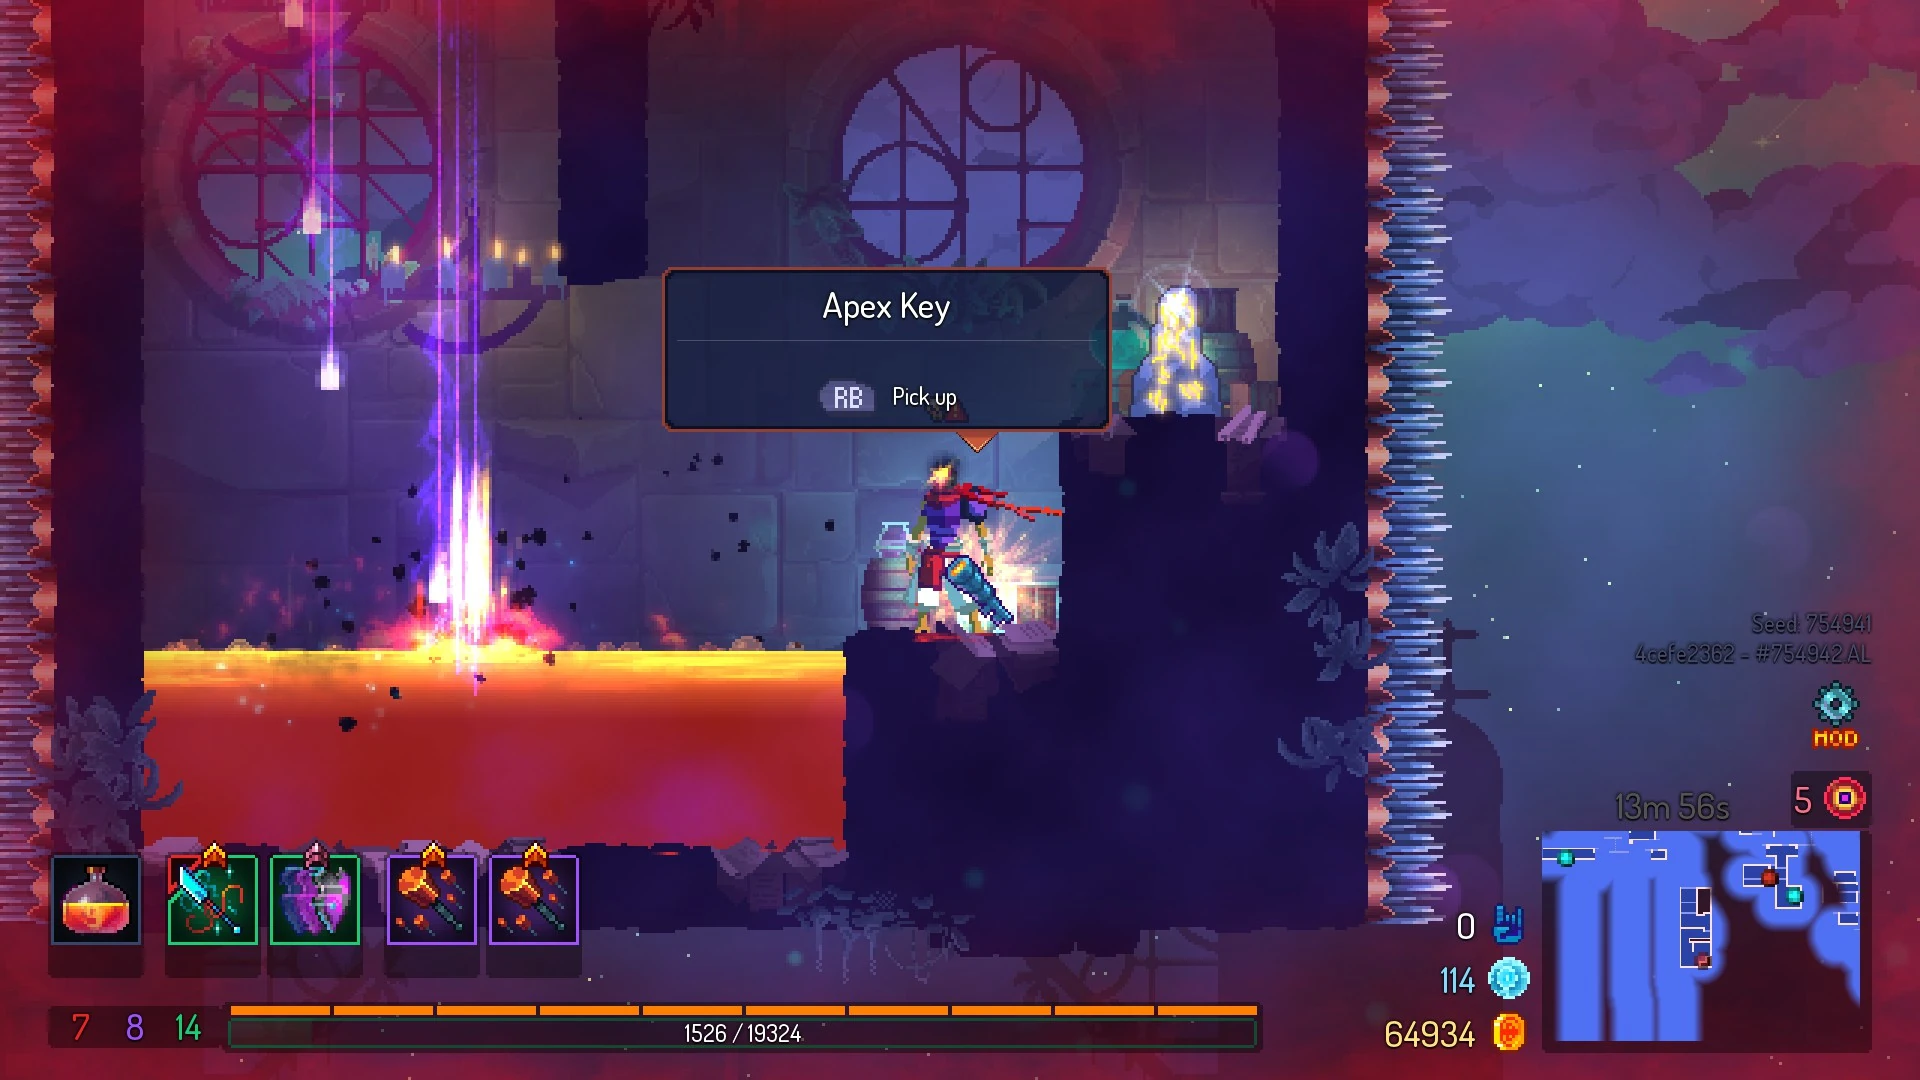
Hemorrhage and the ![]() Thunder Shield. In addition, a hidden tower located under a corridor[1] contains the Apex Key behind a series of traps, which can be used to retrieve the blueprint for the
Thunder Shield. In addition, a hidden tower located under a corridor[1] contains the Apex Key behind a series of traps, which can be used to retrieve the blueprint for the ![]() Sonic Carbine (see Gallery).
Sonic Carbine (see Gallery).
Enemies
In addition to the unique enemies Defenders, Magistrates of Death, and Librarians, the Astrolab is home to Failed Experiments, Slammers and Bombers.
The table below lists which enemies are present in the Astrolab and which blueprints each may drop.
| Enemy | |
|---|---|
| Defender | Thunder Shield |
| Magistrate of Death | Hemorrhage |
| Librarian | |
| Bomber | Seismic Strike, A Thousand and One Nights Outfit |
| Slammer | Flawless, Tactical Retreat |
| Failed Experiment | Berserker |
Lore
Crow experiment room
A room filled with empty crow cages hanging from the ceiling and a broken vat with a tap and a half filled filled flask standing beneath it. There is a desk with a grimoire of the Alchemist. This room is likely the explanation behind the existence of Slammers.
Research notebook
"Against all odds, this solution created mutations in the infected crows instead of curing them."
"Some subjects managed to escape by breaking the bars of their cage!"
"God only knows where they are now... I hope their condition has stabilized now."
Solution
When examined the beheaded notes:
"Another failed cure..."
"How many crows drank this solution?"
Cage
When examined the beheaded notes:
"All these broken cages..."
"Those crows give me the creeps!"
Trivia
- Although not through normal gameplay, it would be possible to access the Astrolab with 4-0 BSC active: the level is present in the .json files for all the difficulties.
Gallery


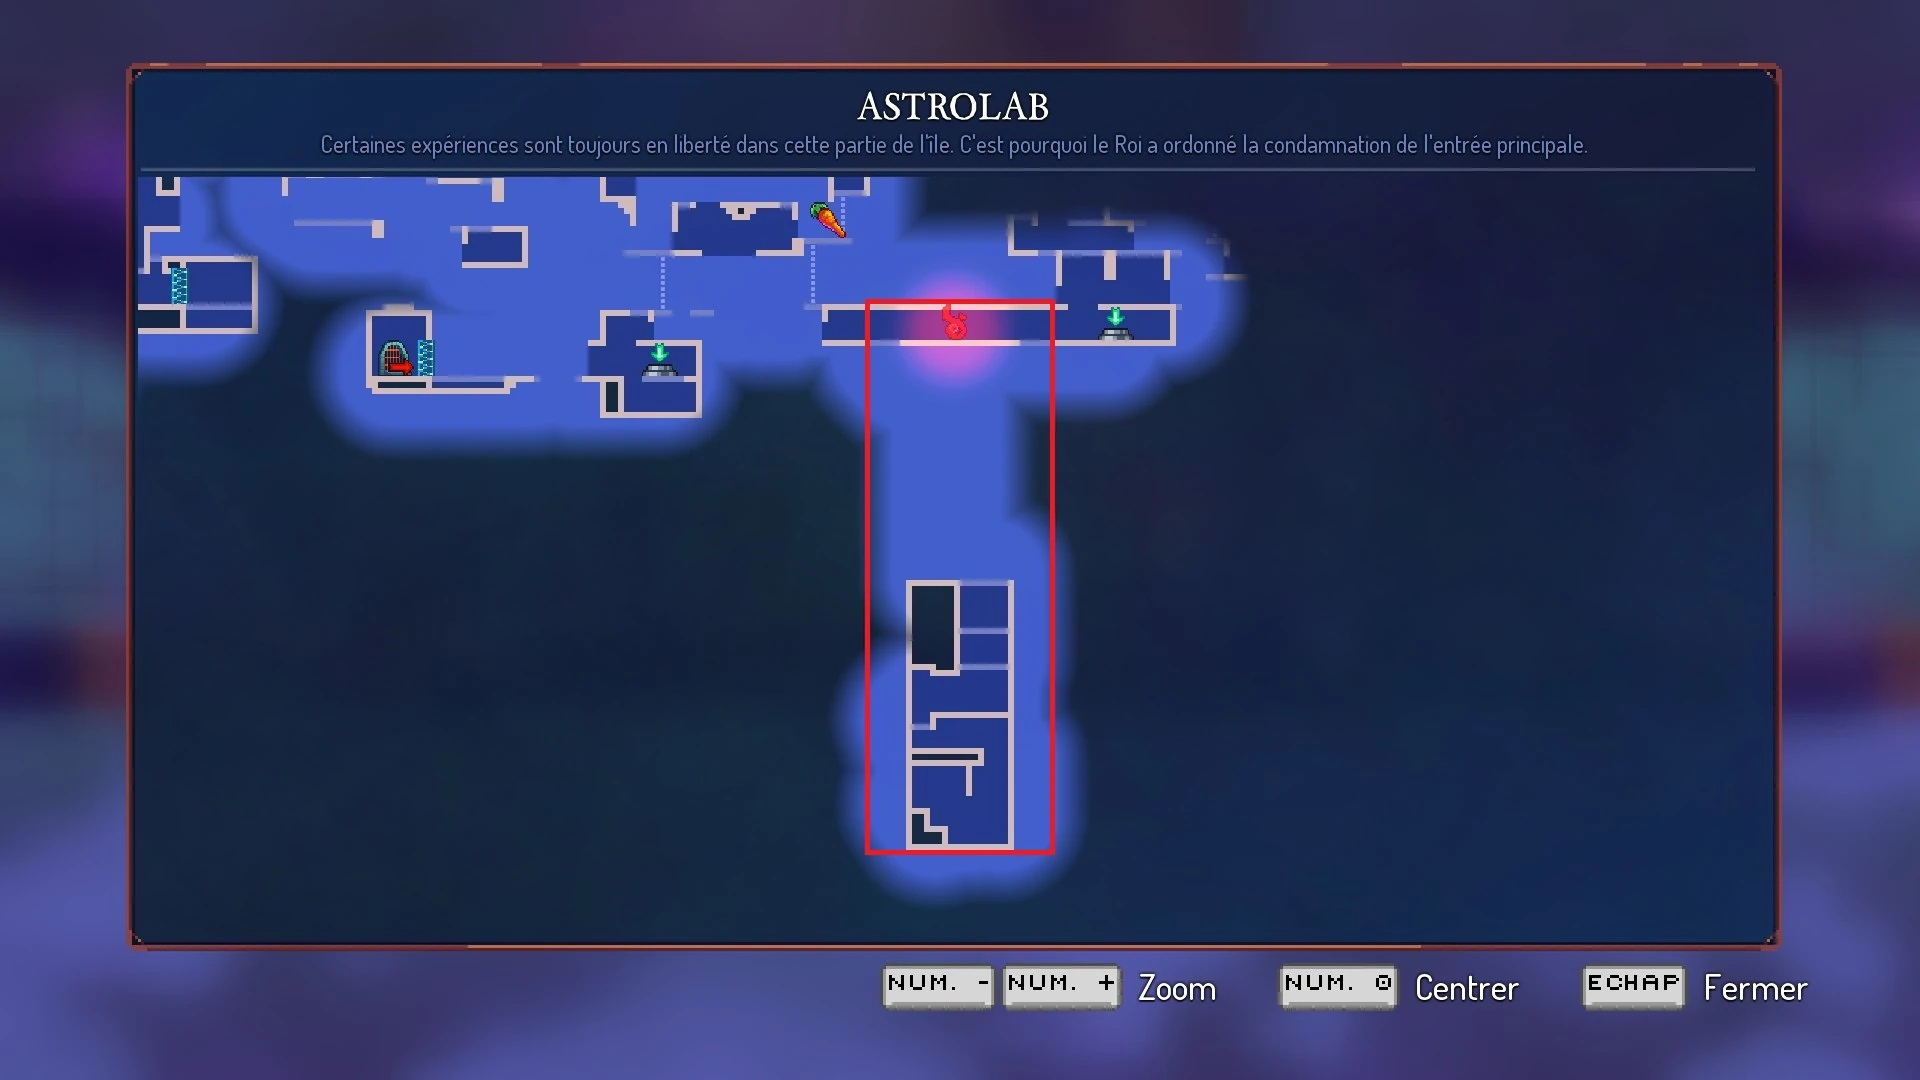
Location of the hidden tower holding the Apex key.

The Apex key, in a tower full of traps and lava.
The exit to the Observatory, with the door for the Apex key above, leading to the Sonic Carbine blueprint (here, an item instead).
Room mentioning experiments done on crows to cure malaise but which backfired, creating the Slammers.
Fully explored map of Astrolab showing general generation of the level.

References
| ||||||||||||||||||||||||||||||||||||||||||||||