Tsunakami321 (talk | contribs) m (→First Boss) |
|||
| Line 252: | Line 252: | ||
* '''Gear Level:''' 3 |
* '''Gear Level:''' 3 |
||
* '''Scrolls:''' 2 [[Scroll Fragments]] (3 [[BSC]]), 3 [[Scroll Fragments]] (4/5 [[BSC]]) |
* '''Scrolls:''' 2 [[Scroll Fragments]] (3 [[BSC]]), 3 [[Scroll Fragments]] (4/5 [[BSC]]) |
||
| − | * '''Exits:''' [[Stilt Village]] |
+ | * '''Exits:''' [[Stilt Village]], [[Fractured Shrines]]{{DLC|FF}} |
** {{Rune|spider}} [[Slumbering Sanctuary]] |
** {{Rune|spider}} [[Slumbering Sanctuary]] |
||
* '''Timed Door (after the fight):''' 15 minutes ({{Item|Root Grenade}} blueprint) |
* '''Timed Door (after the fight):''' 15 minutes ({{Item|Root Grenade}} blueprint) |
||
Revision as of 21:31, 29 January 2021
| Interactive map |

Biomes are the different areas within Dead Cells which players must progress through.[1] There are currently twenty-five biomes, with plans to add more.[2]
Within each run, biomes are procedurally generated within the confines of that biome's set parameters. This puts the focus of gameplay on adaptation rather than memorization, while maintaining each biome's distinct feel.[3] The order in which you'll encounter biomes, and the general location of their exits, are predetermined.
Excluding boss biomes, each biome always contains a shop and at least one treasure chest.
After exiting each biome, the player will enter the Collector's room. Here, they can turn in blueprints, spend cells, enter Timed and Perfect Doors if they met the requirements and replenish their health and health potions. Time spent in treasure chests, shops, lore rooms, and the Collector's room does not count towards Timed Doors. You will know if you are in one of these rooms if there is a [Pause] above the timer.
Note: scaling of enemy and trap stats with tiers operates somewhat differently compared to scaling of player damage and health with Stats - though damage and health initially scale exponentially using bases of 1.09 and 1.08, respectively, there are also additional factors in the code called "scale multipliers per tier" with values of 0.55 and 0.12 for damage and health, respectively. It is not yet known how these modify the exponential formulas to produce final enemy and trap stats.
You will also find in many Biomes a set of doors with up to five dotted circles on them, in random spread-out locations. These can only be unlocked once you have obtained the necessary number of Boss Stem Cells that are only obtained by doing a complete run, and unlock further challenges.
First Stage: Prisoners' Quarters

- Enemy Tier: 1 - 3
- Gear Level: 1
- Scrolls: 2 Power
- Enemies: Zombies, Shieldbearers, Grenadiers, Undead Archers
 Rancid Rats, Knife Throwers (replaces Undead Archers), Oven Knights (replaces Shield bearers)
 Inquisitors (replaces knife throwers), Demolishers
- Rampagers
- Failed Experiments
- Exits: Promenade of the Condemned
- Doors:
- Cavern Key Door - The big door at the start of the biome. Contains the Cavern Key and Homunculus Rune is required to get it. (The Hand of the King must have been beaten at least once)
- Cavern Key Door - The big door at the start of the biome. Contains the Cavern Key and
- Keys:
- Cavern Key: Gives access to the CavernRotG.
- Dilapidated Arboretum Key: Gives access to the Dilapidated ArboretumTBS. It’s near the exit to it.
Second Stage
Promenade of the Condemned
- Runes Needed to Access: None
- Enemy Tier: 3 - 7
- Gear Level: 2
- Scrolls: 1 Power, 1 extra power (1+ BSC), 2 Dual-Stat, 1 Scroll Fragment (3 BSC), 2 Scroll Fragments (4/5 BSC)
- Enemies: Zombies, Grenadiers, Runners, Bats, Protectors
- Kamikazes
- Dark Trackers
- Bombardiers (Replaces Grenadiers)
- Failed Experiments (Replaces Dark Trackers)
- Exits: Ramparts
- Timed Door: 2 minutes (Assault Shield blueprint)
- Hazards: Spikes, spiked flails
- Boss Cell doors:
- Keys:
- Gardener's Key: There are 3 of them, give access to the blueprint of Explosive Crossbow; also give access to 3 Moonflower Keys when 3BSC or more are active.
- Runes: Vine Rune
Toxic Sewers
- Runes Needed to Access: Vine Rune
- Enemy Tier: 4 - 7
- Gear Level: 3
- Scrolls: 1 Power, 1 extra power (1+ BSC), 2 Dual-Stat, 2 Scroll Fragments (3 BSC), 3 Scroll Fragments (4/5 BSC)
- Enemies: Zombies, Scorpions, Disgusting Worms, Undead Archers, Kamikazes, Rancid Rats
- Grenadiers (Replaces Undead Archers)
- Buzzcutters
- Rampagers (Replaces Zombies)
- Purulent Zombies (Sewers) (Replaces Grenadiers), Corpse Worms (spawned by Purulent Zombies (Sewers))
- Exits: Ramparts
- Timed Door: 2 minutes (File:1 Mutation Icon.pngfrenzy blueprint)
- Hazards: Toxic pools
- Cell doors:
- Runes: Teleportation Rune
Dilapidated ArboretumTBS

- Runes Needed to Access: Teleportation Rune
- Enemy Tier: 3 - 6
- Gear Level: 2
- Scrolls: 1 Power, 1 extra power (1+ BSC), 2 Dual-Stat, 1 Scroll Fragment (3 BSC), 2 Scroll Fragments (4/5 BSC)
- Enemies: YeetersTBS, JerkshroomsTBS, Thornies, Zombies, Bats
- Impalers
- Kamikazes (Replaces Bats)
- Rampagers (Replaces Zombies)
- Buzzcutters
- Exits: Morass of the BanishedTBS, Ramparts
- Timed Door: 2 minutes
- Hazards: Spikes, carnivorous plants
- Boss Cell doors:
Optional Stages
Prison Depths
- Entrances: Promenade of the Condemned, Dilapidated ArboretumTBS
- Runes Needed to Access: Spider Rune
- Enemy Tier: 8 - 9
- Gear Level: 3
- Scrolls: 1 Power (contained in a Cursed chest)
- Enemies: Zombies, Undead Archers, Slashers, Maskers, Hammers, Sewer Flies (spawned from Hammers), Kamikazes, Lacerators
- Knife Throwers (Replaces Undead Archers)
- Rampagers (Replaces Zombies)
- Exits: Ossuary, Morass of the BanishedTBS
- Hazards: Spikes, spiked flails
- Boss Cell doors:
- Ancient Sewers exit
- Keys:
- Iron Cells Key: Give access to 1 of 2 treasure rooms in the end of the biome, each room contains two chained items.
Can only be accessed via the Promenade of the Condemned and Dilapidated ArboretumTBS. This biome acts as an optional stage between the second and third stages.
Corrupted Prison
- Runes Needed to Access: Spider Rune
- Enemy Tier: 8 - 9
- Gear Level: 3
- Scrolls: 1 Power (contained in a Cursed chest)
- Enemies: Slammers, Shockers, Bats, Grenadiers, Zombies, Rancid Rats, Toxic Miasmas
- Protectors (Replaces Shockers)
- Weirded Warriors, Dark Trackers (Replaces Zombies)
- Inquisitors (Replaces Grenadiers)
- Bombers (Replaces Dark Trackers)
- Exits: Ancient Sewers
- Boss Cell doors:
- Ramparts exit
- Keys:
- Iron Cells Key: Give access to 1 of 2 treasure rooms in the end of the biome, each room contains two chained items.
Can only be accessed via the Toxic Sewers. This biome acts as an optional stage between the second and third stages.
Third Stage
Ramparts

- Entrances: Toxic Sewers, Promenade of the Condemned, Dilapidated ArboretumTBS, Corrupted Prison (1+ BSC)
- Enemy Tier: 7 - 13
- Gear Level: 3
- Scrolls: 3 Power, 1 extra Power (2+ BSC), 2 Dual-Stat, 1 Scroll Fragment (3 BSC), 2 Scroll Fragments (4/5 BSC)
- Enemies: Zombies, Undead Archers, Buzzcutters, Inquisitors, Sweepers, Shieldbearers
- Weirded Warriors, Slashers, Demolishers (replaces Undead Archers)
- Oven Knights (Replaces Shieldbearers)
- Rampagers (Replaces Zombies)
- Cannibals (Replaces Slashers)
- Exits: Black Bridge
- Timed Door: 8 minutes
- Hazards: Void
- Cell doors:
- Keys:
- Moonflower Key: The first one. Hidden behind some foliage.
- Runes: Customization Rune
Ancient Sewers
- Entrances: Toxic Sewers (Ram Rune needed), Corrupted Prison, Prison Depths (1+ BSC)
- Enemy Tier: 6 - 13
- Gear Level: 4
- Scrolls: 3 Power, 1 extra Power (2+ BSC), 2 Dual-Stat, 3 Scroll Fragments (3 BSC), 5 Scroll Fragments (4/5 BSC)
- Enemies: Zombies, Purulent Zombies (Sewers), Corpse Worms (spawned by Purulent Zombies (Sewers)), Shieldbearers, Disgusting Worms, Kamikazes, Impalers, Sewer's Tentacles
- Failed Experiments (Replaces Zombies)
- Exit: Insufferable Crypt
- Hazards: Toxic pools, spikes, spiked flails
- Boss Cell doors:
- Keys:
- Old Service Key: 3 in total, used to access 3 of the 8 rewards at the end of the biome. Dropped by random enemies.
Ossuary
- Entrances: Promenade of the Condemned, Prison Depths
- Enemy Tier: 7 - 13
- Gear Level: 3
- Scrolls: 2 Power (+1 in a guaranteed Cursed chest), 1 extra Power (2+ BSC), 2 Dual-Stat, 2 Scroll Fragments (3 BSC), 3 Scroll Fragments (4/5 BSC)
- Enemies: Zombies, Grenadiers, Slashers, Shockers, Thornies, Spawners, Corpse Juices (spawned from Spawners)
- Inquisitors
- Bombers (Replaces Grenadiers)
- Dark Trackers (Replaces Zombies)
- Bombardiers (Replaces Bombers)
- Exit: Black Bridge
- Timed Door: 8 minutes (Marksman's Bow blueprint)
- Cell doors:
- Runes: Ram Rune
Morass of the BanishedTBS
- Entrances: Dilapidated ArboretumTBS, Prison Depths, Promenade of the Condemned
- Runes Needed to Access: Teleportation Rune (if entering from Promenade of the Condemned)
- Enemy Tier: 6 - 12
- Gear Level: 3
- Scrolls: 2 Power (+1 in a guaranteed Cursed chest), 1 extra Power (2+ BSC), 2 Dual-Stat, 2 Scroll Fragments (3 BSC), 4 Scroll Fragments (4/5 BSC)
- Enemies: BanishedTBS, BlowgunnersTBS, Giant TicksTBS, Weaver Worms, Cleavers, Slashers
- Dark Trackers
- Rampagers (Replaces Dark Trackers)
- Maskers
- Exit: NestTBS
- Boss Cell doors:
First Boss
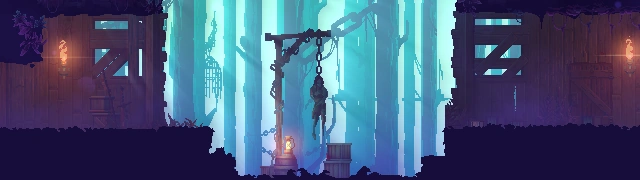
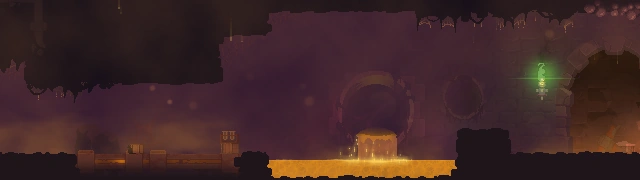
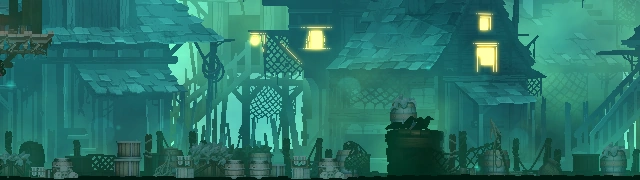
Black Bridge

- Entrances: Ossuary, Ramparts
- Enemies: The Concierge
- Enemy Tier: 13
- Gear Level: 3
- Scrolls: 2 Scroll Fragments (3 BSC), 3 Scroll Fragments (4/5 BSC)
- Exits: Stilt Village, Fractured ShrinesFF
- Timed Door (after the fight): 15 minutes (Root Grenade blueprint)
- Perfect Door (after the fight): Flawless fight (Legendary item)
- Runes: Challenger's Rune
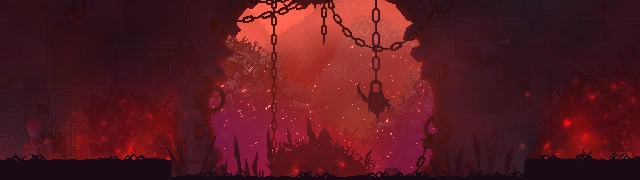
Insufferable Crypt

- Entrances: Ancient Sewers, Ramparts (3+ BSC)
- Enemies: Conjunctivius, Conjunctivius's Tentacles
- Enemy Tier: 11
- Gear Level: 3
- Scrolls: 3 Scroll Fragments (3 BSC), 5 Scroll Fragments (4/5 BSC)
- Timed Door (after the fight): 19:30 minutes (only if going to the Graveyard)
- Perfect Door (after the fight): Flawless fight (Legendary item)
- Exits: Slumbering Sanctuary
- Hazards: Spikes
NestTBS
- Entrances: Morass of the BanishedTBS
- Enemies: Mama TickTBS
- Enemy Tier: 12
- Gear Level: 3
- Scrolls: 3 Scroll Fragments (3 BSC), 4 Scroll Fragments (4/5 BSC)
- Timed Door (after the fight): 15 minutes
- Perfect Door (after the fight): Flawless fight (Legendary item)
- Exits: Stilt Village
Fourth Stage
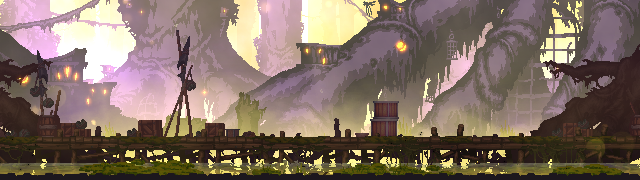
Stilt Village
- Entrances: Black Bridge, NestTBS
- Enemy Tier: 14 - 18
- Gear Level: 4
- Scrolls: 3 Power, 1 extra power (3+ BSC), 1 Dual-Stat, 1 Scroll Fragment (3 BSC), 2 Scroll Fragments (4/5 BSC)
- Enemies: Purulent Zombies (Sewers), Corpse Worms (spawned from Purulent Zombies (Sewers)), Weaver Worms, Pirate Captains, Zombies, Kamikazes, Weirded Warriors
- Demolishers
- Bombers
- Rampagers (Replaces Zombies)
- Failed Experiments
- Exit: Clock Tower, Fractured ShrinesFF
- Cell Doors:
- Keys:
- Village Key: 2 keys can be found in 2 key rooms in the biome, which lead to exits to Forgotten Sepulcher, Fractured ShrinesFF or the Clock Tower, or blueprint of Parry Shield.
Slumbering Sanctuary
- Entrances: Black Bridge (Spider Rune required), Insufferable Crypt
- Enemy Tier: 15 - 20
- Gear Level: 4
- Scrolls: 2 Power (+1 in a guaranteed Cursed chest), 1 extra power (3+ BSC), 1 Dual-Stat, 2 Scroll Fragments (3 BSC), 3 Scroll Fragments (4/5 BSC)
- Enemies:
- Before activating AT switch: Zombies, Catchers, Maskers, Casters
- After activating AT switch: Grenadiers, Inquisitors, Protectors, Kamikazes, Golems, Oven Knights, Dancers
- Bombardiers (Replaces Grenadiers)
- Rampagers
- Demons (Replaces Inquisitors)
- Exits: Clock Tower, Forgotten Sepulcher, Fractured ShrinesFF
- Timed Door: 26 minutes
- Hazards: Spikes, spiked flails, sawblades
- Cell Doors:
- Treasure chest
- Chained items, CavernRotG exit
- Treasure chest
- Runes: Spider Rune
Graveyard

- Entrances: Insufferable Crypt (Spider Rune required), NestTBS (Spider Rune required)
- Enemy Tier: 14 - 19
- Gear Level: 4
- Scrolls: 2 Power (+1 in a guaranteed Cursed chest), 1 extra power (3+ BSC), 1 Dual-Stat, 2 Scroll Fragments (3 BSC), 3 Scroll Fragments (4/5 BSC)
- Enemies: Purulent Zombies (Graveyard), Corpse Flies (spawned from Purulent Zombies (Graveyard)), Inquisitors, Catchers, Bats, Kamikazes, Maskers, Rancid Rats
- Protectors
- Bombers (Replaces Bats)
- Cannibals
- Exits: Forgotten Sepulcher, CavernRotG (Cavern Key needed), Fractured ShrinesFF
- Timed Door: 19 minutes, 30 seconds
- Hazards: Spikes, spiked flails
- Cell Doors:
- Keys:
- Graveyard Key: Give access to the bottom half of the biome.
- Architect's Key: Give access to blueprints of and Merchandise Categories. Hidden in a random Wall Secret.
- Moonflower Key: The second one. Hidden behind some foliage.
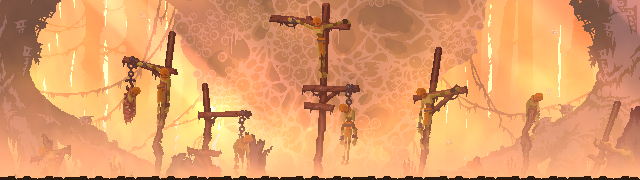
Fractured ShrinesFF

- Entrances: Black Bridge, NestTBS
- Enemy Tier: 12 - 16
- Gear Level: 4
- Scrolls: 1 Power (+1 in a guaranteed Cursed chest), 2 Dual-Stat, 1 Scroll Fragment (3 BSC), 2 Scroll Fragments (4/5 BSC)
- Enemies: Myopic CrowsFF, Stone WardensFF, Cold Blooded GuardiansFF, Slashers, inquisitors, Zombies, Grenadiers, Undead Archers
- Shockers
- Bombardiers (Replaces Grenadiers)
- Bombers (Replaces Zombies)
- Catchers (Replaces Undead Archers)
- Exits: Undying ShoresFF (Cultist OutfitFF), Clock Tower, Forgotten Sepulcher
- Hazards: Pits, rotating axe, swinging log, Myopic Crows
- Cell Doors:
Fifth Stage
Clock Tower

- Entrances: Stilt Village, Slumbering Sanctuary
- Enemy Tier: 19 - 23
- Gear Level: 5
- Scrolls: 4 Power, 1 extra power (4+ BSC), 2 Dual-Stat, 2 Scroll Fragments (3 BSC), 3 Scroll Fragments (4/5 BSC)
- Enemies: Dark Trackers, Cannibals, Bombardiers, Undead Archers, Automatons
- Oven Knights
- Rampagers
- Demolishers (replace Undead Archers)
- Exits: Clock Room
- Hazards: Spikes, spiked flails
- Cell Doors:
- Keys:
- Clockmaker's Key: Gives access to Clock Room. Located in one of the three or four towers.
- Bell Tower Key: Gives access to blueprint of Punishment. Look for the 4 Bells and hit them once from low to high pitch.
Forgotten Sepulcher

- Entrances: Stilt Village (Teleportation Rune required), Slumbering Sanctuary, Graveyard
- Enemy Tier: 19 - 23
- Gear Level: 5
- Scrolls: 3 Power (+1 in a guaranteed Cursed chest), 1 extra power (4+ BSC), 2 Dual-Stat, 3 Scroll Fragments (3 BSC), 4 Scroll Fragments (4/5 BSC)
- Enemies: Dark Trackers, Inquisitors, Lacerators, Cleavers, Kamikazes, Shockers, Corpulent Zombies
- Knife Throwers
- Shieldbearers, Weirded Warriors
- Failed Experiments (Replaces Inquisitors)
- Exits: Clock Room
- Guardian's HavenRotG (The GiantRotG has to have been killed at least once)
- Timed Door: 26 minutes
- Hazards: Spikes, darkness
- Cell Doors:
- Keys:
- Crypt Key: There are 2 of them, each leading player further in the level.
- Moonflower Key: The third one. Hidden behind some foliage.
- Runes: Explorer's Rune
CavernRotG

- Entrances: Graveyard (Cavern Key needed for the first time, always unlocked after that), Slumbering Sanctuary (2+ BSC and kill the GiantRotG at least once)
- Enemy Tier: 20 - 24
- Gear Level: 7
- Scrolls: 4 Power, 1 extra power (4+ BSC), 2 Dual-Stat, 4 Scroll Fragments (3 BSC), 5 Scroll Fragments (4/5 BSC)
- Enemies: Ground ShakersRotG, Inquisitors, ArbitersRotG, Demons, Lacerators, Slammers, SkeletonsRotG
- Oven Knights
- Failed Experiments (Replace Lacerators)
- Exits: Guardian's HavenRotG
- Hazards: Pools of lava, lanterns, spikes, spiked flails, electric waves
- Cell Doors:
- Keys
- Garland Key: Gives access to the 4 BSC door which contains the blueprint of Festive Outfit. Look for a vine passage in the ceiling, often near a shop.
Undying ShoresFF

- Entrances: Fractured ShrinesFF (Cultist OutfitFF needs to be equipped the first time, always unlocked after that), alternate entrances from Slumbering Sanctuary, Stilt Village and Graveyard are available after the entrance in Fractured ShrinesFF has been unlocked.
- Enemy Tier: 19 - 23
- Gear Level: 6
- Scrolls: 4 Power, 2 Dual-Stat, 3 Scroll Fragments (3 BSC), 4 Scroll Fragments (4/5 BSC)
- Enemies: ApostatesFF, Failed HomunculiFF, Compulsive GravediggersFF, Clumsy SwordsmenFF, Dastardly ArchersFF, Rancid Rats, Grenadiers, Bats
- Knife Throwers
- Slammers (Replace Bats)
- Rampagers
- Failed Experiments
- Exits: MausoleumFF
- Hazards: Pits
- Cell Doors:
- TBA
Second Boss
Clock Room

- Entrances: Clock Tower, Forgotten Sepulcher
- Enemies: The Time Keeper
- Enemy Tier: 22
- Gear Level: 5
- Scrolls: 1 Scroll Fragment (3 BSC), 2 Scroll Fragments (4/5 BSC)
- Perfect Door (after the fight): Flawless fight (Legendary item)
- Exit: High Peak Castle
Guardian's HavenRotG

- Entrances: CavernRotG, Forgotten Sepulcher (2+ BSC and kill the GiantRotG at least once)
- Enemies: The GiantRotG
- Enemy Tier: 21
- Gear Level: 7
- Scrolls: 3 Scroll Fragments (3 BSC), 4 Scroll Fragments (4/5 BSC)
- Perfect Door (after the fight): Flawless fight (Legendary item)
- Exit: High Peak Castle, Throne Room (choosing this exit grants you 2 Scrolls of Power)
- Hazards: Pools of lava
MausoleumFF

- Entrances: Undying ShoresFF
- Enemies: The ScarecrowFF
- Enemy Tier: TBA
- Gear Level: 6
- Scrolls: 2 Scroll Fragments (3 BSC), TBA Scroll Fragments (4/5 BSC)
- Perfect Door (after the fight): Flawless fight (Legendary item)
- Exit: High Peak Castle, Derelict Distillery
- Hazards: Explosive mushrooms
Sixth Stage
High Peak Castle

- Entrances: Clock Room, Guardian's HavenRotG
- Enemy Tier: 24 - 27
- Gear Level: 6
- Scrolls: 2 Power, 2 Dual-Stat, 1 Scroll Fragment (3 BSC), 2 Scroll Fragments (4/5 BSC)
- Enemies: Guardian Knights, Lancers, Undead Archers, Bombardiers, Royal Guards
- Knife Throwers (Replaces Undead Archers)
- Rampagers
- Demons (Replaces Knife Throwers)
- Exit: Throne Room
- Hazards: Spikes, spiked flails
- Doors:
- Castle Key Doors: They are 6 doors of 3 different colors, 2 doors each. Each 2 doors lead to an extra section of the biome, which offers an Elite enemy fight and a Castle Key as reward.
- Keys:
- Castle Key: 3 in total. 2 are required to access Throne Room, while the 3rd gives access to blueprint of Boomerang and a Scroll of Power. Dropped by the three Elite enemies.
Derelict Distillery

- Entrances: Clock Room, Guardian's HavenRotG
- Enemy Tier: 17 - 21
- Gear Level: 6
- Scrolls: 2 Power, 2 Dual-Stat, 1 Scroll Fragment (3 BSC), 2 Scroll Fragments (4/5 BSC)
- Enemies: Shieldbearers, Living Barrels, Infected Workers, Rancid Rats, Lacerators, Demolishers, Spawners, Corpse Juices (spawned from Spawners)
- Bombardiers
- Hammers, Sewer Flies (spawned from Hammers), Oven Knights (Replace Shieldbearers)
- Failed Experiments
- Exit: Throne Room
- Hazards: Exploding barrels, Spikes
- Doors: There is a locked door blocking the exit to the Throne Room requiring the Distillery Key.
- Keys:
- Distillery Key: Gives access to the Throne Room. Can be found behind a destructible wall, which can only be destroyed by deflecting a nearby exploding barrel or by using the Barrel Launcher.
Final Boss: Throne Room

- Entrances: High Peak Castle, Guardian's HavenRotG, and Derelict Distillery
- Enemy Tier: 27
- Enemies: The Hand of the King
- Mobs summoned by the Hand of the King (2/5 will be Elites): Zombie, Inquisitor, Grenadier, Lacerator, Scorpion, Disgusting Worm, Cleaver, Slasher
- Perfect Door (after the fight): Flawless fight (Legendary item, if going to the seventh stage)
- Exits: File:BCV Icon.png Seventh Stage
- Hazards: Spikes
- Runes: Homunculus Rune
Seventh Stage

True Final Boss

Unused Stages
Repository of the Architects
Technically inaccessible stage, entrance was behind the door that required 5 boss cells to open in the Graveyard. If accessed via modifying the boss cell counter with third-party tools, it could be seen that it had the same 'darkness' mechanic as the Forgotten Sepulcher. Only enemies present in the stage appeared to be Cannibals. The enemy tier appears to be absurdly high. The majority of the stage was locked behind a door that required a key (simply named "Key") to open, which can't be spawned even by third party modifiers
This stage is irrelevant to the Architect's Key.
Pier
An old ending point of a run that persisted until the 1.0 update came around. It would be accessed after defeating the final boss of the game, which at first was Conjunctivius, then the Time Keeper, and finally, the Hand of the King. It used to have the Fisherman NPC right next to a boat, who would impale the Beheaded with a tentacle to let the player start a new run. Later that was changed to a "Work in Progress" sign and a tube, through which the Beheaded would crawl to go back to the Prisoners' Quarters.
References
- ↑ The development of Dead Cells is really moving on. Twinoid. December 23, 2016.
- ↑ Dead Cells is AVAILABLE NOW! Steam. May 10, 2017.
- ↑ Building the Level Design of a procedurally generated Metroidvania: a hybrid approach, Gamasutra. March 29, 2017.
| Navigation wiki |
|---|