Tag: Visual edit |
PoggestFrogest (talk | contribs) Tag: Source edit |
||
| (37 intermediate revisions by 11 users not shown) | |||
| Line 1: | Line 1: | ||
| − | '''Enemies''' are entities that oppose the player as they navigate the island. |
+ | '''Enemies''' are entities that oppose the player as they navigate the island. Different enemies will appear in different [[biomes]], and the enemies within that biome will be different depending on the current [[Boss Stem Cell|difficulty]]. |
| − | While [[Bosses]] always have the same stats, enemy stats differ depending on the level of the |
+ | While [[Bosses]] always have the same stats, enemy stats differ depending on the level of the biome where they appear. |
| − | Enemies can drop useful things on death: gold, [[cells]], blueprints, or (rarely) a [[ |
+ | Enemies can drop useful things on death: gold, [[cells]], blueprints, or (rarely) a [[pickup]] or [[Gear|item]]. |
| − | == Elite |
+ | == Elite enemies == |
| − | Some enemies appear as '''Elite''' variants, which are much tougher and slightly larger than normal. At all times, a "name tag" hovers over the enemy marking them as Elite, and an aura surrounds them |
+ | Some enemies appear as '''Elite''' variants, which are much tougher and slightly larger than normal. At all times, a "name tag" hovers over the enemy marking them as Elite, and an aura surrounds them. Once an Elite enemy attacks the player, the name of the enemy type is briefly shown on screen. |
| − | Elite enemies spawn randomly, or they can be summoned by walking close enough to an Elite obelisk. Wandering Elites can be found mired in a disgusting substance until the player gets close, and then they free themselves and attack. Same goes if they are provoked by Biters or the Homunculus |
+ | Elite enemies spawn randomly, or they can be summoned by walking close enough to an Elite obelisk. Wandering Elites can be found mired in a disgusting substance until the player gets close, and then they free themselves and attack. Same goes if they are provoked by Biters or the Homunculus Rune. |
| − | Certain areas hold an Elite enemy that drops a [[ |
+ | Certain areas hold an Elite enemy that drops a [[Rune]]. These Elites don't respawn on future runs after the Rune has been collected. |
3 rooms in [[High Peak Castle]] always have Elites that will drop a key. These key-dropping Elites are always the same. |
3 rooms in [[High Peak Castle]] always have Elites that will drop a key. These key-dropping Elites are always the same. |
||
| Line 16: | Line 16: | ||
Killing Elite enemies drops Gear with a level 2 levels higher than normal for the current zone — usually [[Amulets]]. They also have a 6% chance of dropping a [[Gear#Legendary Items|Legendary]] item, which is separated from amulet drop rate, meaning that one Elite can drop both an amulet and a legendary item. |
Killing Elite enemies drops Gear with a level 2 levels higher than normal for the current zone — usually [[Amulets]]. They also have a 6% chance of dropping a [[Gear#Legendary Items|Legendary]] item, which is separated from amulet drop rate, meaning that one Elite can drop both an amulet and a legendary item. |
||
| − | === Special |
+ | === Special abilities === |
| − | In addition to higher attack and health, Elite enemies highly resist controlling status effects such as stun and freeze, shortening their duration by 20%. |
+ | In addition to higher attack, speed and health, Elite enemies highly resist controlling status effects such as stun and freeze, shortening their duration by 20%. |
When an Elite enemy is damaged for the first time or its health goes below 50%, time slows down for a moment and the player is knocked away from the Elite. When an Elite is under 50% health, they also gain the ability to teleport near the player if the player is not within range of their attacks. |
When an Elite enemy is damaged for the first time or its health goes below 50%, time slows down for a moment and the player is knocked away from the Elite. When an Elite is under 50% health, they also gain the ability to teleport near the player if the player is not within range of their attacks. |
||
| Line 23: | Line 23: | ||
The ''v1.1 Pimp My Run Update'' introduced special abilities for Elites. |
The ''v1.1 Pimp My Run Update'' introduced special abilities for Elites. |
||
| − | * Invisibility: the Elite cannot be seen, but their attack |
+ | * Invisibility: the Elite cannot be seen, but but their attack prompt will still appear to give the player time to react. |
* Clone: the Elite summons a clone of himself. Both Elites have 55% of their usual HP. |
* Clone: the Elite summons a clone of himself. Both Elites have 55% of their usual HP. |
||
| − | **Effectively, unless the player can hit both at once they will have 110% of their normal HP combined. |
+ | ** Effectively, unless the player can hit both at once they will have 110% of their normal HP combined. |
| − | **Killing one Elite will drop cells usually, and the second one drops the item/s |
+ | ** Killing one Elite will drop cells usually, and the second one drops the item/s |
* Rotating laser which surrounds the Elite. |
* Rotating laser which surrounds the Elite. |
||
* Horizontal laser on ground level that periodically activates and damages the player on both sides of the Elite. |
* Horizontal laser on ground level that periodically activates and damages the player on both sides of the Elite. |
||
| − | * Red spherical aura, similar to [[Shocker |
+ | * Red spherical aura, similar to [[Shocker]]s, the [[Concierge]], or [[Conjunctivius]]. |
* Horizontal laser that slowly ascends, bumping the player upwards if they get caught in it. |
* Horizontal laser that slowly ascends, bumping the player upwards if they get caught in it. |
||
| − | * Force field maintained by two crystals on either side of the Elite. The Elite cannot take any damage until the crystals are destroyed, and the crystals respawn after 6 seconds. Elites equipped with this ability will not teleport after |
+ | * Force field maintained by two crystals on either side of the Elite. The Elite cannot take any damage until the crystals are destroyed, and the crystals respawn after 6 seconds. Elites equipped with this ability will not teleport after the player. |
* Crystal that hovers above the Elite, which shoots a rapid volley of projectiles at the player. |
* Crystal that hovers above the Elite, which shoots a rapid volley of projectiles at the player. |
||
* Electric cage that surrounds the Elite, hurting the player if they try to get out of it. |
* Electric cage that surrounds the Elite, hurting the player if they try to get out of it. |
||
| − | == Starred |
+ | == Starred enemies == |
These enemies have a yellow star icon above their head, and appear differently on the map. When defeated, they drop a random type of [[Pickups#Scrolls|Scroll]] or a [[Gear#Legendary_Items|Legendary Item]]. Otherwise, they are functionally identical to normal enemies. |
These enemies have a yellow star icon above their head, and appear differently on the map. When defeated, they drop a random type of [[Pickups#Scrolls|Scroll]] or a [[Gear#Legendary_Items|Legendary Item]]. Otherwise, they are functionally identical to normal enemies. |
||
* If they are carrying a scroll, that scroll counts as one of the constant scrolls in the biome it was found in. |
* If they are carrying a scroll, that scroll counts as one of the constant scrolls in the biome it was found in. |
||
| − | == List of |
+ | == List of enemies == |
{| class="wikitable sortable" style="text-align:center" |
{| class="wikitable sortable" style="text-align:center" |
||
!Image!!Name!!Zones!!Offensive abilities!!Defensive abilities |
!Image!!Name!!Zones!!Offensive abilities!!Defensive abilities |
||
| Line 62: | Line 62: | ||
[[Double Crossb-o-matic]] (0.4%) |
[[Double Crossb-o-matic]] (0.4%) |
||
| − | [[Outfits|Bobby Outfit]] (1+ BSC; 0.4%) |
+ | [[Outfits#Bobby Outfit|Bobby Outfit]] (1+ BSC; 0.4%) |
|- |
|- |
||
|[[File:Undead Archer.png|center|52x63px]] |
|[[File:Undead Archer.png|center|52x63px]] |
||
| Line 85: | Line 85: | ||
[[Bow and Endless Quiver]] (0.03%) |
[[Bow and Endless Quiver]] (0.03%) |
||
| − | [[Outfits|Skeleton Outfit]] (0.4%) |
+ | [[Outfits#Skeleton Outfit|Skeleton Outfit]] (0.4%) |
|- |
|- |
||
|[[File:Shieldbearer.png|center|36x63px]] |
|[[File:Shieldbearer.png|center|36x63px]] |
||
|'''[[Shieldbearer]]''' |
|'''[[Shieldbearer]]''' |
||
| − | |• '' |
+ | |• ''Ancient Sewers'' |
| − | • ''Ramparts (0-1 BSC)'' |
+ | • ''Prisoners' Quarters, Ramparts (0-1 BSC)'' |
• ''Derelict Distillery (0-2 BSC)'' |
• ''Derelict Distillery (0-2 BSC)'' |
||
| Line 104: | Line 104: | ||
[[Ice Shield]] (10%) |
[[Ice Shield]] (10%) |
||
| − | [[Outfits|Desert Dweller Outfit]] (4+ BSC; 0.4%) |
+ | [[Outfits#Desert Dweller Outfit|Desert Dweller Outfit]] (4+ BSC; 0.4%) |
|- |
|- |
||
|[[File:Grenadier.png|center|50x63px]] |
|[[File:Grenadier.png|center|50x63px]] |
||
| Line 140: | Line 140: | ||
[[Powerful Grenade]] (10%) |
[[Powerful Grenade]] (10%) |
||
| − | [[Outfits|Aphrodite Outfit]] (3+ BSC; 0.4%) |
+ | [[Outfits#Aphrodite Outfit|Aphrodite Outfit]] (3+ BSC; 0.4%) |
|- |
|- |
||
|[[File:Bat.png|center|38x44px]] |
|[[File:Bat.png|center|38x44px]] |
||
| Line 166: | Line 166: | ||
|[[Frantic Sword]] (0.4%) |
|[[Frantic Sword]] (0.4%) |
||
| − | [[Outfits|Kamikaze Outfit]] (1.7%) |
+ | [[Outfits#Kamikaze Outfit|Kamikaze Outfit]] (1.7%) |
| − | [[Outfits|Neon Outfit]] (1+ BSC; 0.4%) |
+ | [[Outfits#Neon Outfit|Neon Outfit]] (1+ BSC; 0.4%) |
|- |
|- |
||
|[[File:Runner.png|center|100x100px]] |
|[[File:Runner.png|center|100x100px]] |
||
| Line 204: | Line 204: | ||
[[Vampirism]] (0.4%) |
[[Vampirism]] (0.4%) |
||
| − | [[Outfits|Mage Outfit]] (2+ BSC; 0.4%) |
+ | [[Outfits#Mage Outfit|Mage Outfit]] (2+ BSC; 0.4%) |
|- |
|- |
||
|[[File:Protector.png|center|51x60px]] |
|[[File:Protector.png|center|51x60px]] |
||
| Line 219: | Line 219: | ||
[[Explosive Decoy]] (0.4%) |
[[Explosive Decoy]] (0.4%) |
||
| − | [[Outfits|Warrior Outfit]] (3+ BSC; 0.4%) |
+ | [[Outfits#Warrior Outfit|Warrior Outfit]] (3+ BSC; 0.4%) |
|- |
|- |
||
|[[File:Hammer.png|center|98x84px]] |
|[[File:Hammer.png|center|98x84px]] |
||
| Line 238: | Line 238: | ||
|Rolls backwards from the player when close |
|Rolls backwards from the player when close |
||
|Yes |
|Yes |
||
| − | |[[ |
+ | |[[Scheme]] (10%) |
|- |
|- |
||
|[[File:Buzzcutter.png|center|49x29px]] |
|[[File:Buzzcutter.png|center|49x29px]] |
||
| Line 253: | Line 253: | ||
|[[Spite Sword]] (0.03%) |
|[[Spite Sword]] (0.03%) |
||
| − | [[ |
+ | [[Frostbite]] (10%) |
|- |
|- |
||
|[[File:Corpse Fly.png|center|49x30px]] |
|[[File:Corpse Fly.png|center|49x30px]] |
||
|'''[[Fly|Corpse Fly]]''' |
|'''[[Fly|Corpse Fly]]''' |
||
| − | |• ''Spawned by [[ |
+ | |• ''Spawned by [[Swarm Zombie]]'' |
|• Melee attack (after host dies) |
|• Melee attack (after host dies) |
||
• Connects themselves with damaging electricity arcs when host is alive |
• Connects themselves with damaging electricity arcs when host is alive |
||
| Line 274: | Line 274: | ||
|N/A |
|N/A |
||
|- |
|- |
||
| − | |[[File: |
+ | |[[File:Festering Zombie.png|center|78x78px]] |
| − | |'''[[ |
+ | |'''[[Festering Zombie]]''' |
|• ''Ancient Sewers, Stilt Village'' |
|• ''Ancient Sewers, Stilt Village'' |
||
| Line 286: | Line 286: | ||
|Yes |
|Yes |
||
|[[Force Shield]] (0.4%) |
|[[Force Shield]] (0.4%) |
||
| − | [[Outfits|Fisherman's Outfit]] (1+ BSC; 0.4%) |
+ | [[Outfits#Fisherman's Outfit|Fisherman's Outfit]] (1+ BSC; 0.4%) |
|- |
|- |
||
| − | |[[File: |
+ | |[[File:Swarm Zombie.png|center|71x71px]] |
| − | |'''[[ |
+ | |'''[[Swarm Zombie]]''' |
|• ''Graveyard'' |
|• ''Graveyard'' |
||
|• Claw attack |
|• Claw attack |
||
| Line 298: | Line 298: | ||
|Yes |
|Yes |
||
|[[Shovel]] (0.4%) |
|[[Shovel]] (0.4%) |
||
| + | |||
| + | [[Tombstone]] (1.7) |
||
[[Corrosive Cloud]] (0.4%) |
[[Corrosive Cloud]] (0.4%) |
||
| − | [[ |
+ | [[Networking]] (10%) |
|- |
|- |
||
|[[File:Disgusting Worm.png|center|66x38px]] |
|[[File:Disgusting Worm.png|center|66x38px]] |
||
| Line 316: | Line 318: | ||
|N/A |
|N/A |
||
|Yes |
|Yes |
||
| − | |[[ |
+ | |[[What Doesn't Kill Me]] (100%) |
[[Swarm]] (0.4%) |
[[Swarm]] (0.4%) |
||
| Line 322: | Line 324: | ||
[[Valmont's Whip]] (0.4%) |
[[Valmont's Whip]] (0.4%) |
||
|- |
|- |
||
| − | |[[File: |
+ | |[[File:Corpse Worm.png|center|31x31px]] |
|'''[[Worm|Corpse Worm]]''' |
|'''[[Worm|Corpse Worm]]''' |
||
| − | |• ''Spawned by [[ |
+ | |• ''Spawned by [[Festering Zombie]]'' |
|• Bite attack |
|• Bite attack |
||
• Follows you by teleporting |
• Follows you by teleporting |
||
| Line 352: | Line 354: | ||
|Yes |
|Yes |
||
|[[Rapier]] (0.4%) |
|[[Rapier]] (0.4%) |
||
| − | [[Outfits|Donatello Outfit]] (2+ BSC; 0.4%) |
+ | [[Outfits#Donatello Outfit|Donatello Outfit]] (2+ BSC; 0.4%) |
|- |
|- |
||
|[[File:Impaler (Enemy).png|center|68x60px]] |
|[[File:Impaler (Enemy).png|center|68x60px]] |
||
| Line 390: | Line 392: | ||
[[Knockback Shield]] (0.4%) |
[[Knockback Shield]] (0.4%) |
||
| − | [[Outfits|Robin Hood Outfit]] (4+ BSC; 0.4%) |
+ | [[Outfits#Robin Hood Outfit|Robin Hood Outfit]] (4+ BSC; 0.4%) |
|- |
|- |
||
|[[File:Cleaver (Enemy).png|center|104x104px]] |
|[[File:Cleaver (Enemy).png|center|104x104px]] |
||
| Line 408: | Line 410: | ||
|'''[[Pirate Captain]]''' |
|'''[[Pirate Captain]]''' |
||
|• ''Stilt Village'' |
|• ''Stilt Village'' |
||
| + | |• Slams down the cannon multiple times extremely quickly |
||
| − | |• Slam attack |
||
• Shoots a rolling cannonball which explodes after a few seconds or on contact with player |
• Shoots a rolling cannonball which explodes after a few seconds or on contact with player |
||
|N/A |
|N/A |
||
| Line 414: | Line 416: | ||
|[[Wrenching Whip]] (0.4%) |
|[[Wrenching Whip]] (0.4%) |
||
| − | [[ |
+ | [[Heart of Ice]] (10%) |
|- |
|- |
||
|[[File:Knife Thrower.png|center|78x78px]] |
|[[File:Knife Thrower.png|center|78x78px]] |
||
|'''[[Knife Thrower]]''' |
|'''[[Knife Thrower]]''' |
||
| − | |• ''Prisoners' Quarters |
+ | |• ''Prisoners' Quarters (1 BSC)'' |
| + | • ''Prison Depths, Forgotten Sepulcher, Undying Shores (1+ BSC)'' |
||
• ''High Peak Castle (1-3 BSC)'' |
• ''High Peak Castle (1-3 BSC)'' |
||
| Line 427: | Line 430: | ||
• Invisible while not attacking |
• Invisible while not attacking |
||
|Yes |
|Yes |
||
| − | |[[Great Owl of War]] (1.7%) |
+ | |[[Great Owl of War]] (1+ BSC; 1.7%) |
| − | [[Outfits|Legendary Warrior's |
+ | [[Outfits#Legendary Warrior's Outfit|Legendary Warrior's Outfit]] (3+ BSC; 0.4%) |
|- |
|- |
||
|[[File:Slasher.png|center|87x93px]] |
|[[File:Slasher.png|center|87x93px]] |
||
| Line 448: | Line 451: | ||
|Yes |
|Yes |
||
|[[Cluster Grenade]] (1.7%) |
|[[Cluster Grenade]] (1.7%) |
||
| + | |||
| + | [[No Mercy]] (1.7%) |
||
[[Heavy Turret]] (0.4%) |
[[Heavy Turret]] (0.4%) |
||
| − | [[Outfits|Demon Outfit]] (3+ BSC, 0.4%) |
+ | [[Outfits#Demon Outfit|Demon Outfit]] (3+ BSC, 0.4%) |
|- |
|- |
||
|[[File:Lacerator.png|center|72x108px]] |
|[[File:Lacerator.png|center|72x108px]] |
||
| Line 465: | Line 470: | ||
|Yes |
|Yes |
||
|[[Crusher]] (10%) |
|[[Crusher]] (10%) |
||
| − | [[ |
+ | [[Open Wounds]] (0.4%) |
| − | [[Outfits|Carduus Outfit]] (1+ BSC; 0.4%) |
+ | [[Outfits#Carduus Outfit|Carduus Outfit]] (1+ BSC; 0.4%) |
|- |
|- |
||
|[[File:Shocker.png|center|47x65px]] |
|[[File:Shocker.png|center|47x65px]] |
||
| Line 479: | Line 484: | ||
|No |
|No |
||
|[[Flamethrower Turret]] (0.4%) |
|[[Flamethrower Turret]] (0.4%) |
||
| − | [[Outfits|Cloud Outfit]] (3+ BSC; 0.4%) |
+ | [[Outfits#Cloud Outfit|Cloud Outfit]] (3+ BSC; 0.4%) |
|- |
|- |
||
|[[File:Thorny.png|center|45x61px]] |
|[[File:Thorny.png|center|45x61px]] |
||
| Line 495: | Line 500: | ||
[[Barnacle]] (1.7%) |
[[Barnacle]] (1.7%) |
||
| − | [[ |
+ | [[Armadillopack]] (1.7%) |
|- |
|- |
||
|[[File:Spawner.png|center|62x104px]] |
|[[File:Spawner.png|center|62x104px]] |
||
| Line 522: | Line 527: | ||
|Creates a fog which turns other enemies invisible |
|Creates a fog which turns other enemies invisible |
||
|No |
|No |
||
| − | |[[Fire |
+ | |[[Fire Blast]] (1.7%) |
| − | [[Outfits|Ghost Outfit]] (2+ BSC; 0.4%) |
+ | [[Outfits#Ghost Outfit|Ghost Outfit]] (2+ BSC; 0.4%) |
|- |
|- |
||
|[[File:Caster.png|center|95x95px]] |
|[[File:Caster.png|center|95x95px]] |
||
| Line 562: | Line 567: | ||
[[Hayabusa Boots]] (1+ BSC; 1.7%) |
[[Hayabusa Boots]] (1+ BSC; 1.7%) |
||
| − | [[Outfits|Ninja Outfit]] (2+ BSC; 0.4%) |
+ | [[Outfits#Ninja Outfit|Ninja Outfit]] (2+ BSC; 0.4%) |
|- |
|- |
||
|[[File:Cannibal.png|center|105x105px]] |
|[[File:Cannibal.png|center|105x105px]] |
||
| Line 575: | Line 580: | ||
(1.7%) |
(1.7%) |
||
| − | [[Outfits|Dictator Outfit]] (4+ BSC; 0.4%) |
+ | [[Outfits#Dictator Outfit|Dictator Outfit]] (4+ BSC; 0.4%) |
|- |
|- |
||
|[[File:Automaton.png|center|104x104px]] |
|[[File:Automaton.png|center|104x104px]] |
||
| Line 584: | Line 589: | ||
Teleports away from the player after attacking |
Teleports away from the player after attacking |
||
|No |
|No |
||
| − | |[[ |
+ | |[[Predator]] (10%) |
|- |
|- |
||
|[[File:Lancer.png|center|131x131px]] |
|[[File:Lancer.png|center|131x131px]] |
||
| Line 595: | Line 600: | ||
|[[Hayabusa Gauntlets]] (0.4%) |
|[[Hayabusa Gauntlets]] (0.4%) |
||
| − | [[ |
+ | [[Dead Inside]] (4+ BSC; 1.7%) |
|- |
|- |
||
|[[File:Guardian Knight.png|center|129x129px]] |
|[[File:Guardian Knight.png|center|129x129px]] |
||
| Line 607: | Line 612: | ||
(0.4%) |
(0.4%) |
||
| − | [[ |
+ | [[Soldier's Resistance]] (10%) |
|- |
|- |
||
|[[File:Royal Guard.png|center|86x86px]] |
|[[File:Royal Guard.png|center|86x86px]] |
||
| Line 617: | Line 622: | ||
Protected by a shield that deflects ranged attacks when charging |
Protected by a shield that deflects ranged attacks when charging |
||
|Yes |
|Yes |
||
| − | |[[ |
+ | |[[Initiative]] (10%) |
|- |
|- |
||
|[[File:Bomber.png|center|76x76px]] |
|[[File:Bomber.png|center|76x76px]] |
||
| Line 632: | Line 637: | ||
|Flies above the player |
|Flies above the player |
||
|Yes |
|Yes |
||
| − | |[[Seismic Strike]] (0.4%) |
+ | |[[Seismic Strike]] (2+ BSC; 0.4%) |
| − | [[Outfits|A Thousand and One Nights Outfit]] (3+ BSC; 0.4%) |
+ | [[Outfits#A Thousand and One Nights Outfit|A Thousand and One Nights Outfit]] (3+ BSC; 0.4%) |
|- |
|- |
||
|[[File:Slammer.png|center|116x116px]] |
|[[File:Slammer.png|center|116x116px]] |
||
| Line 640: | Line 645: | ||
|• ''Corrupted Prison, Cavern'' |
|• ''Corrupted Prison, Cavern'' |
||
• ''Undying Shores (2+ BSC)'' |
• ''Undying Shores (2+ BSC)'' |
||
| + | |||
| − | |||
• ''Astrolab'' |
• ''Astrolab'' |
||
|• An unparryable AoE slam attack when in range |
|• An unparryable AoE slam attack when in range |
||
| Line 647: | Line 652: | ||
|Yes |
|Yes |
||
|[[Flawless]] (0.4%) |
|[[Flawless]] (0.4%) |
||
| − | [[ |
+ | [[Tactical Retreat]] (10%) |
|- |
|- |
||
|[[File:Demon.png|center|74x74px]] |
|[[File:Demon.png|center|74x74px]] |
||
| Line 659: | Line 664: | ||
|[[Shrapnel Axes]] (0.4%) |
|[[Shrapnel Axes]] (0.4%) |
||
| − | [[Outfits|Drifter Outfit]] (2+ BSC; 0.4%) |
+ | [[Outfits#Drifter Outfit|Drifter Outfit]] (2+ BSC; 0.4%) |
|- |
|- |
||
|[[File:Arbiter.png|center|89x89px]] |
|[[File:Arbiter.png|center|89x89px]] |
||
| Line 670: | Line 675: | ||
|[[Magic Missiles]] (0.4%) |
|[[Magic Missiles]] (0.4%) |
||
| − | [[Outfits|Shaman Outfit]] (4+ BSC; 0.4%) |
+ | [[Outfits#Shaman Outfit|Shaman Outfit]] (4+ BSC; 0.4%) |
|- |
|- |
||
|[[File:Ground Shaker.png|center|125x125px]] |
|[[File:Ground Shaker.png|center|125x125px]] |
||
| Line 683: | Line 688: | ||
[[Ice Armor]] (100%) |
[[Ice Armor]] (100%) |
||
| + | |||
| + | [[Toothpick]] (10%) |
||
|- |
|- |
||
|[[File:Skeleton.png|center|70x70px]] |
|[[File:Skeleton.png|center|70x70px]] |
||
| Line 691: | Line 698: | ||
• Immune to stuns |
• Immune to stuns |
||
|No |
|No |
||
| − | |[[Outfits|Flying Alcoholic Outfit]] (100%) |
+ | |[[Outfits#Flying Alcoholic Outfit|Flying Alcoholic Outfit]] (100%) |
|- |
|- |
||
|[[File:Rampager.png|center|99x99px]] |
|[[File:Rampager.png|center|99x99px]] |
||
| Line 700: | Line 707: | ||
|N/A |
|N/A |
||
|Yes |
|Yes |
||
| − | |[[ |
+ | |[[Adrenaline]] (3+ BSC; 1.7%) |
|- |
|- |
||
|[[File:Failed Experiment.png|center|105x105px]] |
|[[File:Failed Experiment.png|center|105x105px]] |
||
| Line 710: | Line 717: | ||
|Performs an invincible dash behind the player when the player uses a main weapon |
|Performs an invincible dash behind the player when the player uses a main weapon |
||
|Yes |
|Yes |
||
| − | |[[ |
+ | |[[Berserker]] (4+ BSC; 0.4%) |
{{Enemy |
{{Enemy |
||
| name = Defender |
| name = Defender |
||
| Line 771: | Line 778: | ||
|• Always appears in groups |
|• Always appears in groups |
||
|No |
|No |
||
| − | |[[ |
+ | |[[Porcupack]] (0.4%) |
|- |
|- |
||
|[[File:Oven Knight.png|center|104x104px]] |
|[[File:Oven Knight.png|center|104x104px]] |
||
| Line 784: | Line 791: | ||
• Moves faster when its shield is destroyed |
• Moves faster when its shield is destroyed |
||
|Yes |
|Yes |
||
| + | |[[Oven Axe]] (2+ BSC; 1.7%) |
||
| − | |[[Mutations#Survival Mutations|Kill Rhythm]] (0.4%) |
||
| + | [[Kill Rhythm]] (2+ BSC; 0.4%) |
||
|- |
|- |
||
|[[File:Toxic Miasma.png|center|125x125px]] |
|[[File:Toxic Miasma.png|center|125x125px]] |
||
| Line 796: | Line 804: | ||
|N/A |
|N/A |
||
|Yes |
|Yes |
||
| + | |[[Barbed Tips]] (10%) |
||
| − | |N/A |
||
|- |
|- |
||
|[[File:Weirded Warrior.png|center|80x80px]] |
|[[File:Weirded Warrior.png|center|80x80px]] |
||
|'''[[Weirded Warrior]]''' |
|'''[[Weirded Warrior]]''' |
||
|• ''Stilt Village'' |
|• ''Stilt Village'' |
||
| ⚫ | |||
• ''Corrupted Prison, Forgotten Sepulcher (2+ BSC)'' |
• ''Corrupted Prison, Forgotten Sepulcher (2+ BSC)'' |
||
|• Has a quick slashing dash that can be performed up to two times in a row |
|• Has a quick slashing dash that can be performed up to two times in a row |
||
| Line 808: | Line 815: | ||
|[[Hattori's Katana]] (1.7%) |
|[[Hattori's Katana]] (1.7%) |
||
| − | [[Outfits|Blade Master's Outfit]] (1+ BSC; 0.4%) |
+ | [[Outfits#Blade Master's Outfit|Blade Master's Outfit]] (1+ BSC; 0.4%) |
|- |
|- |
||
|[[File:Corpulent Zombie.png|center|115x115px]] |
|[[File:Corpulent Zombie.png|center|115x115px]] |
||
| Line 816: | Line 823: | ||
|N/A |
|N/A |
||
|Yes |
|Yes |
||
| + | |[[Point Blank]] (10%) |
||
| − | |N/A |
||
|- |
|- |
||
|[[File:Dancer.png|center|95x95px]] |
|[[File:Dancer.png|center|95x95px]] |
||
| Line 824: | Line 831: | ||
|• Will delay and re-execute its attack if the player attempts to parry it |
|• Will delay and re-execute its attack if the player attempts to parry it |
||
|Yes |
|Yes |
||
| − | |[[ |
+ | |[[Ranger's Gear]] (10%) |
|- |
|- |
||
|[[File:Infected Worker.png|center|100x100px]] |
|[[File:Infected Worker.png|center|100x100px]] |
||
| Line 845: | Line 852: | ||
|[[File:Demolisher.png|center|90x90px]] |
|[[File:Demolisher.png|center|90x90px]] |
||
|'''[[Demolisher]]''' |
|'''[[Demolisher]]''' |
||
| − | |• '' |
+ | |• ''Derelict Distillery'' |
| ⚫ | |||
• ''Prisoners' Quarters (2+ BSC)'' |
• ''Prisoners' Quarters (2+ BSC)'' |
||
| Line 854: | Line 862: | ||
|N/A |
|N/A |
||
|Yes |
|Yes |
||
| − | |[[ |
+ | |[[Acrobatipack]] (10%) |
| − | [[Outfits|Arbalester's Outfit]] (0.4%) |
+ | [[Outfits#Arbalester's Outfit|Arbalester's Outfit]] (0.4%) |
|- |
|- |
||
|[[File:Yeeter.png|center|100x100px]] |
|[[File:Yeeter.png|center|100x100px]] |
||
| Line 867: | Line 875: | ||
|Yes |
|Yes |
||
|[[Flashing Fans]] (0.4%) |
|[[Flashing Fans]] (0.4%) |
||
| − | [[Outfits|Mushroom King |
+ | [[Outfits#Mushroom King Outfit|Mushroom King Outfit]] |
(3+ BSC; 1.7%) |
(3+ BSC; 1.7%) |
||
| Line 879: | Line 887: | ||
|No |
|No |
||
|[[Mushroom Boi!]] (100%) |
|[[Mushroom Boi!]] (100%) |
||
| − | [[Outfits|Mushroom Boi's Outfit]] |
+ | [[Outfits#Mushroom Boi's Outfit|Mushroom Boi's Outfit]] |
(1+ BSC; 1.7%) |
(1+ BSC; 1.7%) |
||
| Line 893: | Line 901: | ||
|No |
|No |
||
|[[Smoke Bomb]] (0.4%) |
|[[Smoke Bomb]] (0.4%) |
||
| − | [[Outfits|Banished's Outfit]] |
+ | [[Outfits#Banished's Outfit|Banished's Outfit]] |
(2+ BSC; 1.7%) |
(2+ BSC; 1.7%) |
||
| Line 900: | Line 908: | ||
|'''[[Blowgunner]]'''{{DLC|TBS}} |
|'''[[Blowgunner]]'''{{DLC|TBS}} |
||
|• ''Morass of the Banished'' |
|• ''Morass of the Banished'' |
||
| + | • ''Undying Shores (After visiting Morass of the Banished)'' |
||
|Fires a dart projectile towards the player |
|Fires a dart projectile towards the player |
||
|Jumps to a higher platform |
|Jumps to a higher platform |
||
|No |
|No |
||
|[[Blowgun]] (1.7%) |
|[[Blowgun]] (1.7%) |
||
| − | [[Outfits|Blowgunner's Outfit]] |
+ | [[Outfits#Blowgunner's Outfit|Blowgunner's Outfit]] |
(1.7%) |
(1.7%) |
||
| Line 918: | Line 927: | ||
|Yes |
|Yes |
||
|[[Rhythm n' Bouzouki]] (0.4%) |
|[[Rhythm n' Bouzouki]] (0.4%) |
||
| − | [[Outfits|Tick Trainer's Outfit]] |
+ | [[Outfits#Tick Trainer's Outfit|Tick Trainer's Outfit]] |
(4+ BSC; 1.7%) |
(4+ BSC; 1.7%) |
||
| Line 935: | Line 944: | ||
| size = 187x187px |
| size = 187x187px |
||
| zone = • ''Fractured Shrines'' |
| zone = • ''Fractured Shrines'' |
||
| − | | offensive = • Swipes with |
+ | | offensive = • Swipes with its axe |
| − | • |
+ | • Smash the ground with its foot |
| defensive = |
| defensive = |
||
| − | | elite = |
+ | | elite = Yes |
| blueprint = [[Iron Staff]] (100%) |
| blueprint = [[Iron Staff]] (100%) |
||
| − | [[Outfits|Rocky Outfit]] (10%) |
+ | [[Outfits#Rocky Outfit|Rocky Outfit]] (10%) |
| dlc = FF |
| dlc = FF |
||
}} |
}} |
||
| Line 946: | Line 955: | ||
| name = Cold Blooded Guardian |
| name = Cold Blooded Guardian |
||
| size = 116x116px |
| size = 116x116px |
||
| − | | zone = • ''Fractured Shrines'' |
+ | | zone = • ''Fractured Shrines'' |
• ''Undying Shores (After visiting Fractured Shrines)'' |
• ''Undying Shores (After visiting Fractured Shrines)'' |
||
| offensive = • Poison claws attack |
| offensive = • Poison claws attack |
||
| − | • Swipes with |
+ | • Swipes with its tail |
| − | • Throws |
+ | • Throws its javelin at the player and teleports to it if it missed the player |
| defensive = |
| defensive = |
||
| elite = Yes |
| elite = Yes |
||
| blueprint = [[Snake Fangs]] (1.7%) |
| blueprint = [[Snake Fangs]] (1.7%) |
||
| − | [[Outfits|Lizard Outfit]] (1.7%) |
+ | [[Outfits#Lizard Outfit|Lizard Outfit]] (1.7%) |
| dlc = FF |
| dlc = FF |
||
}} |
}} |
||
| Line 963: | Line 972: | ||
| size = 101x101px |
| size = 101x101px |
||
| zone = • ''Undying Shores'' |
| zone = • ''Undying Shores'' |
||
| − | | offensive = • Attacks with |
+ | | offensive = • Attacks with its lantern if the player gets too close |
| − | • Brings back dead enemies to life |
+ | • Brings back dead enemies to life |
| defensive = Summons a barrier that needs to be attacked to break |
| defensive = Summons a barrier that needs to be attacked to break |
||
| elite = |
| elite = |
||
| blueprint = [[Ferryman's Lantern]] (0.4%) |
| blueprint = [[Ferryman's Lantern]] (0.4%) |
||
| − | [[Outfits|Apostate Outfit]] (1.7%) |
+ | [[Outfits#Apostate Outfit|Apostate Outfit]] (1.7%) |
| dlc = FF |
| dlc = FF |
||
}} |
}} |
||
| Line 975: | Line 984: | ||
| size = 50x50px |
| size = 50x50px |
||
| zone = • ''Undying Shores'' |
| zone = • ''Undying Shores'' |
||
| − | | offensive = Uses Homunculus to damage the player |
+ | | offensive = Uses Homunculus to damage the player |
| defensive = |
| defensive = |
||
| elite = |
| elite = |
||
| blueprint = [[Lightning Rods]] (1.7%) |
| blueprint = [[Lightning Rods]] (1.7%) |
||
| − | [[Outfits|Almost-Yourself Outfit]] (10%) |
+ | [[Outfits#Almost-Yourself Outfit|Almost-Yourself Outfit]] (10%) |
| dlc = FF |
| dlc = FF |
||
}} |
}} |
||
| Line 986: | Line 995: | ||
| size = 59x59px |
| size = 59x59px |
||
| zone = • ''Undying Shores'' |
| zone = • ''Undying Shores'' |
||
| − | | offensive = Attacks twice with |
+ | | offensive = Attacks twice with its sword |
| − | | defensive = Rolls forward |
+ | | defensive = Rolls forward |
| elite = |
| elite = |
||
| blueprint = |
| blueprint = |
||
| Line 996: | Line 1,005: | ||
| size = 69x69px |
| size = 69x69px |
||
| zone = • ''Undying Shores'' |
| zone = • ''Undying Shores'' |
||
| − | | offensive = Shoots an arrow |
+ | | offensive = Shoots an arrow to the player |
| − | | defensive = Hops between platforms |
+ | | defensive = Hops between platforms |
| elite = |
| elite = |
||
| blueprint = |
| blueprint = |
||
| Line 1,006: | Line 1,015: | ||
| size = 72x72px |
| size = 72x72px |
||
| zone = • ''Undying Shores'' |
| zone = • ''Undying Shores'' |
||
| − | | offensive = Swipe attack with the Shovel |
+ | | offensive = Swipe attack with the Shovel |
| − | | defensive = Can reflect grenades |
+ | | defensive = Can reflect grenades |
| elite = |
| elite = |
||
| blueprint = |
| blueprint = |
||
| Line 1,018: | Line 1,027: | ||
: ''{{DLC|FF}}: [[Fatal Falls DLC]]'' |
: ''{{DLC|FF}}: [[Fatal Falls DLC]]'' |
||
| − | === Removed |
+ | === Removed enemies === |
{| class="wikitable sortable" style="text-align:center; width:100%;" |
{| class="wikitable sortable" style="text-align:center; width:100%;" |
||
!Image!!Name!!Zones!!Offensive abilities!!Defensive abilities |
!Image!!Name!!Zones!!Offensive abilities!!Defensive abilities |
||
| Line 1,043: | Line 1,052: | ||
[[Category:Enemies]] |
[[Category:Enemies]] |
||
| + | |||
| + | [[ru:Враги]] |
||
[[pl:Przeciwnicy]] |
[[pl:Przeciwnicy]] |
||
Revision as of 03:20, 14 June 2021
Enemies are entities that oppose the player as they navigate the island. Different enemies will appear in different biomes, and the enemies within that biome will be different depending on the current difficulty.
While Bosses always have the same stats, enemy stats differ depending on the level of the biome where they appear.
Enemies can drop useful things on death: gold, cells, blueprints, or (rarely) a pickup or item.
Elite enemies
Some enemies appear as Elite variants, which are much tougher and slightly larger than normal. At all times, a "name tag" hovers over the enemy marking them as Elite, and an aura surrounds them. Once an Elite enemy attacks the player, the name of the enemy type is briefly shown on screen.
Elite enemies spawn randomly, or they can be summoned by walking close enough to an Elite obelisk. Wandering Elites can be found mired in a disgusting substance until the player gets close, and then they free themselves and attack. Same goes if they are provoked by Biters or the Homunculus Rune.
Certain areas hold an Elite enemy that drops a Rune. These Elites don't respawn on future runs after the Rune has been collected.
3 rooms in High Peak Castle always have Elites that will drop a key. These key-dropping Elites are always the same.
Killing Elite enemies drops Gear with a level 2 levels higher than normal for the current zone — usually Amulets. They also have a 6% chance of dropping a Legendary item, which is separated from amulet drop rate, meaning that one Elite can drop both an amulet and a legendary item.
Special abilities
In addition to higher attack, speed and health, Elite enemies highly resist controlling status effects such as stun and freeze, shortening their duration by 20%.
When an Elite enemy is damaged for the first time or its health goes below 50%, time slows down for a moment and the player is knocked away from the Elite. When an Elite is under 50% health, they also gain the ability to teleport near the player if the player is not within range of their attacks.
The v1.1 Pimp My Run Update introduced special abilities for Elites.
- Invisibility: the Elite cannot be seen, but but their attack prompt will still appear to give the player time to react.
- Clone: the Elite summons a clone of himself. Both Elites have 55% of their usual HP.
- Effectively, unless the player can hit both at once they will have 110% of their normal HP combined.
- Killing one Elite will drop cells usually, and the second one drops the item/s
- Rotating laser which surrounds the Elite.
- Horizontal laser on ground level that periodically activates and damages the player on both sides of the Elite.
- Red spherical aura, similar to Shockers, the Concierge, or Conjunctivius.
- Horizontal laser that slowly ascends, bumping the player upwards if they get caught in it.
- Force field maintained by two crystals on either side of the Elite. The Elite cannot take any damage until the crystals are destroyed, and the crystals respawn after 6 seconds. Elites equipped with this ability will not teleport after the player.
- Crystal that hovers above the Elite, which shoots a rapid volley of projectiles at the player.
- Electric cage that surrounds the Elite, hurting the player if they try to get out of it.
Starred enemies
These enemies have a yellow star icon above their head, and appear differently on the map. When defeated, they drop a random type of Scroll or a Legendary Item. Otherwise, they are functionally identical to normal enemies.
- If they are carrying a scroll, that scroll counts as one of the constant scrolls in the biome it was found in.
List of enemies
| Image | Name | Zones | Offensive abilities | Defensive abilities | Elite? | Blueprint drops |
|---|---|---|---|---|---|---|
| Zombie | • Prisoners' Quarters, Ancient Sewers (0–3 BSC)
• Promenade of the Condemned, Corrupted Prison (0–1 BSC) • Toxic Sewers, Prison Depths, Ramparts, Ossuary, Stilt Village, Slumbering Sanctuary, Dilapidated Arboretum, Fractured Shrines (0–2 BSC) • Throne Room (summoned by the Hand of the King) • Spawned by Treasure Chests occasionally |
• Clawing attack
• Leaping attack which deals massive damage |
Hops backwards | Yes | Blood Sword (100%)
Double Crossb-o-matic (0.4%) Bobby Outfit (1+ BSC; 0.4%) | |
 |
Undead Archer | • Prisoners' Quarters, Toxic Sewers, Prison Depths, Ramparts, High Peak Castle (0 BSC)
• Clock Tower, Fractured Shrines (0-3 BSC) • Promenade of the Condemned (Elite Guardian only) • Throne Room (summoned by the Hand of the King) • Observatory (summoned by the boss) |
Arrow, which can be ducked under | • Backwards dash
• Teleports forwards (only happens if its back is to a wall) |
Yes | Infantry Bow (1.7%)
Ice Bow (0.4%) Bow and Endless Quiver (0.03%) Skeleton Outfit (0.4%) |
| Shieldbearer | • Ancient Sewers
• Prisoners' Quarters, Ramparts (0-1 BSC) • Derelict Distillery (0-2 BSC) |
Shield charge | Immune to attacks from the front, unless stunned | Yes | Rampart (0.4%)
Bloodthirsty Shield (0.4%) Ice Shield (10%) Desert Dweller Outfit (4+ BSC; 0.4%) | |
| Grenadier | • Undying Shores
• Prisoners' Quarters, Ossuary, Slumbering Sanctuary, Fractured Shrines (0-1 BSC) • Promenade of the Condemned, Corrupted Prison (0-2 BSC) • Toxic Sewers (1-3 BSC) • Throne Room (summoned by the Hand of the King) • Observatory (summoned by the boss) |
Grenade which goes through walls and explodes after a short delay | Short backwards hop | Yes | Fire Grenade (1.7%)
Magnetic Grenade (0.4%) | |
 |
Bombardier | • Clock Tower, High Peak Castle
• Slumbering Sanctuary, Fractured Shrines (2+ BSC) • Promenade of the Condemned (3+ BSC) • Ossuary (4+ BSC) |
Grenade which travels through walls, and explodes into three smaller grenades, which just explode | Backwards hop | Yes | Wave of Denial (0.4%)
Powerful Grenade (10%) Aphrodite Outfit (3+ BSC; 0.4%) |
| Bat | • Promenade of the Condemned
• Graveyard (0-1 BSC) • Undying Shores (0-2 BSC) • Dilapidated Arboretum (0-3 BSC) |
Charge attack | Flies | No | Knife Dance (0.4%)
Oiled Sword (1.7%) | |
| Kamikaze | • Toxic Sewers, Ancient Sewers, Prison Depths, Stilt Village, Slumbering Sanctuary, Graveyard, Forgotten Sepulcher, Derelict Distillery
• Promenade of the Condemned (1+ BSC) |
Self-detonates | Flies | No | Frantic Sword (0.4%)
Kamikaze Outfit (1.7%) Neon Outfit (1+ BSC; 0.4%) | |
 |
Runner | • Promenade of the Condemned
• Undying Shores (After visiting Promenade of the Condemned) • Observatory (summoned by the boss) |
• Clawing attack
• Teleports after you |
N/A | Yes | Spartan Sandals (100%)
Cleaver (1.7%) Phaser (0.4%) |
| Inquisitor | • Ramparts, Slumbering Sanctuary, Graveyard, Forgotten Sepulcher, Fractured Shrines
• Ossuary (1+ BSC) • Prisoners' Quarters (2+ BSC) • Corrupted Prison (3+ BSC) • Throne Room (summoned by the Hand of the King) |
A magic bolt that travels through walls | Short backwards hop | Yes | Lightning Bolt (1.7%)
Vampirism (0.4%) Mage Outfit (2+ BSC; 0.4%) | |
 |
Protector | • Promenade of the Condemned, Slumbering Sanctuary
• Corrupted Prison (1+ BSC) |
N/A | Makes nearby enemies invincible for several
seconds (has a brief cooldown) |
No | Corrupted Power (0.4%)
Explosive Decoy (0.4%) Warrior Outfit (3+ BSC; 0.4%) |
 |
Hammer | • Prison Depths
• Derelict Distillery (2+ BSC) |
• Pound attack: releases 4 bombs, which explode after a moment
• Summons Sewer Flies |
N/A | Yes | War Spear (10%)
Oil Grenade (10%) |
| Sweeper | • Ramparts | Releases a flaming shockwave after short charge | Rolls backwards from the player when close | Yes | Scheme (10%) | |
| Buzzcutter | • Ramparts
• Toxic Sewers (2+ BSC) • Undying Shores (After visiting Ramparts) • Dilapidated Arboretum (4+ BSC) |
Slash attack | Flies away | No | Spite Sword (0.03%)
Frostbite (10%) | |
| Corpse Fly | • Spawned by Swarm Zombie | • Melee attack (after host dies)
• Connects themselves with damaging electricity arcs when host is alive |
Flies away | No | N/A | |
| Sewer Fly | • Spawned by Hammer
• Spawned by Treasure Chests occasionally |
Slash attack | Flies away | No | N/A | |
| Festering Zombie | • Ancient Sewers, Stilt Village
• Toxic Sewers (4+ BSC) • Undying Shores (After visiting Stilt Village) |
• Claw attack
• Throws an egg which hatches into a Corpse Worm |
N/A | Yes | Force Shield (0.4%)
Fisherman's Outfit (1+ BSC; 0.4%) | |
| Swarm Zombie | • Graveyard | • Claw attack
• Rush attack towards the player • Spawns 6 Corpse Flies around themselves |
N/A | Yes | Shovel (0.4%)
Tombstone (1.7) Corrosive Cloud (0.4%) Networking (10%) | |
| Disgusting Worm | • Toxic Sewers, Ancient Sewers
• Undying Shores (After visiting Ancient Sewers) • Throne Room (summoned by the Hand of the King) |
• Bite attack
• Upon death, releases 6 bombs, which explode in rapid succession • Can jump horizontally across small gaps |
N/A | Yes | What Doesn't Kill Me (100%)
Swarm (0.4%) Valmont's Whip (0.4%) | |
| Corpse Worm | • Spawned by Festering Zombie | • Bite attack
• Follows you by teleporting |
Jumps behind the player | No | N/A | |
| Weaver Worm | • Morass of the Banished, Stilt Village | • Very fast bite attack
• Follows you by teleporting |
Jumps behind the player | No | N/A | |
 |
Scorpion | • Toxic Sewers
• Throne Room (summoned by the Hand of the King) |
• Ambush (Emerges from the ground)
• Poison tail attack • Poison dart, which can be ducked under |
N/A | Yes | Rapier (0.4%)
Donatello Outfit (2+ BSC; 0.4%) |
 |
Impaler | • Ancient Sewers
• Dilapidated Arboretum (1+ BSC) |
Creates an area of spikes underneath you | N/A | No | Sadist's Stiletto
(1.7%) |
 |
Sewer's Tentacle | • Ancient Sewers | • Pops out of the ground directly beneath the player
• Sweeps across the ground from either left or right side |
• Stays below ground when not attacking
• Cannot traverse onto platforms |
No | N/A |
 |
Catcher | • Graveyard
• Fractured Shrines (4+ BSC) • Undying Shores (After visiting Graveyard) |
• Stunning hookshot which pulls you closer (can be ducked)
• Immediately follows with a highly damaging blow with a small window to dodge • Fast kick with high knockback |
N/A | Yes | Grappling Hook (0.4%)
Knockback Shield (0.4%) Robin Hood Outfit (4+ BSC; 0.4%) |
 |
Cleaver | • Forgotten Sepulcher, Morass of the Banished
• Throne Room (summoned by the Hand of the King) • Observatory (summoned by the boss) |
Throws a spinning axe, which returns after traveling a moderate distance | N/A | Yes | Death Orb (10%)
Spiked Shield (100%) |
 |
Pirate Captain | • Stilt Village | • Slams down the cannon multiple times extremely quickly
• Shoots a rolling cannonball which explodes after a few seconds or on contact with player |
N/A | Yes | Wrenching Whip (0.4%)
Heart of Ice (10%) |
 |
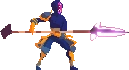
Knife Thrower | • Prisoners' Quarters (1 BSC)
• Prison Depths, Forgotten Sepulcher, Undying Shores (1+ BSC) • High Peak Castle (1-3 BSC) |
Tosses three daggers in a row which inflict poison. | • Dashes away from the player
• Teleports forwards (only happens if its back is to the wall) • Invisible while not attacking |
Yes | Great Owl of War (1+ BSC; 1.7%)
Legendary Warrior's Outfit (3+ BSC; 0.4%) |
 |
Slasher | • Prison Depths, Ossuary, Morass of the Banished, Fractured Shrines
• Graveyard, Ramparts (2+ BSC) • Undying Shores (After visiting Prison Depths) • Toxic Sewers (Elite Guardian only) • High Peak Castle (Elite in blue area) • Throne Room (summoned by the Hand of the King) |
• Teleports horizontally toward you
• Combo of 3 stunning sword swipes with a large range; the third slash creates a shockwave which travels along the ground |
N/A | Yes | Cluster Grenade (1.7%)
No Mercy (1.7%) Heavy Turret (0.4%) Demon Outfit (3+ BSC, 0.4%) |
 |
Lacerator | • Prison Depths, Derelict Distillery
• Graveyard (1-3 BSC) • Slumbering Sanctuary (3+ BSC) • Throne Room (summoned by the Hand of the King) |
Spins towards you. Can quickly change direction to catch you if you roll through it. | N/A | Yes | Crusher (10%)
Open Wounds (0.4%) Carduus Outfit (1+ BSC; 0.4%) |
| Shocker | • Ossuary
• Corrupted Prison, Forgotten Sepulcher (0 BSC) • Fractured Shrines (1+ BSC) |
A large area of effect which does damage over time and interrupts your actions | N/A | No | Flamethrower Turret (0.4%)
Cloud Outfit (3+ BSC; 0.4%) | |
| Thorny | • Dilapidated Arboretum, Ossuary
• High Peak Castle (Elite in green area) |
Winds up before rolling towards you | • Forward jump over you
• Short backwards hop • Damages you if hit in the back with a melee weapon |
Yes | Spiked Boots (0.4%)
Barnacle (1.7%) Armadillopack (1.7%) | |
 |
Spawner | • Ossuary, Derelict Distillery
• Undying Shores (After visiting Ossuary) |
Spawns a Corpse Juice if there are less than 3 nearby. This drains its health slightly, but it will not die to self-inflicted damage. | N/A | No | Torch (1.7%) |
| Corpse Juice | • Spawned by Spawners | Stab attack | N/A | No | N/A | |
 |
Masker | • Prison Depths, Slumbering Sanctuary, Graveyard
• Morass of the Banished (4+ BSC) |
N/A | Creates a fog which turns other enemies invisible | No | Fire Blast (1.7%)
Ghost Outfit (2+ BSC; 0.4%) |
 |
Caster | • Slumbering Sanctuary | Shoots a high-speed orb. | Teleports away if you get too close | Yes | Pyrotechnics
(1.7%) |
 |
Golem | • Slumbering Sanctuary | • Punches towards you
• Teleports you next to him if you retreat • Earth shockwave that inflicts long-lasting stun |
N/A | Yes | Wings of the Crow (10%) |
| Dark Tracker | • Clock Tower, Forgotten Sepulcher
• Morass of the Banished (1-2 BSC) • Promenade of the Condemned (2-3 BSC) • Ossuary (3+ BSC) • High Peak Castle (Elite in red area) |
Dagger swing that deals critical damage if it hits your back | Teleports behind you | Yes | Repeater Crossbow (0.4%)
Hayabusa Boots (1+ BSC; 1.7%) Ninja Outfit (2+ BSC; 0.4%) | |
 |
Cannibal | • Clock Tower
• Graveyard (4+ BSC) |
• With enough space, hops backwards, hops towards you, then does a combo of 3 sword slashes.
• If it misses its first attack, it can stop the combo. |
Hops backwards, leaving a grenade behind | Yes | Hokuto's Bow
(1.7%) Dictator Outfit (4+ BSC; 0.4%) |
 |
Automaton | • Clock Tower | Dashes up to two times across the platform | Invisible until in range
Teleports away from the player after attacking |
No | Predator (10%) |
 |
Lancer | • High Peak Castle
• Observatory (summoned by the boss) |
Attacks through walls and platforms: 1 stab if attacking vertically, several stabs if attacking horizontally. | N/A | Yes | Hayabusa Gauntlets (0.4%)
Dead Inside (4+ BSC; 1.7%) |
 |
Guardian Knight | • High Peak Castle | • Charges up, and after a few seconds unleashes a whirlwind that sucks you and other enemies in
• An overhead swing with very high damage |
Deflects arrows during whirlwind | No | Tornado
(0.4%) Soldier's Resistance (10%) |
 |
Royal Guard | • High Peak Castle | • Projects a shield and charges towards the player
• Jumps and stomps near the player, releasing shockwave on impact |
Jumps away from the player when close
Protected by a shield that deflects ranged attacks when charging |
Yes | Initiative (10%) |
 |
Bomber | • Ossuary (2-3 BSC)
• Fractured Shrines (3+ BSC) • Astrolab |
• An unparryable dive attack when above the player
• Throws a grenade when far from the player • A sword attack when near |
Flies above the player | Yes | Seismic Strike (2+ BSC; 0.4%)
A Thousand and One Nights Outfit (3+ BSC; 0.4%) |
 |
Slammer | • Corrupted Prison, Cavern
• Undying Shores (2+ BSC) • Astrolab |
• An unparryable AoE slam attack when in range
• Jumps between platforms and towards the player |
Immune to stuns | Yes | Flawless (0.4%)
Tactical Retreat (10%) |
 |
Demon | • Cavern
• Slumbering Sanctuary, High Peak Castle (4+ BSC) |
• A claw attack when next to the player
• A volley of two projectiles when at range |
Flies | Yes | Shrapnel Axes (0.4%)
Drifter Outfit (2+ BSC; 0.4%) |
 |
ArbiterRotG | • Cavern
• Observatory (summoned by the boss) |
Fires 5 wall-piercing projectiles in a spread from all 3 of its hands | Spawns a bomb on death which fires projectiles in 6 directions | Yes | Magic Missiles (0.4%)
Shaman Outfit (4+ BSC; 0.4%) |
 |
Ground ShakerRotG | • Cavern | • Shakes debris loose from ceilings
• A combo of 3 melee attacks followed by a long-windup AoE slam |
• Back is impervious to non-whip attacks
• Immune to stuns |
Yes | The Boy's Axe (1.7%)
Ice Armor (100%) Toothpick (10%) |
| SkeletonRotG | • Cavern | Repeatedly jumps and stomps the ground after charging, creating flaming shockwaves on each impact | • Jumps away from the player when close
• Immune to stuns |
No | Flying Alcoholic Outfit (100%) | |
 |
Rampager | • Prisoners' Quarters, Toxic Sewers, Dilapidated Arboretum, Prison Depths, Ramparts, Morass of the Banished, Stilt Village, Slumbering Sanctuary, High Peak Castle, Undying Shores (3+ BSC) | • Rushes in to instantly attack once you're close enough, doing attack combo for a bit
• Leaps across map towards the player |
N/A | Yes | Adrenaline (3+ BSC; 1.7%) |
 |
Failed Experiment | • Prisoners' Quarters, Promenade of the Condemned, Ancient Sewers, Stilt Village, Forgotten Sepulcher, Cavern, Derelict Distillery, Undying Shores (4+ BSC)
• Astrolab |
• A combo of 3 quick melee attacks followed by a head slam which locks them in place
• Leaping attack towards the player |
Performs an invincible dash behind the player when the player uses a main weapon | Yes | Berserker (4+ BSC; 0.4%) |
| [Show enemy]DefenderRotG | Contains spoilers• Astrolab | ???A quick slam attack with the Protector if alone | ???• Makes one nearby enemy invincible
• Runs from the player if there are other enemies around |
???No | ???Thunder Shield (100%) | |
 |
[Show enemy]Magistrate of DeathRotG | Contains spoilers• Astrolab | ???Summons Screaming Skulls | ???Dashes away from the player | ???Yes | ???Hemorrhage (10%) |
| [Show enemy]Screaming SkullRotG | Contains spoilers• Spawned by Magistrates of Death | ???Projects laser barriers which deal contact damage | ???Laser barriers deal high knockback and briefly stun | ???No | ???N/A | |
| [Show enemy]LibrarianRotG | Contains spoilers• Astrolab | ???Charges up a laser up to three times | ???Floats above the player while attacking | ???No | ???N/A | |
| Rancid Rat | • Toxic Sewers, Corrupted Prison, Graveyard, Derelict Distillery
• Prisoners' Quarters (1+ BSC) • Undying Shores (After visiting Toxic Sewers) |
• Scurries around and does a short jump attack | • Always appears in groups | No | Porcupack (0.4%) | |
 |
Oven Knight | • Prisoners' Quarters, Clock Tower, Cavern (2+ BSC)
• Derelict Distillery (3+ BSC) • Ramparts (4+ BSC) |
• While it has its shield, does a shield bash attack followed by an axe swing
• When its shield is destroyed, has a two-swing axe combo that can change directions during the second swing |
• Has a wooden shield that absorbs a single hit
• Moves faster when its shield is destroyed |
Yes | Oven Axe (2+ BSC; 1.7%)
Kill Rhythm (2+ BSC; 0.4%) |
 |
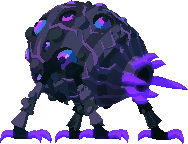
Toxic Miasma | • Corrupted Prison
• Undying Shores (After visiting Corrupted Prison) |
• Protrudes spikes in a large area around itself
• Fires a fast arcing sludge projectile • Can teleport to the player |
N/A | Yes | Barbed Tips (10%) |
 |
Weirded Warrior | • Stilt Village
• Corrupted Prison, Forgotten Sepulcher (2+ BSC) |
• Has a quick slashing dash that can be performed up to two times in a row | • Can block ranged attacks using its swords | Yes | Hattori's Katana (1.7%)
Blade Master's Outfit (1+ BSC; 0.4%) |
 |
Corpulent Zombie | • Forgotten Sepulcher | • Leaps onto the player's position and pounds the ground several times | N/A | Yes | Point Blank (10%) |
 |
Dancer | • Slumbering Sanctuary | • Stabs towards the player repeatedly | • Will delay and re-execute its attack if the player attempts to parry it | Yes | Ranger's Gear (10%) |
 |
Infected Worker | • Derelict Distillery | • Throws an explosive barrel to the players position which explodes on impact. | • When the player is close, places a barrel on the ground and jumps back. The barrel explodes after a second or two. | Yes | Barrel Launcher (0.4%) |
 |
Living Barrel | • Derelict Distillery | • Charges and fires an AoE attack of spikes.
• Chases the player and self destructs. |
N/A | Yes | Tesla Coil (1.7%) |
 |
Demolisher | • Derelict Distillery
• Ramparts, Stilt Village (1+ BSC) • Prisoners' Quarters (2+ BSC) • Clock Tower (4+ BSC) |
• Fires explosive bolts from its crossbow, alternating between 1 bolt and 2 bolts.
• Slams its crossbow on the ground creating an explosion |
N/A | Yes | Acrobatipack (10%)
Arbalester's Outfit (0.4%) |
 |
YeeterTBS | • Dilapidated Arboretum | • Calls Jerkshrooms and throws them to the player
• Throws a small rock towards the player in an arc • Punches the player at an upwards angle |
N/A | Yes | Flashing Fans (0.4%)
(3+ BSC; 1.7%) |
| JerkshroomTBS | • Dilapidated Arboretum
• Undying Shores (After visiting Dilapidated Arboretum ) |
Dashes towards the player | Crouches down, become immune to almost all types of attack | No | Mushroom Boi! (100%)
(1+ BSC; 1.7%) | |
 |
BanishedTBS | • Morass of the Banished | • Dashes towards the player
• Impales the player with its spear • Ambushes the player from above |
Hops backwards | No | Smoke Bomb (0.4%)
(2+ BSC; 1.7%) |
| BlowgunnerTBS | • Morass of the Banished
• Undying Shores (After visiting Morass of the Banished) |
Fires a dart projectile towards the player | Jumps to a higher platform | No | Blowgun (1.7%)
(1.7%) | |
 |
Giant TickTBS | • Morass of the Banished | • Jabs the player with its claws front and back claws
• Hops towards the player • Drops three explosive projectiles |
Hops backwards | Yes | Rhythm n' Bouzouki (0.4%)
(4+ BSC; 1.7%) |
| Myopic CrowFF | • Fractured Shrines | Appears from any side of the screen and flies in a straight path | N/A | No | N/A | |
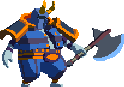
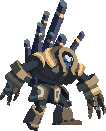
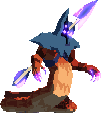
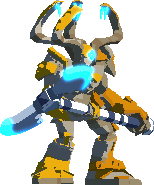 |
Stone WardenFF | • Fractured Shrines | • Swipes with its axe
• Smash the ground with its foot |
N/A | Yes | Iron Staff (100%)
Rocky Outfit (10%) |
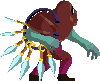
 |
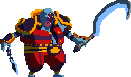
Cold Blooded GuardianFF | • Fractured Shrines
• Undying Shores (After visiting Fractured Shrines) |
• Poison claws attack
• Swipes with its tail • Throws its javelin at the player and teleports to it if it missed the player |
N/A | Yes | Snake Fangs (1.7%)
Lizard Outfit (1.7%) |
 |
ApostateFF | • Undying Shores | • Attacks with its lantern if the player gets too close
• Brings back dead enemies to life |
Summons a barrier that needs to be attacked to break | No | Ferryman's Lantern (0.4%)
Apostate Outfit (1.7%) |
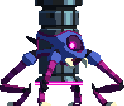
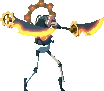
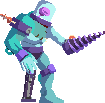
| Failed HomunculusFF | • Undying Shores | Uses Homunculus to damage the player | N/A | No | Lightning Rods (1.7%)
Almost-Yourself Outfit (10%) | |
 |
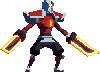
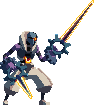
Clumsy SwordsmanFF | • Undying Shores | Attacks twice with its sword | Rolls forward | No | N/A |
 |
Dastardly ArcherFF | • Undying Shores | Shoots an arrow to the player | Hops between platforms | No | N/A |
 |
Compulsive GravediggerFF | • Undying Shores | Swipe attack with the Shovel | Can reflect grenades | No | N/A |
- RotG: Rise of the Giant DLC
- TBS: The Bad Seed DLC
- FF: Fatal Falls DLC
Removed enemies
| Image | Name | Zones | Offensive abilities | Defensive abilities | Elite? | Blueprint drops |
|---|---|---|---|---|---|---|
| Running Zombie | • Stilt Village | Claw attack | Hops backwards | Yes | N/A | |
| Elite Lieutenant | Spawned by Elite enemies in any regular biome | Claw attack | Hops backwards | No | N/A |
| Navigation wiki |
|---|