AlternateRT (talk | contribs) mNo edit summary |
No edit summary Tag: Visual edit |
||
| (47 intermediate revisions by 8 users not shown) | |||
| Line 1: | Line 1: | ||
| − | Dead Cells presents a variety of NPCs, some of which have an active role in the player's progression through the game, while others are just characters the player encounters on his path. |
+ | ''Dead Cells'' presents a variety of NPCs, some of which have an active role in the player's progression through the game, while others are just characters the player encounters on his path. |
{| class="wikitable sortable" style="width: 100%" |
{| class="wikitable sortable" style="width: 100%" |
||
| − | !style="width: 15%| |
+ | !style="width: 15%|Name |
!style="width: 40%|Info |
!style="width: 40%|Info |
||
!style="width: 25%|Location |
!style="width: 25%|Location |
||
| Line 8: | Line 8: | ||
|- |
|- |
||
|[[Tutorial Knight]] |
|[[Tutorial Knight]] |
||
| − | |Guides the player throughout the start of the game, while also giving |
+ | |Guides the player throughout the start of the game, while also giving the player some cryptic advice before sending them on their way. She dies early in the game and her corpse can be looted to unlock the {{Item|Broadsword}}. Her corpse can then be found next to the entrance of the [[Promenade of the Condemned]]. |
| + | Afterwards she can be found in the [[Training Room]] to guide the player. |
||
| − | After player beats the [[The Collector (5 BSC)|fourth boss]] for the first time, she re-appears as a glitched figure at the start of the game, until the |
+ | After player beats the [[The Collector (5 BSC)|5 BSC fourth boss]]{{DLC|RotG}} for the first time, she re-appears as a glitched figure at the start of the game, until the true ending is achieved. |
| − | |[[Prisoners' Quarters]] |
+ | |At the starting area of the [[Prisoners' Quarters]]; after her death, at the entrance hall of the [[Training Room]]. |
|[[File:Tutorial Knight.png|center|100px]] |
|[[File:Tutorial Knight.png|center|100px]] |
||
|- |
|- |
||
|[[The Collector]] |
|[[The Collector]] |
||
| − | |Blueprints that you have collected are given to the Collector and are then unlocked by bringing cells to him. He is the main way of progressing throughout the game |
+ | |Blueprints that you have collected are given to the Collector and are then unlocked by bringing cells to him. He is the main way of progressing throughout the game.ㅤ |
| ⚫ | |||
| − | |||
| ⚫ | |||
| − | He is absent from the whole game when [[Boss Stem Cell|5 Boss Cells]] is enabled, giving player no opportunity to spend cells. |
||
| ⚫ | |||
| ⚫ | |||
|- |
|- |
||
|[[Guillain]] |
|[[Guillain]] |
||
| − | |Lets the player choose a mutation to acquire after every completed biome, with a max |
+ | |Lets the player choose a mutation to acquire after every completed biome, with a max amount of 3 at the same time. Those can be restarted and reselected by a price which increases with each use. |
| − | |In the |
+ | |In the [[Passage]]s located between each two biomes. |
| − | |[[File:Guillain.png|center| |
+ | |[[File:Guillain.png|center|100px]] |
|- |
|- |
||
|[[The Blacksmith]] |
|[[The Blacksmith]] |
||
| − | |The only access the player has to the Legendary Forge, where they can permanently upgrade the quality of the gear found throughout the game. |
+ | |The only access the player has to the [[Legendary Forge]], where they can permanently upgrade the quality of the gear found throughout the game. |
| − | |In the |
+ | |In the [[Passage]]s after each boss biome (after the [[Black Bridge]], [[Insufferable Crypt]] or the [[Nest]], and after the [[Clock Room]], [[Guardian's Haven]], or the [[Mausoleum]]). |
|[[File:The Blacksmith.png|center|130px]] |
|[[File:The Blacksmith.png|center|130px]] |
||
| ⚫ | |||
| + | |[[The Blacksmith's Apprentice]] |
||
| + | |Upgrades and rerolls the affixes of your gear at the [[Minor Forge]]. |
||
| + | |Located in all [[Passages]] after reaching a passage containing the Legendary Forge for the first time. |
||
| + | |[[File:The Blacksmith's Apprentice.png|center|100px]] |
||
|- |
|- |
||
|[[The Tailor]] |
|[[The Tailor]] |
||
| − | |Lets the player change the Beheaded's outfit, choosing between those they have unlocked. |
+ | |Lets the player change the [[The Beheaded|Beheaded's]] outfit, choosing between those they have unlocked. |
| − | |[[Prisoners' Quarters]] |
+ | |In a large room entered at the starting area of the [[Prisoners' Quarters]]. |
|[[File:The Tailor.png|center|140px]] |
|[[File:The Tailor.png|center|140px]] |
||
|- |
|- |
||
|[[The Scribe]] |
|[[The Scribe]] |
||
|Keeps track of player's game stats and achievements. |
|Keeps track of player's game stats and achievements. |
||
| − | |[[Prisoners' Quarters]] |
+ | |At the starting area of the [[Prisoners' Quarters]], next to the entrance to the [[Daily Run]]. |
|[[File:The Scribe.png|center|140px]] |
|[[File:The Scribe.png|center|140px]] |
||
|- |
|- |
||
| − | |[[ |
+ | |[[Crypt Demon]] |
| − | |Explains the [[Forgotten Sepulcher#The Darkness|Darkness]] mechanic at the entrance of the Forgotten |
+ | |Explains the [[Forgotten Sepulcher#The Darkness|Darkness]] mechanic at the entrance of the Forgotten Sepulcher. |
| − | |At the entrance of the [[Forgotten Sepulcher]] |
+ | |At the entrance of the [[Forgotten Sepulcher]]. |
| − | |[[File: |
+ | |[[File:Crypt Demon.png|center|140px]] |
|- |
|- |
||
|[[The Ghost]] |
|[[The Ghost]] |
||
|Explains how challenge rifts work, the first time one is entered. |
|Explains how challenge rifts work, the first time one is entered. |
||
| − | |At the entrance of the first [[Challenge Rift]] the player enters |
+ | |At the entrance of the first [[Challenge Rift]] the player enters; once the [[Training Room]] is unlocked, at the entrance of the [[Training Room#Combat Room|Combat Room]]. |
| − | |[[File:Ghost.png|center|90px]] |
+ | |[[File:The Ghost.png|center|90px]] |
|- |
|- |
||
|[[The King]] |
|[[The King]] |
||
| + | |The King of the island. |
||
| ⚫ | |||
| − | |[[Throne Room]] |
+ | |Sitting in the throne of the [[Throne Room]]. |
| − | |[[File: |
+ | |[[File:The King.png|center|170px]] |
|- |
|- |
||
|[[Gollum]] |
|[[Gollum]] |
||
| + | |Found in a cell, in the Toxic Sewers. Asks the player to find the {{Rune|tel|1}} and take it back to him, so that he can escape. |
||
| ⚫ | |||
| + | |Near the starting area of the [[Toxic Sewers]]; in subsequent encounters, midway through the biome. |
||
| − | |[[Toxic Sewers]] |
||
| − | |[[File:Gollum |
+ | |[[File:Gollum.png|center|140px]] |
|- |
|- |
||
| + | |[[The Doctor]] |
||
| ⚫ | |||
| + | |Provides the player with [[Aspects]] |
||
| ⚫ | |||
| + | |In the starting area of the [[Prisoners' Quarters]], left of the [[Tailor]]. |
||
| − | |[[Morass of the Banished]] |
||
| − | |[[ |
+ | |[[File:The Doctor.png|center|100px]] |
| − | | |
+ | |- |
| + | |[[The Bank Teller]] |
||
| − | |||
| + | |Introduces the player to the Bank and its [[Currency#Debt|debt]] mechanic. |
||
| − | == Unused NPCs == |
||
| + | |In the starting area of the [[Bank]]. |
||
| − | {| class="wikitable sortable" style="width: 100%" |
||
| + | |[[File:The Bank Teller.png|center|100px]] |
||
| − | !style="width: 15%|NPC name |
||
| ⚫ | |||
| − | !style="width: 40%|Info |
||
| + | {{SpoilerTable |
||
| − | !style="width: 25%|Location |
||
| + | | content = [[The Collector's Intern]]{{DLC|RotG}} |
||
| − | !style="width: 20%|Image |
||
| + | | hidden = Yes |
||
| + | | toggle = <div style="text-align:center;">[[File:Exclamation.png|x25px|link=]]<br/>[Show spoilers]</div> |
||
| + | | identifier = collector-intern |
||
| + | }} |
||
| + | {{SpoilerTable |
||
| + | | content = Replaces the Collector in [[Passage]]s when 5 [[Boss Stem Cells]] are active, but is functionally identical for purchasing upgrades. |
||
| + | | hidden = Yes |
||
| + | | toggle = <span style="color:#d1394e; text-align:center;">'''Contains spoilers'''</span> |
||
| + | | identifier = collector-intern |
||
| + | }} |
||
| + | {{SpoilerTable |
||
| + | | content = In the [[Passage]]s located between each two biomes. |
||
| + | | hidden = Yes |
||
| + | | identifier = collector-intern |
||
| + | }} |
||
| + | {{SpoilerTable |
||
| + | | content = [[File:The Collector's Intern.png|center|100px]] |
||
| + | | hidden = Yes |
||
| + | | identifier = collector-intern |
||
| + | }} |
||
| + | |- |
||
| ⚫ | |||
| ⚫ | |||
| + | |In the altar found before the exit of the [[Morass of the Banished]]. |
||
| + | |[[File:Swamp Priest.png|center|180px]] |
||
|- |
|- |
||
| − | |The Fisherman |
+ | |[[The Fisherman]]{{DLC|TQatS}} |
| + | |Helps the player reach the [[Infested Shipwreck]] |
||
| − | |NPC that was found in the Pier and, when spoken to, would kill the Beheaded to let him start a new run. |
||
| + | |At the docks of the leading to the Infested Shipwreck. |
||
| − | |[[Pier]] |
||
| − | |[[File:Fisherman.png|center|160px]] |
+ | |[[File:The Fisherman.png|center|160px]] |
|} |
|} |
||
Revision as of 15:55, 22 April 2022
Dead Cells presents a variety of NPCs, some of which have an active role in the player's progression through the game, while others are just characters the player encounters on his path.
| Name | Info | Location | Image |
|---|---|---|---|
| Tutorial Knight | Guides the player throughout the start of the game, while also giving the player some cryptic advice before sending them on their way. She dies early in the game and her corpse can be looted to unlock the Afterwards she can be found in the Training Room to guide the player. After player beats the 5 BSC fourth bossRotG for the first time, she re-appears as a glitched figure at the start of the game, until the true ending is achieved. |
At the starting area of the Prisoners' Quarters; after her death, at the entrance hall of the Training Room. |  |
| The Collector | Blueprints that you have collected are given to the Collector and are then unlocked by bringing cells to him. He is the main way of progressing throughout the game.ㅤ | In the Passages located between each two biomes. |  |
| Guillain | Lets the player choose a mutation to acquire after every completed biome, with a max amount of 3 at the same time. Those can be restarted and reselected by a price which increases with each use. | In the Passages located between each two biomes. |  |
| The Blacksmith | The only access the player has to the Legendary Forge, where they can permanently upgrade the quality of the gear found throughout the game. | In the Passages after each boss biome (after the Black Bridge, Insufferable Crypt or the Nest, and after the Clock Room, Guardian's Haven, or the Mausoleum). |  |
| The Blacksmith's Apprentice | Upgrades and rerolls the affixes of your gear at the Minor Forge. | Located in all Passages after reaching a passage containing the Legendary Forge for the first time. |  |
| The Tailor | Lets the player change the Beheaded's outfit, choosing between those they have unlocked. | In a large room entered at the starting area of the Prisoners' Quarters. |  |
| The Scribe | Keeps track of player's game stats and achievements. | At the starting area of the Prisoners' Quarters, next to the entrance to the Daily Run. | 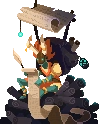 |
| Crypt Demon | Explains the Darkness mechanic at the entrance of the Forgotten Sepulcher. | At the entrance of the Forgotten Sepulcher. |  |
| The Ghost | Explains how challenge rifts work, the first time one is entered. | At the entrance of the first Challenge Rift the player enters; once the Training Room is unlocked, at the entrance of the Combat Room. |  |
| The King | The King of the island. | Sitting in the throne of the Throne Room. | 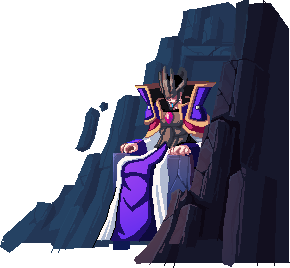 |
| Gollum | Found in a cell, in the Toxic Sewers. Asks the player to find the |
Near the starting area of the Toxic Sewers; in subsequent encounters, midway through the biome. | 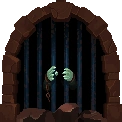 |
| The Doctor | Provides the player with Aspects | In the starting area of the Prisoners' Quarters, left of the Tailor. |  |
| The Bank Teller | Introduces the player to the Bank and its debt mechanic. | In the starting area of the Bank. |  |
[Show spoilers] |
Contains spoilersReplaces the Collector in Passages when 5 Boss Stem Cells are active, but is functionally identical for purchasing upgrades. | In the Passages located between each two biomes. |  |
| Swamp PriestTBS | A miscreant priest appears in the Morass of the Banished, nagging you to offer a sacrifice ( |
In the altar found before the exit of the Morass of the Banished. | 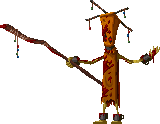 |
| The FishermanTQatS | Helps the player reach the Infested Shipwreck | At the docks of the leading to the Infested Shipwreck. | 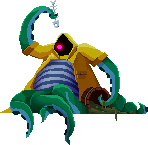 |
| Navigation wiki |
|---|