AlternateRT (talk | contribs) (Readjusting entries using Template:Outfit) |
AlternateRT (talk | contribs) mNo edit summary |
||
| (32 intermediate revisions by 8 users not shown) | |||
| Line 1: | Line 1: | ||
{{Spoiler}} |
{{Spoiler}} |
||
| − | '''Outfits''' are sets of clothes for the [[ |
+ | '''Outfits''' are sets of clothes for the [[Beheaded]]. They are unlocked by finding their blueprints and unlocking them at the [[Collector]] with [[cells]] like all other upgrades or items. |
Once at least one new outfit is unlocked at the Collector, the player can change clothes by entering the [[Tailor]]'s shop at the start of [[Prisoners' Quarters]]. |
Once at least one new outfit is unlocked at the Collector, the player can change clothes by entering the [[Tailor]]'s shop at the start of [[Prisoners' Quarters]]. |
||
| − | Outfits change the colors and |
+ | Outfits change the colors and sometimes model of the player's appearance. Some specific outfit elements, like the Concierge outfits' shoulder plate, changes color depending on the player's gear and action. Many outfits reference enemies (e.g. Ninja Outfit), bosses (e.g. Temporal Outfit), fictional characters unrelated to ''Dead Cells'' (e.g. Piccolo from ''Dragon Ball''), or the game's developers (Carduus Outfit). |
== Obtaining outfits == |
== Obtaining outfits == |
||
| Line 11: | Line 11: | ||
For outfits dropped by enemies, the [[Hunter's Grenade]] can be used. Unlike most blueprints, some outfits will only drop from enemies with a certain amount of [[Boss Stem Cell]]s active, even if those enemies can be found at lower difficulties. |
For outfits dropped by enemies, the [[Hunter's Grenade]] can be used. Unlike most blueprints, some outfits will only drop from enemies with a certain amount of [[Boss Stem Cell]]s active, even if those enemies can be found at lower difficulties. |
||
| − | + | Most bosses drop up to 5 outfits, one for each difficulty level from 0 (any) to 4+ BSCs. The outfit of the lowest difficulty will always be found first; the 0 BSC outfit will drop before any others even if the player is on Nightmare difficulty. |
|
== List of outfits == |
== List of outfits == |
||
| Line 24: | Line 24: | ||
! style="position:sticky; top:0;" |Notes |
! style="position:sticky; top:0;" |Notes |
||
! style="position:sticky; top:0;" |In-game appearance |
! style="position:sticky; top:0;" |In-game appearance |
||
| + | {{OutfitTable |
||
| − | {{Outfit |
||
| name = Classic Outfit |
| name = Classic Outfit |
||
| description = You went through a lot with this one, and will most likely go through a lot more. |
| description = You went through a lot with this one, and will most likely go through a lot more. |
||
| Line 32: | Line 32: | ||
| note = |
| note = |
||
}} |
}} |
||
| + | {{OutfitTable |
||
| − | |- |
||
| + | | name = Golden Outfit |
||
| − | |[[File:Golden Outfit Icon.png|center|48px|link=]] |
||
| + | | description = You definitely won't go unnoticed wearing this. |
||
| − | |Golden Outfit |
||
| + | | location = Specialist Shop in the [[Prisoners' Quarters]]; costs 10,000 gold or 50 curses |
||
| − | |''You definitely won't go unnoticed wearing this.'' |
||
| + | | difficulty = Any |
||
| − | |Specialist Shop in the [[Prisoners' Quarters]]; |
||
| + | | cost = 150 |
||
| − | costs 10,000 gold or 50 curses |
||
| + | | note = |
||
| − | |data-sort-value=0|Any |
||
| + | }} |
||
| − | |150 |
||
| + | {{OutfitTable |
||
| − | | |
||
| + | | name = Legendary Warrior's Outfit |
||
| − | |[[File:Golden Outfit.png|center]] |
||
| + | | description = Monkey tail not included. |
||
| − | |- |
||
| + | | location = Drops from [[Knife Thrower]]s (0.4%) |
||
| − | |[[File:Legendary Warrior's Outfit Icon.png|center|48px|link=]] |
||
| + | | difficulty = 3+ BSC |
||
| − | |Legendary Warrior's Outfit |
||
| + | | cost = 500 |
||
| − | |''Monkey tail not included.'' |
||
| + | | note = Based on the character ''Son Goku'' from the ''Dragon Ball'' series |
||
| − | |Drops from [[Knife Thrower]]s (0.4%) |
||
| + | }} |
||
| − | |3+ BSC |
||
| + | {{OutfitTable |
||
| − | |500 |
||
| + | | name = Ninja Outfit |
||
| − | |Son Goku from ''Dragon Ball'' |
||
| + | | description = Become one with the shadows... |
||
| − | |[[File:Legendary Warrior's Outfit.png|center]] |
||
| + | | location = Drops from [[Dark Tracker]]s (0.4%) |
||
| − | |- |
||
| + | | difficulty = 2+ BSC |
||
| − | |[[File:Ninja Outfit Icon.png|center|48px|link=]] |
||
| + | | cost = 300 |
||
| − | |Ninja Outfit |
||
| + | | note = Based on the appearance of Dark Trackers |
||
| − | |''Become one with the shadows...'' |
||
| + | }} |
||
| − | |Drops from [[Dark Tracker]]s (0.4%) |
||
| + | {{OutfitTable |
||
| − | |2+ BSC |
||
| + | | name = Ghost Outfit |
||
| − | |300 |
||
| + | | description = Ready for Halloween. |
||
| − | |Based on the [[Dark Tracker|Dark Tracker's]] clothes |
||
| + | | location = Drops from [[Masker]]s (0.4%) |
||
| − | |[[File:Ninja Outfit.png|center]] |
||
| + | | difficulty = 2+ BSC |
||
| − | |- |
||
| + | | cost = 300 |
||
| − | |[[File:Ghost Outfit Icon.png|center|48px|link=]] |
||
| + | | note = |
||
| − | |Ghost Outfit |
||
| + | }} |
||
| − | |''Ready for Halloween.'' |
||
| + | {{OutfitTable |
||
| − | |Drops from [[Masker]]s (0.4%) |
||
| + | | name = Donatello Outfit |
||
| − | |2+ BSC |
||
| + | | description = For the sewer dwellers. |
||
| − | |300 |
||
| + | | location = Drops from [[Scorpion]]s (0.4%) |
||
| − | | |
||
| + | | difficulty = 2+ BSC |
||
| − | |[[File:Ghost Outfit.png|center]] |
||
| + | | cost = 300 |
||
| − | |- |
||
| + | | note = Based on the character ''Donatello'' from the ''Teenage Mutant Ninja Turtles'' series |
||
| − | |[[File:Donatello Outfit Icon.png|center|48px|link=]] |
||
| + | }} |
||
| − | |Donatello Outfit |
||
| + | {{OutfitTable |
||
| − | |''For the sewer dwellers.'' |
||
| + | | name = Festive Outfit |
||
| − | |Drops from [[Scorpion]]s (0.4%) |
||
| + | | description = The last wearer left you some cookie crumbs. |
||
| − | |2+ BSC |
||
| + | | location = Hidden inside the 4 BSC door in the [[Cavern]]; requires [[Pickups#Keys|Garland Key]] |
||
| − | |300 |
||
| + | | difficulty = 4+ BSC |
||
| − | |Based on Donatello of the ''Teenage Mutant Ninja Turtles'', which explains the Sewer location |
||
| + | | cost = 500 |
||
| − | |[[File:Donatello Outfit.png|center]] |
||
| + | | note = A costume of Santa for Christmas |
||
| − | |- |
||
| + | | dlc = RotG |
||
| − | |[[File:Festive Outfit Icon.png|center|48px|link=]] |
||
| + | }} |
||
| − | |Festive Outfit{{DLC|RotG}} |
||
| + | {{OutfitTable |
||
| − | |''The last wearer left you some cookie crumbs.'' |
||
| + | | name = Fisherman's Outfit |
||
| − | |Hidden beyond 4 BSC door in the [[Cavern]]; requires [[Pickups#Keys|Garland Key]] |
||
| + | | description = Invisible among the fishes. |
||
| − | |4+ BSC |
||
| + | | location = Drops from [[Festering Zombie]]s (0.4%) |
||
| − | |500 |
||
| + | | difficulty = 1+ BSC |
||
| − | |A costume of Santa for Christmas |
||
| + | | cost = 150 |
||
| − | |[[File:Festive Outfit.png|center]] |
||
| + | | note = Based on the removed [[Pier|Fisherman]] NPC |
||
| − | |- |
||
| + | }} |
||
| − | |[[File:Fisherman's Outfit Icon.png|center|48px|link=]] |
||
| + | {{OutfitTable |
||
| − | |Fisherman's Outfit |
||
| + | | name = Skeleton Outfit |
||
| − | |''Invisible among the fishes.'' |
||
| + | | description = Climb all the way back down the social ladder. |
||
| − | |Drops from [[Purulent Zombie (Sewers)|Purulent Zombies (Sewers)]] (0.4%) |
||
| + | | location = Drops from [[Undead Archer]]s (0.4%) |
||
| − | |1+ BSC |
||
| + | | difficulty = Any |
||
| − | |150 |
||
| + | | cost = 150 |
||
| − | |Based on the removed [[Pier|Fisherman]] NPC |
||
| + | | note = Based on the appearance of Undead Archers |
||
| − | |[[File:Fisherman's Outfit.png|center]] |
||
| + | }} |
||
| − | |- |
||
| + | {{OutfitTable |
||
| − | |[[File:Skeleton Outfit Icon.png|center|48px|link=]] |
||
| − | | |
+ | | name = Carduus Outfit |
| − | | |
+ | | description = Made of the purest purple. |
| − | |Drops from [[ |
+ | | location = Drops from [[Lacerator]]s (0.4%) |
| + | | difficulty = 1+ BSC |
||
| − | |data-sort-value=0|Any |
||
| − | |150 |
+ | | cost = 150 |
| + | | note = A reference to Carduus, the main artist for ''Dead Cells'', who really likes purple and tries to use it everywhere<ref>B. Reinier (2019), ''The Heart of Dead Cells: A Visual Making-Of'' Toulouse: Third Editions. ISBN: 2377840558</ref> |
||
| − | |Based on the [[Undead Archer|Undead Archer's]] clothes |
||
| + | }} |
||
| − | |[[File:Skeleton Outfit.png|center]] |
||
| + | {{OutfitTable |
||
| − | |- |
||
| + | | name = Aphrodite Outfit |
||
| − | |[[File:Carduus Outfit Icon.png|center|48px|link=]] |
||
| + | | description = Stage fright be gone! |
||
| − | |Carduus Outfit |
||
| + | | location = Drops from [[Bombardier]]s (0.4%) |
||
| − | |''Made of the purest purple.'' |
||
| + | | difficulty = 3+ BSC |
||
| − | |Drops from [[Lacerator]]s (0.4%) |
||
| + | | cost = 500 |
||
| − | |1+ BSC |
||
| + | | note = Based on the famous Greek goddess Aphrodite, who's associated with love and beauty, often represented by the color pink |
||
| − | |150 |
||
| + | }} |
||
| − | |A reference to Carduus, the main artist for ''Dead Cells'', who really likes purple and tries to use it everywhere<ref>B. Reinier (2019), ''The Heart of Dead Cells: A Visual Making Of.'' Toulouse: Third Editions. ISBN: 2377840558</ref> |
||
| + | {{OutfitTable |
||
| − | |[[File:Carduus Outfit.png|center]] |
||
| + | | name = Shaman Outfit |
||
| − | |- |
||
| + | | description = Shamans are always stronger in the shadows. |
||
| − | |[[File:Aphrodite Outfit Icon.png|center|48px|link=]] |
||
| + | | location = Drops from [[Arbiter]]s (0.4%) |
||
| − | |Aphrodite Outfit |
||
| + | | difficulty = 4+ BSC |
||
| − | |''Stage fright be gone!'' |
||
| + | | cost = 750 |
||
| − | |Drops from [[Bombardier]]s (0.4%) |
||
| + | | note = |
||
| − | |3+ BSC |
||
| + | | dlc = RotG |
||
| − | |500 |
||
| + | }} |
||
| − | | |
||
| + | {{OutfitTable |
||
| − | |[[File:Aphrodite Outfit.png|center]] |
||
| + | | name = Cloud Outfit |
||
| − | |- |
||
| + | | description = Nobody remembers where it comes from. |
||
| − | |[[File:Shaman Outfit Icon.png|center|48px|link=]] |
||
| + | | location = Drops from [[Shocker]]s (0.4%) |
||
| − | |Shaman Outfit{{DLC|RotG}} |
||
| + | | difficulty = 3+ BSC |
||
| − | |''Shamans are always stronger in the shadows.'' |
||
| + | | cost = 500 |
||
| − | |Drops from [[Arbiter]]s (0.4%) |
||
| + | | note = Based on the character ''Cloud Strife'', the protagonist of ''Final Fantasy VII''; the shoulder plate resembles Cloud's, and the scarf resembles his blonde hair; the description alludes to how Cloud doesn't remember his past |
||
| − | |4+ BSC |
||
| + | }} |
||
| − | |750 |
||
| + | {{OutfitTable |
||
| − | | |
||
| − | | |
+ | | name = Drifter Outfit |
| + | | description = An outfit for those with heart. |
||
| − | |- |
||
| + | | location = Drops from [[Demon]]s (0.4%) |
||
| − | |[[File:Cloud Outfit Icon.png|center|48px|link=]] |
||
| + | | difficulty = 2+ BSC |
||
| − | |Cloud Outfit |
||
| + | | cost = 300 |
||
| − | |''Nobody remembers where it comes from.'' |
||
| + | | note = Based on the main character of ''Hyper Light Drifter'' |
||
| − | |Drops from [[Shocker]]s (0.4%) |
||
| + | }} |
||
| − | |3+ BSC |
||
| + | {{OutfitTable |
||
| − | |500 |
||
| + | | name = A Thousand and One Nights Outfit |
||
| − | |Based on Cloud Strife, the protagonist of ''Final Fantasy VII''; the shoulder plate resembles Cloud's, and the scarf resembles his blonde hair; the description alludes to how Cloud doesn't remember his past |
||
| + | | description = Magic lamp not included. |
||
| − | |[[File:Cloud Outfit.png|center]] |
||
| + | | location = Drops from [[Bomber]]s (0.4%) |
||
| − | |- |
||
| + | | difficulty = 3+ BSC |
||
| − | |[[File:Drifter Outfit Icon.png|center|48px|link=]] |
||
| + | | cost = 750 |
||
| − | |Drifter Outfit |
||
| + | | note = Based on the ''Aladdin'' animated movie |
||
| − | |''An outfit for those with heart.'' |
||
| + | }} |
||
| − | |Drops from [[Demon]]s (0.4%) |
||
| + | {{OutfitTable |
||
| − | |2+ BSC |
||
| + | | name = Dictator Outfit |
||
| − | |300 |
||
| + | | description = An outfit for fighting in the streets. |
||
| − | |Based on the main character of ''Hyper Light Drifter'' |
||
| + | | location = Drops from [[Cannibal]]s (0.4%) |
||
| − | |[[File:Drifter Outfit.png|center]] |
||
| + | | difficulty = 4+ BSC |
||
| − | |- |
||
| + | | cost = 750 |
||
| − | |[[File:A Thousand and One Nights Outfit Icon.png|center|48px|link=]] |
||
| + | | note = Based on the character [https://streetfighter.fandom.com/wiki/M._Bison ''M. Bison''], also known as ''Dictator'', from the ''Street Fighter'' series |
||
| − | |A Thousand and One Nights Outfit |
||
| + | }} |
||
| − | |''Magic lamp not included.'' |
||
| + | {{OutfitTable |
||
| − | |Drops from [[Bomber]]s (0.4%) |
||
| + | | name = Warrior Outfit |
||
| − | |3+ BSC |
||
| + | | description = The dungeoneer's traditional outfit. |
||
| − | |750 |
||
| + | | location = Drops from [[Protector]]s (0.4%) |
||
| − | |Based on the ''Aladdin'' animated movie |
||
| + | | difficulty = 3+ BSC |
||
| − | |[[File:A Thousand and One Nights Outfit.png|center]] |
||
| + | | cost = 500 |
||
| − | |- |
||
| + | | note = |
||
| − | |[[File:Dictator Outfit Icon.png|center|48px|link=]] |
||
| + | }} |
||
| − | |Dictator Outfit |
||
| + | {{OutfitTable |
||
| − | |''An outfit for fighting in the streets.'' |
||
| + | | name = Mage Outfit |
||
| − | |Drops from [[Cannibal]]s (0.4%) |
||
| + | | description = For wise people only. |
||
| − | |4+ BSC |
||
| + | | location = Drops from [[Inquisitor]]s (0.4%) |
||
| − | |750 |
||
| + | | difficulty = 2+ BSC |
||
| − | |Based on the character [https://streetfighter.fandom.com/wiki/M._Bison ''M. Bison''], also known as ''Dictator'', from the ''Street Fighter'' series. (Trivia: ''Dictator'' is a region neutral nickname for the character who is known as ''Vega'' in Japan. ''Mike Bison'' (jp) is the ''Boxer'' known as [https://streetfighter.fandom.com/wiki/Balrog ''Balrog''] (int.) and ''Balrog'' (jp) is the Spaniard [https://streetfighter.fandom.com/wiki/Vega ''Vega''] (int.) nicknamed ''Claw''. |
||
| + | | cost = 300 |
||
| − | |[[File:Dictator Outfit.png|center]] |
||
| + | | note = Based on the Black Mage's color scheme from the ''Final Fantasy'' series |
||
| − | |- |
||
| + | }} |
||
| − | |[[File:Warrior Outfit Icon.png|center|48px|link=]] |
||
| + | {{OutfitTable |
||
| − | |Warrior Outfit |
||
| + | | name = Neon Outfit |
||
| − | |''The dungeoneer's traditional outfit.'' |
||
| + | | description = Stealth is for losers. |
||
| − | |Drops from [[Protector]]s (0.4%) |
||
| + | | location = Drops from [[Kamikaze]]s (0.4%) |
||
| − | |3+ BSC |
||
| + | | difficulty = 1+ BSC |
||
| − | |500 |
||
| + | | cost = 150 |
||
| − | | |
||
| + | | note = |
||
| − | |[[File:Warrior Outfit.png|center]] |
||
| + | }} |
||
| − | |- |
||
| + | {{OutfitTable |
||
| − | |[[File:Mage Outfit Icon.png|center|48px|link=]] |
||
| − | | |
+ | | name = Bobby Outfit |
| + | | description = Prisoner Bobby's outfit. |
||
| − | |''For wise people only.'' |
||
| − | |Drops from [[ |
+ | | location = Drops from [[Zombie]]s (0.4%) |
| − | | |
+ | | difficulty = 1+ BSC |
| + | | cost = 150 |
||
| − | |300 |
||
| − | |Based on the |
+ | | note = Based on the Beheaded's appearance in the animated ''Dead Cells'' trailers |
| + | }} |
||
| − | |[[File:Mage Outfit.png|center]] |
||
| + | {{OutfitTable |
||
| − | |- |
||
| + | | name = Demon Outfit |
||
| − | |[[File:Neon Outfit Icon.png|center|48px|link=]] |
||
| + | | description = W3 4ll h4ve 0ur d4rk sid3. |
||
| − | |Neon Outfit |
||
| + | | location = Drops from [[Slasher]]s (0.4%) |
||
| − | |''Stealth is for losers.'' |
||
| + | | difficulty = 3+ BSC |
||
| − | |Drops from [[Kamikaze]]s (0.4%) |
||
| + | | cost = 500 |
||
| − | |1+ BSC |
||
| + | | note = |
||
| − | |150 |
||
| + | }} |
||
| − | | |
||
| + | {{OutfitTable |
||
| − | |[[File:Neon Outfit.png|center]] |
||
| + | | name = Robin Hood Outfit |
||
| − | |- |
||
| + | | description = The arrow is mightier than the sword! |
||
| − | |[[File:Bobby Outfit Icon.png|center|48px|link=]] |
||
| + | | location = Drops from [[Catcher]]s (0.4%) |
||
| − | |Bobby Outfit |
||
| + | | difficulty = 4+ BSC |
||
| − | |''Prisoner Bobby's outfit.'' |
||
| + | | cost = 750 |
||
| − | |Drops from [[Zombie]]s (0.4%) |
||
| + | | note = Based on the famous fictional character Robin Hood |
||
| − | |1+ BSC |
||
| + | }} |
||
| − | |150 |
||
| + | {{OutfitTable |
||
| − | |Based on the Beheaded's appearance in the animated ''Dead Cells'' trailers |
||
| + | | name = Desert Dweller Outfit |
||
| − | |[[File:Bobby Outfit.png|center]] |
||
| + | | description = Smells of hot sand and desert nights. |
||
| − | |- |
||
| + | | location = Drops from [[Shieldbearer]]s (0.4%) |
||
| − | |[[File:Demon Outfit Icon.png|center|48px|link=]] |
||
| + | | difficulty = 4+ BSC |
||
| − | |Demon Outfit |
||
| + | | cost = 750 |
||
| − | |''W3 4ll h4ve 0ur d4rk sid3.'' |
||
| + | | note = Based on the ''Vault Jumpsuits'' from the ''Fallout'' series |
||
| − | |Drops from [[Slasher]]s (0.4%) |
||
| + | }} |
||
| − | |3+ BSC |
||
| + | {{OutfitTable |
||
| − | |500 |
||
| + | | name = Galaxy Outfit |
||
| − | | |
||
| + | | description = A DRM-free outfit! |
||
| − | |[[File:Demon Outfit.png|center]] |
||
| + | | location = |
||
| − | |- |
||
| + | | difficulty = |
||
| − | |[[File:Robin Hood Outfit Icon.png|center|48px|link=]] |
||
| + | | cost = |
||
| − | |Robin Hood Outfit |
||
| − | | |
+ | | note = Added to the game in ''v1.3.9'' |
| + | Based on both ''GOG.com'' and ''GOG Galaxy'' |
||
| − | |Drops from [[Catcher]]s (0.4%) |
||
| + | }} |
||
| − | |4+ BSC |
||
| + | {{OutfitTable |
||
| − | |750 |
||
| + | | name = Baguette Outfit |
||
| − | |Based on the famous fictional character Robin Hood |
||
| + | | description = Beret and moustache sold separately. |
||
| − | |[[File:Robin Hood Outfit.png|center]] |
||
| + | | location = |
||
| − | |- |
||
| + | | difficulty = |
||
| − | |[[File:Desert Dweller Outfit Icon.png|center|48px|link=]] |
||
| + | | cost = |
||
| − | |Desert Dweller Outfit |
||
| + | | note = Added to the game in ''v1.3.9'' |
||
| − | |''Smells of hot sand and desert nights.'' |
||
| + | Based around ''Bastille Day'', the national day of France |
||
| − | |Drops from [[Shieldbearer]]s (0.4%) |
||
| + | }} |
||
| − | |4+ BSC |
||
| + | {{OutfitTable |
||
| − | |750 |
||
| + | | name = Flying Alcoholic Outfit |
||
| − | |Based on Vault Jumpsuits from the ''Fallout'' series |
||
| + | | description = Happy holidays! |
||
| − | |[[File:Desert Dweller Outfit.png|center]] |
||
| + | | location = Drops from [[Skeleton]]s (100%) |
||
| − | |- |
||
| + | | difficulty = Any |
||
| − | |[[File:Galaxy Outfit Icon.png|center|48px|link=]] |
||
| + | | cost = 1 |
||
| − | |Galaxy Outfit |
||
| + | | note = Added to the game in ''v1.6'' |
||
| − | |''A DRM-free outfit!'' |
||
| + | Another costume related to Christmas |
||
| − | |data-sort-value=0|N/A (Always available) |
||
| + | | dlc = RotG |
||
| − | |data-sort-value=-1|N/A |
||
| + | }} |
||
| − | |data-sort-value=0|N/A |
||
| + | {{OutfitTable |
||
| − | |Based on both ''GOG.com'' and ''GOG Galaxy'' |
||
| + | | name = Gardener's Outfit |
||
| − | Added to the game in ''v1.3.9'' |
||
| + | | description = Get the green thumb. |
||
| − | |[[File:Galaxy Outfit.png|center]] |
||
| + | | location = Drops from lore room in the [[Dilapidated Arboretum]] |
||
| − | |- |
||
| + | | difficulty = Any |
||
| − | |[[File:Baguette Outfit Icon.png|center|48px|link=]] |
||
| + | | cost = 75 |
||
| − | |Baguette Outfit |
||
| + | | note = Added to the game in ''v1.8'' |
||
| − | |''Beret and moustache sold separately.'' |
||
| + | Misspelled in-game as "Gardner's Outfit" |
||
| − | |data-sort-value=0|N/A (Always available) |
||
| + | | dlc = TBS |
||
| − | |data-sort-value=-1|N/A |
||
| + | }} |
||
| − | |data-sort-value=0|N/A |
||
| + | {{OutfitTable |
||
| − | |Based around ''Bastille Day'', which is also a national day of France |
||
| + | | name = Mushroom Boi's Outfit |
||
| − | Added to the game in ''v1.3.9'' |
||
| + | | description = Delicious, fried, sauteed or baked. Don't forget the sauce. |
||
| − | |[[File:Baguette Outfit.png|center]] |
||
| + | | location = Drops from [[Jerkshroom]]s (1.7%) |
||
| − | |- |
||
| + | | difficulty = 1+ BSC |
||
| − | |[[File:Flying Alcoholic Outfit Icon.png|center|48px|link=]] |
||
| + | | cost = 150 |
||
| − | |Flying Alcoholic Outfit{{DLC|RotG}} |
||
| + | | note = Based on the appearance of Jerkshrooms |
||
| − | |''Happy holidays!'' |
||
| + | | dlc = TBS |
||
| − | |Drops from [[Skeleton]]s (100%) |
||
| + | }} |
||
| − | |data-sort-value=0|Any |
||
| + | {{OutfitTable |
||
| − | |1 |
||
| + | | name = Mushroom King Outfit |
||
| − | |Another costume related to Christmas |
||
| + | | description = People are strange, when you're a stranger... |
||
| − | Added to the game in ''v1.6'' |
||
| + | | location = Drops from [[Yeeter]]s (1.7%) |
||
| − | |[[File:Flying Alcoholic Outfit.png|center]] |
||
| + | | difficulty = 3+ BSC |
||
| − | |- |
||
| + | | cost = 150 |
||
| − | |[[File:Gardener's Outfit Icon.png|center|48px|link=]] |
||
| + | | note = Based on the appearance of Yeeters |
||
| − | |Gardener's Outfit{{DLC|TBS}} |
||
| + | | dlc = TBS |
||
| − | |''Get the green thumb.'' |
||
| + | }} |
||
| − | |Drops from lore room in the [[Dilapidated Arboretum]] |
||
| + | {{OutfitTable |
||
| − | | data-sort-value="0" |Any |
||
| + | | name = Banished's Outfit |
||
| − | |75 |
||
| + | | description = A perfect reproduction of the different shades of mud. |
||
| − | |Misspelled in-game as "Gardner's Outfit" |
||
| + | | location = Drops from [[Banished]] (1.7%) |
||
| − | Added to the game in ''v1.8'' |
||
| + | | difficulty = 2+ BSC |
||
| − | |[[File:Gardener's Outfit.png|center]] |
||
| + | | cost = 150 |
||
| − | |- |
||
| + | | note = Based on the appearance of the Banished |
||
| − | |[[File:Mushroom Boi's Outfit Icon.png|center|48px|link=]] |
||
| + | | dlc = TBS |
||
| − | |Mushroom Boi's Outfit{{DLC|TBS}} |
||
| + | }} |
||
| − | |''Delicious, fried, sauteed or baked. Don't forget the sauce.'' |
||
| + | {{OutfitTable |
||
| − | |Drops from [[Jerkshroom]]s (1.7%) |
||
| + | | name = Blowgunner's Outfit |
||
| − | |1+ BSC |
||
| + | | description = For when you want an angry mob chasing you. |
||
| − | |150 |
||
| + | | location = Drops from [[Blowgunner]]s (1.7%) |
||
| − | | |
||
| + | | difficulty = Any |
||
| − | |[[File:Mushroom Boi's Outfit.png|center]] |
||
| + | | cost = 150 |
||
| − | |- |
||
| + | | note = Based on the appearance of Blowgunners |
||
| − | |[[File:Mushroom King Outfit Icon.png|center|48px|link=]] |
||
| + | | dlc = TBS |
||
| − | |Mushroom King Outfit{{DLC|TBS}} |
||
| + | }} |
||
| − | |''People are strange, when you're a stranger...'' |
||
| + | {{OutfitTable |
||
| − | |Drops from [[Yeeter]]s (1.7%) |
||
| + | | name = Tick Trainer's Outfit |
||
| − | |3+ BSC |
||
| + | | description = Average life expectancy: 3 minutes. |
||
| − | |150 |
||
| + | | location = Drops from [[Giant Tick]]s (1.7%) |
||
| − | | |
||
| + | | difficulty = 4+ BSC |
||
| − | |[[File:Mushroom King Outfit.png|center]] |
||
| + | | cost = 150 |
||
| − | |- |
||
| + | | note = Based on the appearance of Giant Ticks |
||
| − | |[[File:Banished's Outfit Icon.png|center|48px|link=]] |
||
| + | | dlc = TBS |
||
| − | |Banished's Outfit{{DLC|TBS}} |
||
| + | }} |
||
| − | |''A perfect reproduction of the different shades of mud.'' |
||
| + | {{OutfitTable |
||
| − | |Drops from [[Banished]] (1.7%) |
||
| + | | name = The Royal Gardener's Outfit |
||
| − | |2+ BSC |
||
| + | | description = Really too decorated and pompous for working in the dirt. |
||
| − | |150 |
||
| + | | location = Drops from the Royal Gardener's corpse in the [[Prisoners' Quarters]] |
||
| − | | |
||
| + | | difficulty = Any |
||
| − | |[[File:Banished's Outfit.png|center]] |
||
| + | | cost = 150 |
||
| − | |- |
||
| + | | note = |
||
| − | |[[File:Blowgunner's Outfit Icon.png|center|48px|link=]] |
||
| + | | dlc = TBS |
||
| − | |Blowgunner's Outfit{{DLC|TBS}} |
||
| + | }} |
||
| − | |''For when you want an angry mob chasing you.'' |
||
| + | {{OutfitTable |
||
| − | |Drops from [[Blowgunner]]s (1.7%) |
||
| + | | name = Retro Outfit |
||
| − | | data-sort-value="0" |Any |
||
| + | | description = Batteries not included |
||
| − | |150 |
||
| + | | location = |
||
| − | | |
||
| + | | difficulty = |
||
| − | |[[File:Blowgunner's Outfit.png]] |
||
| + | | cost = |
||
| − | |- |
||
| + | | note = Added to the game in ''v2.0'' |
||
| − | |[[File:Tick Trainer's Outfit Icon.png|center|48px|link=]] |
||
| + | Based on the monochromatic green screen of the original ''Game Boy''; was added alongside 8-bit versions of all in-game tracks. |
||
| − | |Tick Trainer's Outfit{{DLC|TBS}} |
||
| + | }} |
||
| − | |''Average life expectancy: 3 minutes.'' |
||
| + | {{OutfitTable |
||
| − | |Drops from [[Giant Tick]]s (1.7%) |
||
| + | | name = HEV Outfit |
||
| − | |4+ BSC |
||
| + | | description = The right outfit in the wrong place can make all the difference in the world. |
||
| − | |150 |
||
| + | | location = Drops from lore room in the [[Prisoners' Quarters]] |
||
| − | | |
||
| + | | difficulty = Any |
||
| − | |[[File:Tick Trainer's Outfit.png|center]] |
||
| + | | cost = 75 |
||
| − | |- |
||
| + | | note = Added to the game in ''v1.7.3'' |
||
| − | |[[File:The Royal Gardener's Outfit Icon.png|center|48px|link=]] |
||
| + | Based on the suit ''Gordon Freeman'' wears in the ''Half-Life'' series |
||
| − | |The Royal Gardener's Outfit{{DLC|TBS}} |
||
| + | }} |
||
| − | |''Really too decorated and pompous for working in the dirt.'' |
||
| + | {{OutfitTable |
||
| − | |Drops from the Royal Gardener's corpse in the [[Prisoners' Quarters]] |
||
| + | | name = Kamikaze Outfit |
||
| − | | data-sort-value="0" |Any |
||
| + | | description = The shoe is on the other bat... |
||
| − | |150 |
||
| + | | location = Drops from [[Kamikaze]]s (1.7%) |
||
| − | | |
||
| + | | difficulty = Any |
||
| − | |[[File:The Royal Gardener's Outfit.png|center]] |
||
| + | | cost = 150 |
||
| − | |- |
||
| + | | note = Added to the game in ''v2.1'' |
||
| − | |[[File:Retro Outfit Icon.png|center|48px|link=]] |
||
| + | }} |
||
| − | |Retro Outfit |
||
| + | {{OutfitTable |
||
| − | |''Batteries not included'' |
||
| + | | name = Arbalester's Outfit |
||
| − | |data-sort-value=0|N/A (Always available) |
||
| + | | description = Your enemies will stand bolt upright. |
||
| − | |data-sort-value=-1|N/A |
||
| + | | location = Drops from [[Demolisher]]s (0.4%) |
||
| − | |data-sort-value=0|N/A |
||
| + | | difficulty = Any |
||
| − | |Based on the monochromatic green screen of the original ''Game Boy.'' Was added alongside 8-bit versions of all ingame tracks. |
||
| + | | cost = 150 |
||
| − | Added to the game in ''v2.0'' |
||
| + | | note = Added to the game in ''v2.1'' |
||
| − | |[[File:Retro Outfit.png|center]] |
||
| − | |- |
||
| − | |[[File:HEV Outfit Icon.png|center|48px|link=]] |
||
| − | |HEV Outfit |
||
| − | |''The right outfit in the wrong place can make all the difference in the world.'' |
||
| − | |Drops from lore room in the [[Prisoners' Quarters]] |
||
| − | | data-sort-value="0" |Any |
||
| − | |75 |
||
| − | |Based on the suit ''Gordon Freeman'' wears in the ''Half-Life'' series |
||
| − | Added to the game in ''v1.7.3'' |
||
| − | |[[File:HEV Outfit.png|center]] |
||
| − | |- |
||
| − | |[[File:Kamikaze Outfit Icon.png|center|48px|link=]] |
||
| − | |Kamikaze Outfit |
||
| − | |''The shoe is on the other bat...'' |
||
| − | |Drops from [[Kamikaze]]s (1.7%) |
||
| − | | data-sort-value="0" |Any |
||
| − | |150 |
||
| − | |Added to the game in ''v2.1'' |
||
| − | |[[File:Kamikaze Outfit.png|center]] |
||
| − | |- |
||
| − | |[[File:Arbalester's Outfit Icon.png|center|48px|link=]] |
||
| − | |Arbalester's Outfit |
||
| − | |''Your enemies will stand bolt upright.'' |
||
| − | |Drops from [[Demolisher]]s (0.4%) |
||
| − | | data-sort-value="0" |Any |
||
| − | |150 |
||
| − | |Added to the game in ''v2.1'' |
||
Referring to a user of a type of crossbow known as an [[wikipedia:Arbalest|Arbalest]] |
Referring to a user of a type of crossbow known as an [[wikipedia:Arbalest|Arbalest]] |
||
| + | }} |
||
| − | |[[File:Albalester's Outfit.png|center]] |
||
| + | {{OutfitTable |
||
| − | |- |
||
| − | | |
+ | | name = Blade Master's Outfit |
| + | | description = People will lose their heads over this... |
||
| − | |Blade Master's Outfit |
||
| + | | location = Drops from [[Weirded Warrior]]s (0.4%) |
||
| − | |''People will lose their heads over this...'' |
||
| + | | difficulty = 1+ BSC |
||
| − | |Drops from [[Weirded Warrior]]s (0.4%) |
||
| + | | cost = 150 |
||
| − | |1+ BSC |
||
| + | | note = Added to the game in ''v2.1'' |
||
| − | |150 |
||
| + | Based on the outfit of Beatrix Kiddo, the main character of ''[[wikipedia:Kill Bill|Kill Bill]]'' franchise |
||
| − | |Added to the game in ''v2.1'' |
||
| + | }} |
||
| − | |[[File:Blade Master's Outfit.png|center]] |
||
| + | {{OutfitTable |
||
| − | {{Outfit |
||
| name = Reverse Burglar's Outfit |
| name = Reverse Burglar's Outfit |
||
| description = The legendary outfit of an ephemeral creature that illegally enters people's homes to leave random objects there. |
| description = The legendary outfit of an ephemeral creature that illegally enters people's homes to leave random objects there. |
||
| Line 379: | Line 352: | ||
| difficulty = |
| difficulty = |
||
| cost = |
| cost = |
||
| − | | note = |
+ | | note = Added to the game in ''v2.1'' |
| + | The third Christmas related costume; an obvious reference to Santa Claus |
||
| − | Added to the game in ''v2.1'' |
||
}} |
}} |
||
| + | {{OutfitTable |
||
| − | {{Outfit |
||
| name = Winter Outfit |
| name = Winter Outfit |
||
| description = No you can't eat your own nose for HP. |
| description = No you can't eat your own nose for HP. |
||
| Line 388: | Line 361: | ||
| difficulty = |
| difficulty = |
||
| cost = |
| cost = |
||
| − | | note = |
+ | | note = Added to the game in ''v2.1'' |
| + | The fourth Christmas related costume; description alludes to how the carrot is a possible food item in the game |
||
| − | Added to the game in ''v2.1'' |
||
}} |
}} |
||
| + | {{OutfitTable |
||
| − | {{Outfit |
||
| name = Lizard Outfit |
| name = Lizard Outfit |
||
| description = Just like a second skin... |
| description = Just like a second skin... |
||
| Line 397: | Line 370: | ||
| difficulty = Any |
| difficulty = Any |
||
| cost = 50 |
| cost = 50 |
||
| + | | note = Based on the appearance of Cold Blooded Guardians |
||
| − | | note = |
||
| dlc = FF |
| dlc = FF |
||
}} |
}} |
||
| + | {{OutfitTable |
||
| − | {{Outfit |
||
| name = Apostate Outfit |
| name = Apostate Outfit |
||
| description = Like a lighthouse amidst the tempest! |
| description = Like a lighthouse amidst the tempest! |
||
| Line 406: | Line 379: | ||
| difficulty = Any |
| difficulty = Any |
||
| cost = 80 |
| cost = 80 |
||
| + | | note = Based on the appearance of Apostates |
||
| − | | note = |
||
| dlc = FF |
| dlc = FF |
||
}} |
}} |
||
| + | {{OutfitTable |
||
| − | {{Outfit |
||
| name = Almost-Yourself Outfit |
| name = Almost-Yourself Outfit |
||
| description = Never stop being yourself. |
| description = Never stop being yourself. |
||
| Line 415: | Line 388: | ||
| difficulty = Any |
| difficulty = Any |
||
| cost = 30 |
| cost = 30 |
||
| + | | note = Based on the appearance of Failed Homunculi |
||
| − | | note = |
||
| dlc = FF |
| dlc = FF |
||
}} |
}} |
||
| + | {{OutfitTable |
||
| − | {{Outfit |
||
| name = Cultist Outfit |
| name = Cultist Outfit |
||
| description = Do you have a minute to talk about our Lord and Saviour? |
| description = Do you have a minute to talk about our Lord and Saviour? |
||
| Line 427: | Line 400: | ||
| dlc = FF |
| dlc = FF |
||
}} |
}} |
||
| + | {{OutfitTable |
||
| − | {{Outfit |
||
| name = Rocky Outfit |
| name = Rocky Outfit |
||
| description = "I've tasted blood and I want more!" |
| description = "I've tasted blood and I want more!" |
||
| Line 433: | Line 406: | ||
| difficulty = Any |
| difficulty = Any |
||
| cost = 100 |
| cost = 100 |
||
| + | | note = Based on the appearance of Stone Wardens |
||
| + | | dlc = FF |
||
| + | }} |
||
| + | {{OutfitTable |
||
| + | | name = Classic Concierge Outfit |
||
| + | | description = You've got the Concierge under your skin! |
||
| + | | location = Drops from the [[Concierge]] |
||
| + | | difficulty = Any |
||
| + | | cost = 75 |
||
| + | | note = |
||
| + | }} |
||
| + | {{OutfitTable |
||
| + | | name = Piccolo Concierge Outfit |
||
| + | | description = You've got the Concierge under your skin! |
||
| + | | location = Drops from the [[Concierge]] |
||
| + | | difficulty = 1+ BSC |
||
| + | | cost = 150 |
||
| + | | note = Based on the character ''Piccolo'' from the ''Dragon Ball'' series |
||
| + | }} |
||
| + | {{OutfitTable |
||
| + | | name = Misunderstood Concierge Outfit |
||
| + | | description = You've got the Concierge under your skin! |
||
| + | | location = Drops from the [[Concierge]] |
||
| + | | difficulty = 2+ BSC |
||
| + | | cost = 300 |
||
| + | | note = |
||
| + | }} |
||
| + | {{OutfitTable |
||
| + | | name = Ascended Concierge Outfit |
||
| + | | description = You've got the Concierge under your skin! |
||
| + | | location = Drops from the [[Concierge]] |
||
| + | | difficulty = 3+ BSC |
||
| + | | cost = 500 |
||
| + | | note = |
||
| + | }} |
||
| + | {{OutfitTable |
||
| + | | name = Ultimate Concierge Outfit |
||
| + | | description = You've got the Concierge under your skin! |
||
| + | | location = Drops from the [[Concierge]] |
||
| + | | difficulty = 4+ BSC |
||
| + | | cost = 750 |
||
| + | | note = |
||
| + | }} |
||
| + | {{OutfitTable |
||
| + | | name = Classic Conjunctivius Outfit |
||
| + | | description = Do you like tentacles? |
||
| + | | location = Drops from [[Conjunctivius]] |
||
| + | | difficulty = Any |
||
| + | | cost = 75 |
||
| + | | note = |
||
| + | }} |
||
| + | {{OutfitTable |
||
| + | | name = Starved Conjunctivius Outfit |
||
| + | | description = Do you like tentacles? |
||
| + | | location = Drops from [[Conjunctivius]] |
||
| + | | difficulty = 1+ BSC |
||
| + | | cost = 150 |
||
| + | | note = |
||
| + | }} |
||
| + | {{OutfitTable |
||
| + | | name = Enraged Conjunctivius Outfit |
||
| + | | description = Do you like tentacles? |
||
| + | | location = Drops from [[Conjunctivius]] |
||
| + | | difficulty = 2+ BSC |
||
| + | | cost = 300 |
||
| + | | note = |
||
| + | }} |
||
| + | {{OutfitTable |
||
| + | | name = Revolted Conjunctivius Outfit |
||
| + | | description = Do you like tentacles? |
||
| + | | location = Drops from [[Conjunctivius]] |
||
| + | | difficulty = 3+ BSC |
||
| + | | cost = 500 |
||
| + | | note = |
||
| + | }} |
||
| + | {{OutfitTable |
||
| + | | name = Legendary Conjunctivius Outfit |
||
| + | | description = Do you like tentacles? |
||
| + | | location = Drops from [[Conjunctivius]] |
||
| + | | difficulty = 4+ BSC |
||
| + | | cost = 750 |
||
| + | | note = |
||
| + | }} |
||
| + | {{OutfitTable |
||
| + | | name = Giant Tick Outfit |
||
| + | | description = Make sure you get the head out. |
||
| + | | location = Drops from [[Mama Tick]] |
||
| + | | difficulty = Any |
||
| + | | cost = 75 |
||
| + | | note = |
||
| + | | dlc = TBS |
||
| + | }} |
||
| + | {{OutfitTable |
||
| + | | name = Annoyed Tick Outfit |
||
| + | | description = Make sure you get the head out. |
||
| + | | location = Drops from [[Mama Tick]] |
||
| + | | difficulty = 1+ BSC |
||
| + | | cost = 150 |
||
| + | | note = |
||
| + | | dlc = TBS |
||
| + | }} |
||
| + | {{OutfitTable |
||
| + | | name = Irritated Tick Outfit |
||
| + | | description = Make sure you get the head out. |
||
| + | | location = Drops from [[Mama Tick]] |
||
| + | | difficulty = 2+ BSC |
||
| + | | cost = 300 |
||
| + | | note = |
||
| + | | dlc = TBS |
||
| + | }} |
||
| + | {{OutfitTable |
||
| + | | name = Mad Tick Outfit |
||
| + | | description = Make sure you get the head out. |
||
| + | | location = Drops from [[Mama Tick]] |
||
| + | | difficulty = 3+ BSC |
||
| + | | cost = 500 |
||
| + | | note = |
||
| + | | dlc = TBS |
||
| + | }} |
||
| + | {{OutfitTable |
||
| + | | name = Furious Tick Outfit |
||
| + | | description = Make sure you get the head out. |
||
| + | | location = Drops from [[Mama Tick]] |
||
| + | | difficulty = 4+ BSC |
||
| + | | cost = 750 |
||
| + | | note = |
||
| + | | dlc = TBS |
||
| + | }} |
||
| + | {{OutfitTable |
||
| + | | name = Sacrificial Tick Outfit |
||
| + | | description = There are many paths that lead to your opponent's death. Taking path to the death of an innocent, for example... |
||
| + | | location = Sacrifice the [[Mushroom Boi!]] in the lore room at the end of the [[Morass of the Banished]], then enter the [[Nest]] |
||
| + | | difficulty = Any |
||
| + | | cost = 66 |
||
| + | | note = Added to the game in ''v1.8'' |
||
| + | | dlc = TBS |
||
| + | }} |
||
| + | {{OutfitTable |
||
| + | | name = Classic Temporal Outfit |
||
| + | | description = The time, bespoke of course. |
||
| + | | location = Drops from the [[Time Keeper]] |
||
| + | | difficulty = Any |
||
| + | | cost = 75 |
||
| + | | note = |
||
| + | }} |
||
| + | {{OutfitTable |
||
| + | | name = Desert Temporal Outfit |
||
| + | | description = The time, bespoke of course. |
||
| + | | location = Drops from the [[Time Keeper]] |
||
| + | | difficulty = 1+ BSC |
||
| + | | cost = 150 |
||
| + | | note = |
||
| + | }} |
||
| + | {{OutfitTable |
||
| + | | name = Volcanic Temporal Outfit |
||
| + | | description = The time, bespoke of course. |
||
| + | | location = Drops from the [[Time Keeper]] |
||
| + | | difficulty = 2+ BSC |
||
| + | | cost = 300 |
||
| + | | note = |
||
| + | }} |
||
| + | {{OutfitTable |
||
| + | | name = Hunter's Temporal Outfit |
||
| + | | description = The time, bespoke of course. |
||
| + | | location = Drops from the [[Time Keeper]] |
||
| + | | difficulty = 3+ BSC |
||
| + | | cost = 500 |
||
| + | | note = |
||
| + | }} |
||
| + | {{OutfitTable |
||
| + | | name = Collector's Temporal Outfit |
||
| + | | description = The time, bespoke of course. |
||
| + | | location = Drops from the [[Time Keeper]] |
||
| + | | difficulty = 4+ BSC |
||
| + | | cost = 750 |
||
| + | | note = |
||
| + | }} |
||
| + | {{OutfitTable |
||
| + | | name = Classic Giant Outfit |
||
| + | | description = Your very own oversized suit, David Byrne-style! |
||
| + | | location = Drops from the [[Giant]] |
||
| + | | difficulty = Any |
||
| + | | cost = 75 |
||
| + | | note = The flavor text references David Byrne in the 1984 Talking Heads live album ''“Stop Making Sense”'' |
||
| + | | dlc = RotG |
||
| + | }} |
||
| + | {{OutfitTable |
||
| + | | name = Disappointed Giant's Outfit |
||
| + | | description = Your very own oversized suit, David Byrne-style! |
||
| + | | location = Drops from the [[Giant]] |
||
| + | | difficulty = 1+ BSC |
||
| + | | cost = 150 |
||
| + | | note = |
||
| + | | dlc = RotG |
||
| + | }} |
||
| + | {{OutfitTable |
||
| + | | name = Cursed Giant's Outfit |
||
| + | | description = Your very own oversized suit, David Byrne-style! |
||
| + | | location = Drops from the [[Giant]] |
||
| + | | difficulty = 2+ BSC |
||
| + | | cost = 300 |
||
| + | | note = |
||
| + | | dlc = RotG |
||
| + | }} |
||
| + | {{OutfitTable |
||
| + | | name = Misunderstood Giant's Outfit |
||
| + | | description = Your very own oversized suit, David Byrne-style! |
||
| + | | location = Drops from the [[Giant]] |
||
| + | | difficulty = 3+ BSC |
||
| + | | cost = 500 |
||
| + | | note = |
||
| + | | dlc = RotG |
||
| + | }} |
||
| + | {{OutfitTable |
||
| + | | name = Frustrated Giant's Outfit |
||
| + | | description = Your very own oversized suit, David Byrne-style! |
||
| + | | location = Drops from the [[Giant]] |
||
| + | | difficulty = 4+ BSC |
||
| + | | cost = 750 |
||
| + | | note = |
||
| + | | dlc = RotG |
||
| + | }} |
||
| + | {{OutfitTable |
||
| + | | name = Scarecrow Outfit 1 |
||
| + | | icon = Scarecrow Outfit blue Icon.png |
||
| + | | description = Nothing is too fancy for a flower. |
||
| + | | location = Drops from the [[Scarecrow]] |
||
| + | | difficulty = Any |
||
| + | | cost = 75 |
||
| note = |
| note = |
||
| dlc = FF |
| dlc = FF |
||
}} |
}} |
||
| + | {{OutfitTable |
||
| − | |- |
||
| + | | name = Scarecrow Outfit 2 |
||
| − | |[[File:Classic Concierge Outfit Icon.png|center|48px|link=]] |
||
| + | | icon = Scarecrow Outfit teal Icon.png |
||
| − | |Classic Concierge Outfit |
||
| + | | description = Time to harvest! |
||
| − | | rowspan="5" |''You've got the Concierge under your skin!'' |
||
| − | | |
+ | | location = Drops from the [[Scarecrow]] |
| + | | difficulty = 1+ BSC |
||
| − | | data-sort-value="0" |Any |
||
| + | | cost = 150 |
||
| − | |75 |
||
| + | | note = |
||
| − | | |
||
| + | | dlc = FF |
||
| − | |[[File:Classic Concierge Outfit.png|center]] |
||
| + | }} |
||
| − | |- |
||
| + | {{OutfitTable |
||
| − | |[[File:Piccolo Concierge Outfit Icon.png|center|48px|link=]] |
||
| − | | |
+ | | name = Scarecrow Outfit 3 |
| + | | icon = Scarecrow Outfit purple Icon.png |
||
| − | |1+ BSC |
||
| + | | description = We should all respect good old mother nature. |
||
| − | |150 |
||
| + | | location = Drops from the [[Scarecrow]] |
||
| − | |Based on the character ''Piccolo'' from the ''Dragon Ball'' series |
||
| + | | difficulty = 2+ BSC |
||
| − | |[[File:Piccolo Concierge Outfit.png|center]] |
||
| + | | cost = 300 |
||
| − | |- |
||
| + | | note = |
||
| − | |[[File:Misunderstood Concierge Outfit Icon.png|center|48px|link=]] |
||
| + | | dlc = FF |
||
| − | |Misunderstood Concierge Outfit |
||
| + | }} |
||
| − | |2+ BSC |
||
| + | {{OutfitTable |
||
| − | |300 |
||
| + | | name = Scarecrow Outfit 4 |
||
| − | | |
||
| + | | icon = Scarecrow Outfit pink Icon.png |
||
| − | |[[File:Misunderstood Concierge Outfit.png|center]] |
||
| + | | description = The fastest gardener in the West! |
||
| − | |- |
||
| + | | location = Drops from the [[Scarecrow]] |
||
| − | |[[File:Ascended Concierge Outfit Icon.png|center|48px|link=]] |
||
| + | | difficulty = 3+ BSC |
||
| − | |Ascended Concierge Outfit |
||
| + | | cost = 500 |
||
| − | |3+ BSC |
||
| + | | note = |
||
| − | |500 |
||
| + | | dlc = FF |
||
| − | | |
||
| + | }} |
||
| − | |[[File:Ascended Concierge Outfit.png|center]] |
||
| + | {{OutfitTable |
||
| − | |- |
||
| + | | name = Scarecrow Outfit 5 |
||
| − | |[[File:Ultimate Concierge Outfit Icon.png|center|48px|link=]] |
||
| + | | icon = Scarecrow Outfit goth Icon.png |
||
| − | |Ultimate Concierge Outfit |
||
| + | | description = Hiii-haaa ! |
||
| − | |4+ BSC |
||
| + | | location = Drops from the [[Scarecrow]] |
||
| − | |750 |
||
| + | | difficulty = 4+ BSC |
||
| − | | |
||
| + | | cost = 750 |
||
| − | |[[File:Ultimate Concierge Outfit.png|center]] |
||
| + | | note = |
||
| − | |- |
||
| + | | dlc = FF |
||
| − | |[[File:Classic Conjunctivius Outfit Icon.png|center|48px|link=]] |
||
| + | }} |
||
| − | |Classic Conjunctivius Outfit |
||
| + | {{OutfitTable |
||
| − | | rowspan="5" |''Do you like tentacles?'' |
||
| + | | name = The Hand of the King Outfit |
||
| − | | rowspan="5" | Drops from [[Conjunctivius]] |
||
| + | | description = One outfit to protect them all. |
||
| − | | data-sort-value="0" |Any |
||
| + | | location = Drops from the [[Hand of the King]] |
||
| − | |75 |
||
| + | | difficulty = Any |
||
| − | | |
||
| + | | cost = 75 |
||
| − | |[[File:Classic Conjunctivius Outfit.png|center]] |
||
| + | | note = |
||
| − | |- |
||
| + | }} |
||
| − | |[[File:Starved Conjunctivius Outfit Icon.png|center|48px|link=]] |
||
| + | {{OutfitTable |
||
| − | |Starved Conjunctivius Outfit |
||
| + | | name = Loyal Hand of the King Outfit |
||
| − | |1+ BSC |
||
| + | | description = One outfit to protect them all. |
||
| − | |150 |
||
| + | | location = Drops from the [[Hand of the King]] |
||
| − | | |
||
| + | | difficulty = 1+ BSC |
||
| − | |[[File:Starved Conjunctivius Outfit.png|center]] |
||
| + | | cost = 150 |
||
| − | |- |
||
| + | | note = |
||
| − | |[[File:Enraged Conjunctivius Outfit Icon.png|center|48px|link=]] |
||
| + | }} |
||
| − | |Enraged Conjunctivius Outfit |
||
| + | {{OutfitTable |
||
| − | |2+ BSC |
||
| + | | name = Incorruptible Hand of the King Outfit |
||
| − | |300 |
||
| + | | description = One outfit to protect them all. |
||
| − | | |
||
| + | | location = Drops from the [[Hand of the King]] |
||
| − | |[[File:Enraged Conjunctivius Outfit.png|center]] |
||
| + | | difficulty = 2+ BSC |
||
| − | |- |
||
| + | | cost = 300 |
||
| − | |[[File:Revolted Conjunctivius Outfit Icon.png|center|48px|link=]] |
||
| + | | note = |
||
| − | |Revolted Conjunctivius Outfit |
||
| + | }} |
||
| − | |3+ BSC |
||
| + | {{OutfitTable |
||
| − | |500 |
||
| + | | name = Faithful Hand of the King Outfit |
||
| − | | |
||
| + | | description = One outfit to protect them all. |
||
| − | |[[File:Revolted Conjunctivius Outfit.png|center]] |
||
| + | | location = Drops from the [[Hand of the King]] |
||
| − | |- |
||
| + | | difficulty = 3+ BSC |
||
| − | |[[File:Legendary Conjunctivius Outfit Icon.png|center|48px|link=]] |
||
| + | | cost = 500 |
||
| − | |Legendary Conjunctivius Outfit |
||
| + | | note = |
||
| − | |4+ BSC |
||
| + | }} |
||
| − | |750 |
||
| + | {{OutfitTable |
||
| − | | |
||
| + | | name = Devoted Hand of the King Outfit |
||
| − | |[[File:Legendary Conjunctivius Outfit.png|center]] |
||
| + | | description = One outfit to protect them all. |
||
| − | |- |
||
| + | | location = Drops from the [[Hand of the King]] |
||
| − | |[[File:Giant Tick Outfit Icon.png|center|48px|link=]] |
||
| + | | difficulty = 4+ BSC |
||
| − | |Giant Tick Outfit{{DLC|TBS}} |
||
| + | | cost = 750 |
||
| − | | rowspan="5" |''Make sure you get the head out.'' |
||
| + | | note = |
||
| − | | rowspan="5" |Drops from [[Mama Tick]] |
||
| + | }} |
||
| − | | data-sort-value="0" |Any |
||
| + | {{OutfitTable |
||
| − | |75 |
||
| − | | |
||
| − | |[[File:Giant Tick Outfit.png|center]] |
||
| − | |- |
||
| − | |[[File:Annoyed Tick Outfit Icon.png|center|48px|link=]] |
||
| − | |Annoyed Tick Outfit{{DLC|TBS}} |
||
| − | |1+ BSC |
||
| − | |150 |
||
| − | | |
||
| − | |[[File:Annoyed Tick Outfit.png|center]] |
||
| − | |- |
||
| − | |[[File:Irritated Tick Outfit Icon.png|center|48px|link=]] |
||
| − | |Irritated Tick Outfit{{DLC|TBS}} |
||
| − | |2+ BSC |
||
| − | |300 |
||
| − | | |
||
| − | |[[File:Irritated Tick Outfit.png|center]] |
||
| − | |- |
||
| − | |[[File:Mad Tick Outfit Icon.png|center|48px|link=]] |
||
| − | |Mad Tick Outfit{{DLC|TBS}} |
||
| − | |3+ BSC |
||
| − | |500 |
||
| − | | |
||
| − | |[[File:Mad Tick Outfit.png|center]] |
||
| − | |- |
||
| − | |[[File:Furious Tick Outfit Icon.png|center|48px|link=]] |
||
| − | |Furious Tick Outfit{{DLC|TBS}} |
||
| − | |4+ BSC |
||
| − | |750 |
||
| − | | |
||
| − | |[[File:Furious Tick Outfit.png|center]] |
||
| − | |- |
||
| − | |[[File:Sacrificial Outfit Icon.png|center|48px|link=]] |
||
| − | |Sacrificial Outfit{{DLC|TBS}} |
||
| − | |''There are many paths that lead to your opponent's death. Taking path to the death of an innocent, for example...'' |
||
| − | |Sacrifice the [[Mushroom Boi!]] in the lore room at the end of the [[Morass of the Banished]], then enter the [[Nest]] |
||
| − | | data-sort-value="0" |Any |
||
| − | |66 |
||
| − | |Added to the game in ''v1.8'' |
||
| − | |[[File:Sacrificial Outfit.png|center]] |
||
| − | |- |
||
| − | |[[File:Classic Temporal Outfit Icon.png|center|48px|link=]] |
||
| − | |Classic Temporal Outfit |
||
| − | | rowspan="5" |''The time, bespoke of course.'' |
||
| − | | rowspan="5" | Drops from [[The Time Keeper]] |
||
| − | | data-sort-value="0" |Any |
||
| − | |75 |
||
| − | | |
||
| − | |[[File:Classic Temporal Outfit.png|center]] |
||
| − | |- |
||
| − | |[[File:Desert Temporal Outfit Icon.png|center|48px|link=]] |
||
| − | |Desert Temporal Outfit |
||
| − | |1+ BSC |
||
| − | |150 |
||
| − | | |
||
| − | |[[File:Desert Temporal Outfit.png|center]] |
||
| − | |- |
||
| − | |[[File:Volcanic Temporal Outfit Icon.png|center|48px|link=]] |
||
| − | |Volcanic Temporal Outfit |
||
| − | |2+ BSC |
||
| − | |300 |
||
| − | | |
||
| − | |[[File:Volcanic Temporal Outfit.png|center]] |
||
| − | |- |
||
| − | |[[File:Hunter's Temporal Outfit Icon.png|center|48px|link=]] |
||
| − | |Hunter's Temporal Outfit |
||
| − | |3+ BSC |
||
| − | |500 |
||
| − | | |
||
| − | |[[File:Hunter's Temporal Outfit.png|center]] |
||
| − | |- |
||
| − | |[[File:Collector's Temporal Outfit Icon.png|center|48px|link=]] |
||
| − | |Collector's Temporal Outfit |
||
| − | |4+ BSC |
||
| − | |750 |
||
| − | | |
||
| − | |[[File:Collector's Temporal Outfit.png|center]] |
||
| − | |- |
||
| − | |[[File:Classic Giant Outfit Icon.png|center|48px|link=]] |
||
| − | |Classic Giant Outfit{{DLC|RotG}} |
||
| − | | rowspan="5" |''Your very own oversized suit, David Byrne-style!'' |
||
| − | | rowspan="5" | Drops from [[The Giant]] |
||
| − | | data-sort-value="0" |Any |
||
| − | |75 |
||
| − | | rowspan="5" |The flavor text references David Byrne in the 1984 Talking Heads live album ''“Stop Making Sense”'' |
||
| − | |[[File:Classic Giant Outfit.png|center]] |
||
| − | |- |
||
| − | |[[File:Disappointed Giant's Outfit Icon.png|center|48px|link=]] |
||
| − | |Disappointed Giant's Outfit{{DLC|RotG}} |
||
| − | |1+ BSC |
||
| − | |150 |
||
| − | |[[File:Disappointed Giant's Outfit.png|center]] |
||
| − | |- |
||
| − | |[[File:Cursed Giant's Outfit Icon.png|center|48px|link=]] |
||
| − | |Cursed Giant's Outfit{{DLC|RotG}} |
||
| − | |2+ BSC |
||
| − | |300 |
||
| − | |[[File:Cursed Giant's Outfit.png|center]] |
||
| − | |- |
||
| − | |[[File:Misunderstood Giant's Outfit Icon.png|center|48px|link=]] |
||
| − | |Misunderstood Giant's Outfit{{DLC|RotG}} |
||
| − | |3+ BSC |
||
| − | |500 |
||
| − | |[[File:Misunderstood Giant's Outfit.png|center]] |
||
| − | |- |
||
| − | |[[File:Frustrated Giant's Outfit Icon.png|center|48px|link=]] |
||
| − | |Frustrated Giant's Outfit{{DLC|RotG}} |
||
| − | |4+ BSC |
||
| − | |750 |
||
| − | |[[File:Frustrated Giant's Outfit.png|center]] |
||
| − | |- |
||
| − | |[[File:Scarecrow Outfit blue Icon.png|center|48px|link=]] |
||
| − | |Scarecrow Outfit 1{{DLC|FF}} |
||
| − | | rowspan="5" |''Nothing is too fancy for a flower.'' |
||
| − | | rowspan="5" | Drops from [[The Scarecrow]] |
||
| − | | data-sort-value="0" |Any |
||
| − | |75 |
||
| − | | |
||
| − | |[[File:Scarecrow Outfit 1.png|center]] |
||
| − | |- |
||
| − | |[[File:Scarecrow Outfit teal Icon.png|center|48px|link=]] |
||
| − | |Scarecrow Outfit 2{{DLC|FF}} |
||
| − | |1+ BSC |
||
| − | |150 |
||
| − | | |
||
| − | | |
||
| − | |- |
||
| − | |[[File:Scarecrow Outfit purple Icon.png|center|48px|link=]] |
||
| − | |Scarecrow Outfit 3{{DLC|FF}} |
||
| − | |2+ BSC |
||
| − | |300 |
||
| − | | |
||
| − | | |
||
| − | |- |
||
| − | |[[File:Scarecrow Outfit pink Icon.png|center|48px|link=]] |
||
| − | |Scarecrow Outfit 4{{DLC|FF}} |
||
| − | |3+ BSC |
||
| − | |500 |
||
| − | | |
||
| − | | |
||
| − | |- |
||
| − | |[[File:Scarecrow Outfit goth Icon.png|center|48px|link=]] |
||
| − | |Scarecrow Outfit 5{{DLC|FF}} |
||
| − | |4+ BSC |
||
| − | |750 |
||
| − | | |
||
| − | | |
||
| − | |- |
||
| − | |[[File:The Hand of the King Outfit Icon.png|center|48px|link=]] |
||
| − | |The Hand of the King Outfit |
||
| − | | rowspan="5" |''One outfit to protect them all.'' |
||
| − | | rowspan="5" | Drops from [[The Hand of the King]] |
||
| − | | data-sort-value="0" |Any |
||
| − | |75 |
||
| − | | |
||
| − | |[[File:The Hand of the King Outfit.png|center]] |
||
| − | |- |
||
| − | |[[File:Loyal Hand of the King Outfit Icon.png|center|48px|link=]] |
||
| − | |Loyal Hand of the King Outfit |
||
| − | |1+ BSC |
||
| − | |150 |
||
| − | | |
||
| − | |[[File:Loyal Hand of the King Outfit.png|center]] |
||
| − | |- |
||
| − | |[[File:Incorruptible Hand of the King Outfit Icon.png|center|48px|link=]] |
||
| − | |Incorruptible Hand of the King Outfit |
||
| − | |2+ BSC |
||
| − | |300 |
||
| − | | |
||
| − | |[[File:Incorruptible Hand of the King Outfit.png|center]] |
||
| − | |- |
||
| − | |[[File:Faithful Hand of the King Outfit Icon.png|center|48px|link=]] |
||
| − | |Faithful Hand of the King Outfit |
||
| − | |3+ BSC |
||
| − | |500 |
||
| − | | |
||
| − | |[[File:Faithful Hand of the King Outfit.png|center]] |
||
| − | |- |
||
| − | |[[File:Devoted Hand of the King Outfit Icon.png|center|48px|link=]] |
||
| − | |Devoted Hand of the King Outfit |
||
| − | |4+ BSC |
||
| − | |750 |
||
| − | | |
||
| − | |[[File:Devoted Hand of the King Outfit.png|center]] |
||
| − | {{Outfit |
||
| name = King Outfit |
| name = King Outfit |
||
| description = Royal armor with class. |
| description = Royal armor with class. |
||
| − | | location = |
+ | | location = Defeat the [[The Collector (5 BSC)|Collector]] after possessing the King |
| difficulty = 5 BSC |
| difficulty = 5 BSC |
||
| cost = |
| cost = |
||
| + | | note = The King can only be possessed after the Collector has been defeated once - smash the shield with the Symmetrical Lance dropped by the Hand of the King and use the Homunculus Rune |
||
| − | | note = |
||
| dlc = RotG |
| dlc = RotG |
||
| identifier = KingDefault |
| identifier = KingDefault |
||
| spoiler = Yes |
| spoiler = Yes |
||
}} |
}} |
||
| + | {{OutfitTable |
||
| − | {{Outfit |
||
| name = White King Outfit |
| name = White King Outfit |
||
| description = Classy, ever so classy. |
| description = Classy, ever so classy. |
||
| − | | location = |
+ | | location = Defeat the [[The Collector (5 BSC)|Collector]] without taking damage |
| difficulty = 5 BSC |
| difficulty = 5 BSC |
||
| cost = |
| cost = |
||
| note = Added to the game in ''v1.8'' |
| note = Added to the game in ''v1.8'' |
||
| + | Can only be unlocked while possessing the King or after the King Outfit has already been unlocked |
||
| dlc = RotG |
| dlc = RotG |
||
| identifier = KingWhite |
| identifier = KingWhite |
||
| spoiler = Yes |
| spoiler = Yes |
||
}} |
}} |
||
| + | {{OutfitTable |
||
| − | {{Outfit |
||
| name = Fallen Collector Outfit |
| name = Fallen Collector Outfit |
||
| − | | description = Special collector's edition |
+ | | description = Special collector's edition Outfit... |
| − | | location = Drops from [[The Collector (5 BSC)| |
+ | | location = Drops from the [[The Collector (5 BSC)|Collector]] on 2nd kill |
| difficulty = 5 BSC |
| difficulty = 5 BSC |
||
| cost = 1000 |
| cost = 1000 |
||
| Line 740: | Line 759: | ||
== Trivia == |
== Trivia == |
||
| − | * Outfits were added with the ''v1.2'' release of the game, also known as the ''Rise of the Giant Update''. |
+ | * Outfits were added with the ''[[Version 1.2|v1.2]]'' release of the game, also known as the ''[[Version 1.2|Rise of the Giant Update]]''. |
** Not to be confused with the ''[[Rise of the Giant DLC]]'', which must be downloaded separately on Steam, GOG, and the Nintendo Switch. |
** Not to be confused with the ''[[Rise of the Giant DLC]]'', which must be downloaded separately on Steam, GOG, and the Nintendo Switch. |
||
* While all costumes are in the base game, some of them cannot be legitimately obtained without installing the ''[[Rise of the Giant DLC]]'', the ''[[Bad Seed DLC]]'', or the ''[[Fatal Falls DLC]]''. |
* While all costumes are in the base game, some of them cannot be legitimately obtained without installing the ''[[Rise of the Giant DLC]]'', the ''[[Bad Seed DLC]]'', or the ''[[Fatal Falls DLC]]''. |
||
* The Flying Alcoholic Outfit was previously called the ''Christmas Outfit''. |
* The Flying Alcoholic Outfit was previously called the ''Christmas Outfit''. |
||
| − | * Outfits that drop from [[Mama Tick]] and [[ |
+ | * Outfits that drop from [[Mama Tick]] and the [[Time Keeper]] give the beheaded a female body. |
| + | ** While [[Conjunctivius]] is canonically female, her outfits do not have a female body. |
||
== References == |
== References == |
||
| Line 750: | Line 770: | ||
{{Nav}} |
{{Nav}} |
||
| + | |||
[[ru:Костюмы]] |
[[ru:Костюмы]] |
||
Revision as of 08:02, 5 May 2021
| This article contains spoilers regarding the true ending of the game. Discretion is advised. |
Outfits are sets of clothes for the Beheaded. They are unlocked by finding their blueprints and unlocking them at the Collector with cells like all other upgrades or items.
Once at least one new outfit is unlocked at the Collector, the player can change clothes by entering the Tailor's shop at the start of Prisoners' Quarters.
Outfits change the colors and sometimes model of the player's appearance. Some specific outfit elements, like the Concierge outfits' shoulder plate, changes color depending on the player's gear and action. Many outfits reference enemies (e.g. Ninja Outfit), bosses (e.g. Temporal Outfit), fictional characters unrelated to Dead Cells (e.g. Piccolo from Dragon Ball), or the game's developers (Carduus Outfit).
Obtaining outfits
Outfits drop from enemies and bosses, or are found in secret areas around the island.
For outfits dropped by enemies, the Hunter's Grenade can be used. Unlike most blueprints, some outfits will only drop from enemies with a certain amount of Boss Stem Cells active, even if those enemies can be found at lower difficulties.
Most bosses drop up to 5 outfits, one for each difficulty level from 0 (any) to 4+ BSCs. The outfit of the lowest difficulty will always be found first; the 0 BSC outfit will drop before any others even if the player is on Nightmare difficulty.
List of outfits
| Icon | Name | Description | Location | Difficulty required | Cell cost |
Notes | In-game appearance |
|---|---|---|---|---|---|---|---|
| Classic Outfit | You went through a lot with this one, and will most likely go through a lot more. | N/A (Always available) | N/A | 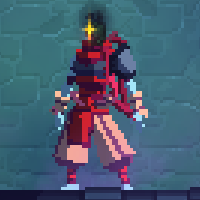 | |||
| Golden Outfit | You definitely won't go unnoticed wearing this. | Specialist Shop in the Prisoners' Quarters; costs 10,000 gold or 50 curses | 150 | 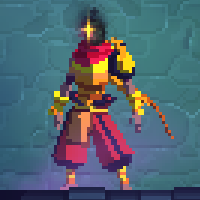 | |||
| Legendary Warrior's Outfit | Monkey tail not included.Based on the character Son Goku from the Dragon Ball series | Drops from Knife Throwers (0.4%) (3+ BSC) | 500 | 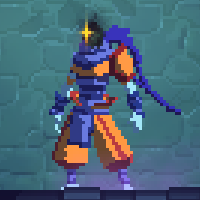 | |||
| Ninja Outfit | Become one with the shadows...Based on the appearance of Dark Trackers | Drops from Dark Trackers (0.4%) (2+ BSC) | 300 | 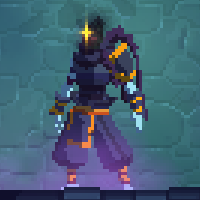 | |||
| Ghost Outfit | Ready for Halloween. | Drops from Maskers (0.4%) (2+ BSC) | 300 | 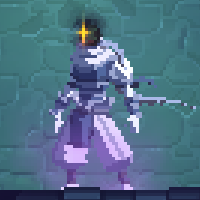 | |||
| Donatello Outfit | For the sewer dwellers.Based on the character Donatello from the Teenage Mutant Ninja Turtles series | Drops from Scorpions (0.4%) (2+ BSC) | 300 | 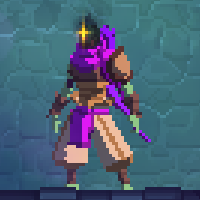 | |||
| Festive OutfitRotG | The last wearer left you some cookie crumbs.A costume of Santa for Christmas | Hidden inside the 4 BSC door in the Cavern; requires Garland Key (4+ BSC) | 500 | 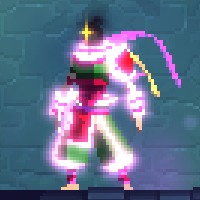 | |||
| Fisherman's Outfit | Invisible among the fishes.Based on the removed Fisherman NPC | Drops from Festering Zombies (0.4%) (1+ BSC) | 150 |  | |||
| Skeleton Outfit | Climb all the way back down the social ladder.Based on the appearance of Undead Archers | Drops from Undead Archers (0.4%) | 150 | 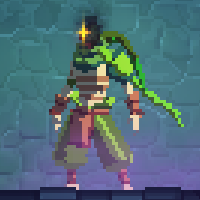 | |||
| Carduus Outfit | Made of the purest purple.A reference to Carduus, the main artist for Dead Cells, who really likes purple and tries to use it everywhere[1] | Drops from Lacerators (0.4%) (1+ BSC) | 150 | 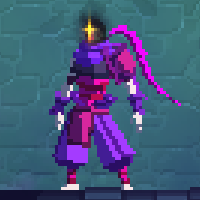 | |||
| Aphrodite Outfit | Stage fright be gone!Based on the famous Greek goddess Aphrodite, who's associated with love and beauty, often represented by the color pink | Drops from Bombardiers (0.4%) (3+ BSC) | 500 | 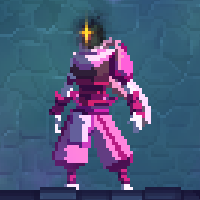 | |||
| Shaman OutfitRotG | Shamans are always stronger in the shadows. | Drops from Arbiters (0.4%) (4+ BSC) | 750 | 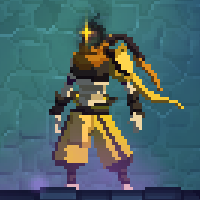 | |||
| Cloud Outfit | Nobody remembers where it comes from.Based on the character Cloud Strife, the protagonist of Final Fantasy VII; the shoulder plate resembles Cloud's, and the scarf resembles his blonde hair; the description alludes to how Cloud doesn't remember his past | Drops from Shockers (0.4%) (3+ BSC) | 500 | 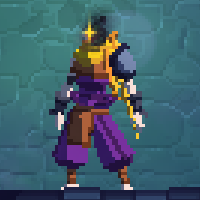 | |||
| Drifter Outfit | An outfit for those with heart.Based on the main character of Hyper Light Drifter | Drops from Demons (0.4%) (2+ BSC) | 300 | 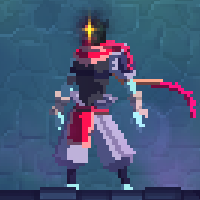 | |||
| A Thousand and One Nights Outfit | Magic lamp not included.Based on the Aladdin animated movie | Drops from Bombers (0.4%) (3+ BSC) | 750 | 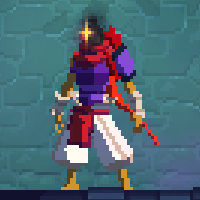 | |||
| Dictator Outfit | An outfit for fighting in the streets.Based on the character M. Bison, also known as Dictator, from the Street Fighter series | Drops from Cannibals (0.4%) (4+ BSC) | 750 | 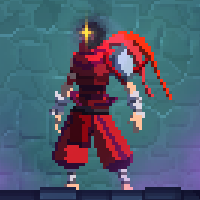 | |||
| Warrior Outfit | The dungeoneer's traditional outfit. | Drops from Protectors (0.4%) (3+ BSC) | 500 | 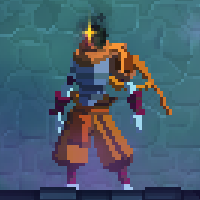 | |||
| Mage Outfit | For wise people only.Based on the Black Mage's color scheme from the Final Fantasy series | Drops from Inquisitors (0.4%) (2+ BSC) | 300 | 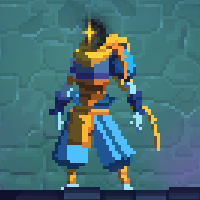 | |||
| Neon Outfit | Stealth is for losers. | Drops from Kamikazes (0.4%) (1+ BSC) | 150 | 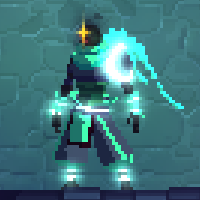 | |||
| Bobby Outfit | Prisoner Bobby's outfit.Based on the Beheaded's appearance in the animated Dead Cells trailers | Drops from Zombies (0.4%) (1+ BSC) | 150 | 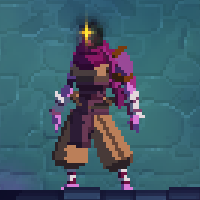 | |||
| Demon Outfit | W3 4ll h4ve 0ur d4rk sid3. | Drops from Slashers (0.4%) (3+ BSC) | 500 | 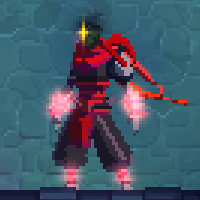 | |||
| Robin Hood Outfit | The arrow is mightier than the sword!Based on the famous fictional character Robin Hood | Drops from Catchers (0.4%) (4+ BSC) | 750 | 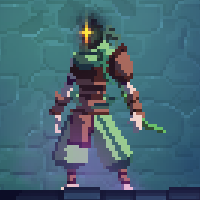 | |||
| Desert Dweller Outfit | Smells of hot sand and desert nights.Based on the Vault Jumpsuits from the Fallout series | Drops from Shieldbearers (0.4%) (4+ BSC) | 750 | 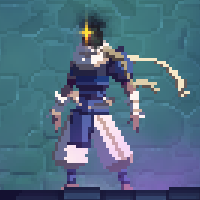 | |||
| Galaxy Outfit | A DRM-free outfit!Added to the game in v1.3.9
Based on both GOG.com and GOG Galaxy |
N/A (Always available) | N/A | 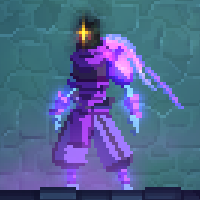 | |||
| Baguette Outfit | Beret and moustache sold separately.Added to the game in v1.3.9
Based around Bastille Day, the national day of France |
N/A (Always available) | N/A | 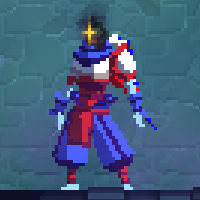 | |||
| Flying Alcoholic OutfitRotG | Happy holidays!Added to the game in v1.6
Another costume related to Christmas |
Drops from Skeletons (100%) | 1 | 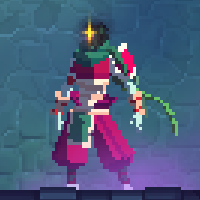 | |||
| Gardener's OutfitTBS | Get the green thumb.Added to the game in v1.8
Misspelled in-game as "Gardner's Outfit" |
Drops from lore room in the Dilapidated Arboretum | 75 | 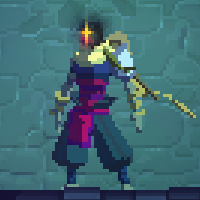 | |||
| Mushroom Boi's OutfitTBS | Delicious, fried, sauteed or baked. Don't forget the sauce.Based on the appearance of Jerkshrooms | Drops from Jerkshrooms (1.7%) (1+ BSC) | 150 | 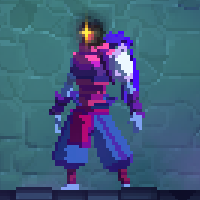 | |||
| Mushroom King OutfitTBS | People are strange, when you're a stranger...Based on the appearance of Yeeters | Drops from Yeeters (1.7%) (3+ BSC) | 150 | 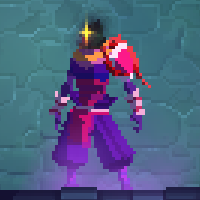 | |||
| Banished's OutfitTBS | A perfect reproduction of the different shades of mud.Based on the appearance of the Banished | Drops from Banished (1.7%) (2+ BSC) | 150 | 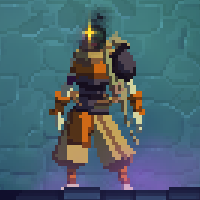 | |||
| Blowgunner's OutfitTBS | For when you want an angry mob chasing you.Based on the appearance of Blowgunners | Drops from Blowgunners (1.7%) | 150 | 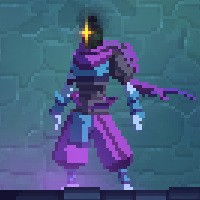 | |||
| Tick Trainer's OutfitTBS | Average life expectancy: 3 minutes.Based on the appearance of Giant Ticks | Drops from Giant Ticks (1.7%) (4+ BSC) | 150 | 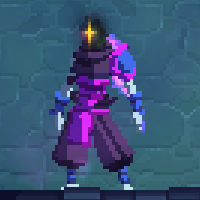 | |||
| The Royal Gardener's OutfitTBS | Really too decorated and pompous for working in the dirt. | Drops from the Royal Gardener's corpse in the Prisoners' Quarters | 150 | 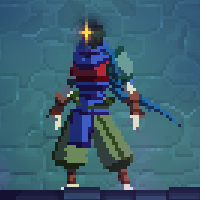 | |||
| Retro Outfit | Batteries not includedAdded to the game in v2.0
Based on the monochromatic green screen of the original Game Boy; was added alongside 8-bit versions of all in-game tracks. |
N/A (Always available) | N/A | 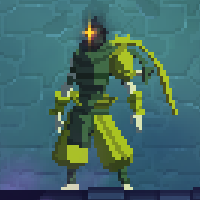 | |||
| HEV Outfit | The right outfit in the wrong place can make all the difference in the world.Added to the game in v1.7.3
Based on the suit Gordon Freeman wears in the Half-Life series |
Drops from lore room in the Prisoners' Quarters | 75 |  | |||
| Kamikaze Outfit | The shoe is on the other bat...Added to the game in v2.1 | Drops from Kamikazes (1.7%) | 150 | 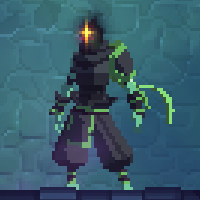 | |||
| Arbalester's Outfit | Your enemies will stand bolt upright.Added to the game in v2.1
Referring to a user of a type of crossbow known as an Arbalest |
Drops from Demolishers (0.4%) | 150 | 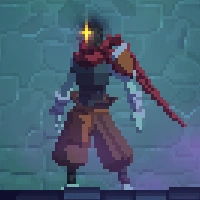 | |||
| Blade Master's Outfit | People will lose their heads over this...Added to the game in v2.1
Based on the outfit of Beatrix Kiddo, the main character of Kill Bill franchise |
Drops from Weirded Warriors (0.4%) (1+ BSC) | 150 | 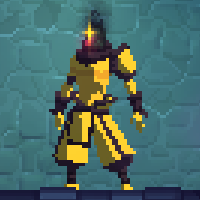 | |||
| Reverse Burglar's Outfit | The legendary outfit of an ephemeral creature that illegally enters people's homes to leave random objects there.Added to the game in v2.1
The third Christmas related costume; an obvious reference to Santa Claus |
N/A (Always available) | N/A | 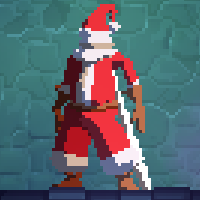 | |||
| Winter Outfit | No you can't eat your own nose for HP.Added to the game in v2.1
The fourth Christmas related costume; description alludes to how the carrot is a possible food item in the game |
N/A (Always available) | N/A | 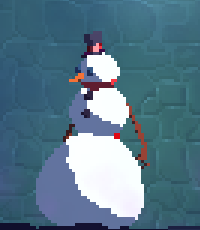 | |||
| Lizard OutfitFF | Just like a second skin...Based on the appearance of Cold Blooded Guardians | Drops from Cold Blooded Guardians (1.7%) | 50 | 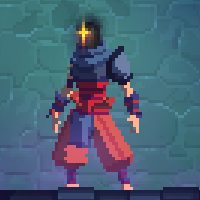 | |||
| Apostate OutfitFF | Like a lighthouse amidst the tempest!Based on the appearance of Apostates | Drops from Apostates (1.7%) | 80 | 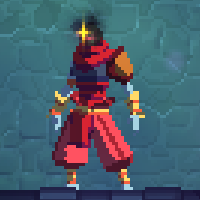 | |||
| Almost-Yourself OutfitFF | Never stop being yourself.Based on the appearance of Failed Homunculi | Drops from Failed Homunculi (10%) | 30 | 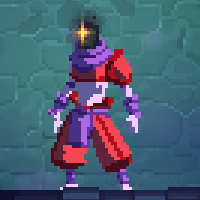 | |||
| Cultist OutfitFF | Do you have a minute to talk about our Lord and Saviour?Based off of the outfit of cult members in the Fractured Shrines | Drops from any of the corpses scattered inside the large floating islands of Fractured Shrines; can be instantly equipped with the Homunculus Rune | 1 | 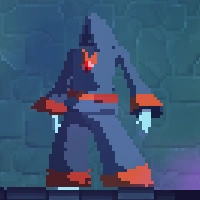 | |||
| Rocky OutfitFF | "I've tasted blood and I want more!"Based on the appearance of Stone Wardens | Drops from Stone Wardens (10%) | 100 | 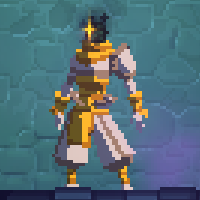 | |||
| Classic Concierge Outfit | You've got the Concierge under your skin! | Drops from the Concierge | 75 | 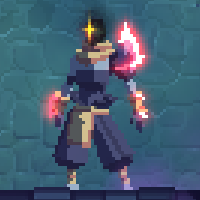 | |||
| Piccolo Concierge Outfit | You've got the Concierge under your skin!Based on the character Piccolo from the Dragon Ball series | Drops from the Concierge (1+ BSC) | 150 | 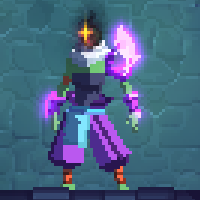 | |||
| Misunderstood Concierge Outfit | You've got the Concierge under your skin! | Drops from the Concierge (2+ BSC) | 300 | 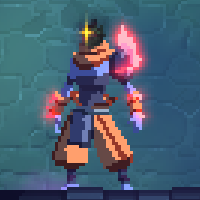 | |||
| Ascended Concierge Outfit | You've got the Concierge under your skin! | Drops from the Concierge (3+ BSC) | 500 | 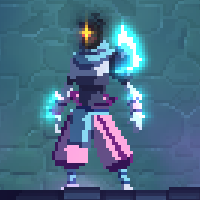 | |||
| Ultimate Concierge Outfit | You've got the Concierge under your skin! | Drops from the Concierge (4+ BSC) | 750 | 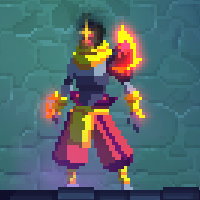 | |||
| Classic Conjunctivius Outfit | Do you like tentacles? | Drops from Conjunctivius | 75 | 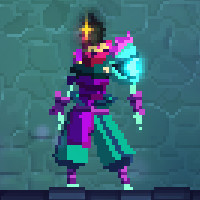 | |||
| Starved Conjunctivius Outfit | Do you like tentacles? | Drops from Conjunctivius (1+ BSC) | 150 | 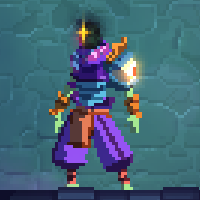 | |||
| Enraged Conjunctivius Outfit | Do you like tentacles? | Drops from Conjunctivius (2+ BSC) | 300 | 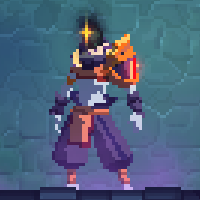 | |||
| Revolted Conjunctivius Outfit | Do you like tentacles? | Drops from Conjunctivius (3+ BSC) | 500 |  | |||
| Legendary Conjunctivius Outfit | Do you like tentacles? | Drops from Conjunctivius (4+ BSC) | 750 | 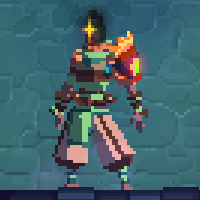 | |||
| Giant Tick OutfitTBS | Make sure you get the head out. | Drops from Mama Tick | 75 |  | |||
| Annoyed Tick OutfitTBS | Make sure you get the head out. | Drops from Mama Tick (1+ BSC) | 150 | 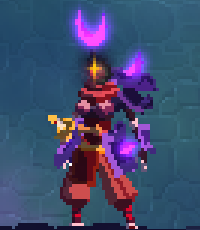 | |||
| Irritated Tick OutfitTBS | Make sure you get the head out. | Drops from Mama Tick (2+ BSC) | 300 | 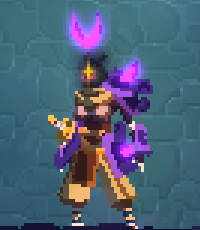 | |||
| Mad Tick OutfitTBS | Make sure you get the head out. | Drops from Mama Tick (3+ BSC) | 500 | 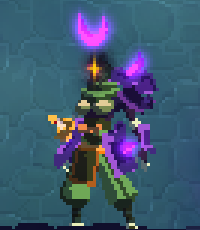 | |||
| Furious Tick OutfitTBS | Make sure you get the head out. | Drops from Mama Tick (4+ BSC) | 750 | 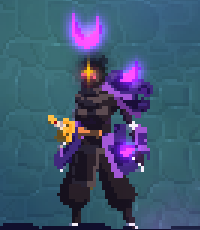 | |||
| Sacrificial Tick OutfitTBS | There are many paths that lead to your opponent's death. Taking path to the death of an innocent, for example...Added to the game in v1.8 | Sacrifice the Mushroom Boi! in the lore room at the end of the Morass of the Banished, then enter the Nest | 66 |  | |||
| Classic Temporal Outfit | The time, bespoke of course. | Drops from the Time Keeper | 75 | 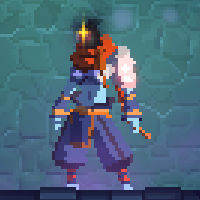 | |||
| Desert Temporal Outfit | The time, bespoke of course. | Drops from the Time Keeper (1+ BSC) | 150 | 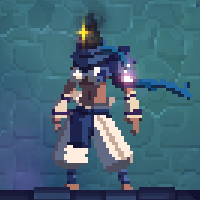 | |||
| Volcanic Temporal Outfit | The time, bespoke of course. | Drops from the Time Keeper (2+ BSC) | 300 | 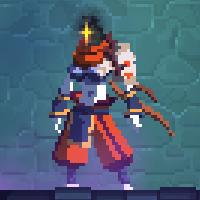 | |||
| Hunter's Temporal Outfit | The time, bespoke of course. | Drops from the Time Keeper (3+ BSC) | 500 | 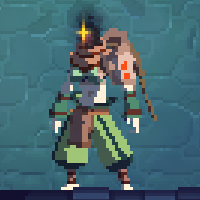 | |||
| Collector's Temporal Outfit | The time, bespoke of course. | Drops from the Time Keeper (4+ BSC) | 750 | 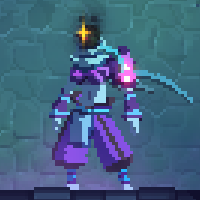 | |||
| Classic Giant OutfitRotG | Your very own oversized suit, David Byrne-style!The flavor text references David Byrne in the 1984 Talking Heads live album “Stop Making Sense” | Drops from the Giant | 75 | 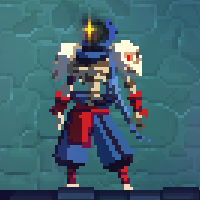 | |||
| Disappointed Giant's OutfitRotG | Your very own oversized suit, David Byrne-style! | Drops from the Giant (1+ BSC) | 150 | 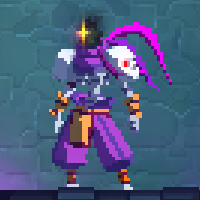 | |||
| Cursed Giant's OutfitRotG | Your very own oversized suit, David Byrne-style! | Drops from the Giant (2+ BSC) | 300 |  | |||
| Misunderstood Giant's OutfitRotG | Your very own oversized suit, David Byrne-style! | Drops from the Giant (3+ BSC) | 500 | 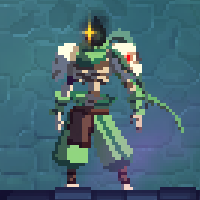 | |||
| Frustrated Giant's OutfitRotG | Your very own oversized suit, David Byrne-style! | Drops from the Giant (4+ BSC) | 750 | 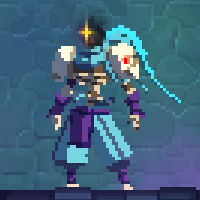 | |||
| Scarecrow Outfit 1FF | Nothing is too fancy for a flower. | Drops from the Scarecrow | 75 | Image is missing | |||
| Scarecrow Outfit 2FF | Time to harvest! | Drops from the Scarecrow (1+ BSC) | 150 | Image is missing | |||
| Scarecrow Outfit 3FF | We should all respect good old mother nature. | Drops from the Scarecrow (2+ BSC) | 300 | Image is missing | |||
| Scarecrow Outfit 4FF | The fastest gardener in the West! | Drops from the Scarecrow (3+ BSC) | 500 | Image is missing | |||
| Scarecrow Outfit 5FF | Hiii-haaa ! | Drops from the Scarecrow (4+ BSC) | 750 | Image is missing | |||
| The Hand of the King Outfit | One outfit to protect them all. | Drops from the Hand of the King | 75 | 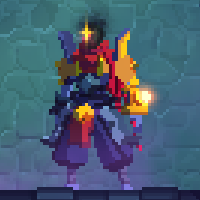 | |||
| Loyal Hand of the King Outfit | One outfit to protect them all. | Drops from the Hand of the King (1+ BSC) | 150 |  | |||
| Incorruptible Hand of the King Outfit | One outfit to protect them all. | Drops from the Hand of the King (2+ BSC) | 300 | 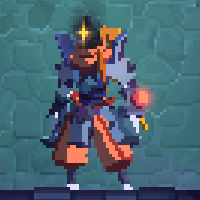 | |||
| Faithful Hand of the King Outfit | One outfit to protect them all. | Drops from the Hand of the King (3+ BSC) | 500 | 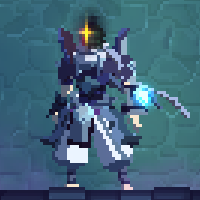 | |||
| Devoted Hand of the King Outfit | One outfit to protect them all. | Drops from the Hand of the King (4+ BSC) | 750 | 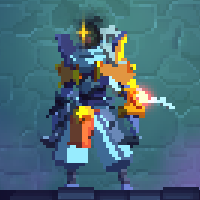 | |||
[Show outfit]King OutfitRotG |
Contains spoilersRoyal armor with class.The King can only be possessed after the Collector has been defeated once - smash the shield with the Symmetrical Lance dropped by the Hand of the King and use the Homunculus Rune | ???Defeat the Collector after possessing the King (5 BSC) | ???N/A | 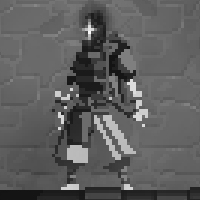 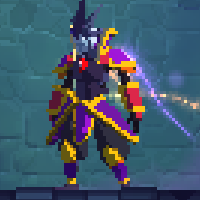 | |||
[Show outfit]White King OutfitRotG |
Contains spoilersClassy, ever so classy.Added to the game in v1.8
Can only be unlocked while possessing the King or after the King Outfit has already been unlocked |
???Defeat the Collector without taking damage (5 BSC) | ???N/A | 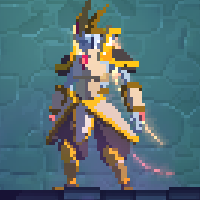 | |||
[Show outfit]Fallen Collector OutfitRotG |
Contains spoilersSpecial collector's edition Outfit... | ???Drops from the Collector on 2nd kill (5 BSC) | ???1000 |  |
- RotG: Rise of the Giant DLC
- TBS: The Bad Seed DLC
- FF: Fatal Falls DLC
Trivia
- Outfits were added with the v1.2 release of the game, also known as the Rise of the Giant Update.
- Not to be confused with the Rise of the Giant DLC, which must be downloaded separately on Steam, GOG, and the Nintendo Switch.
- While all costumes are in the base game, some of them cannot be legitimately obtained without installing the Rise of the Giant DLC, the Bad Seed DLC, or the Fatal Falls DLC.
- The Flying Alcoholic Outfit was previously called the Christmas Outfit.
- Outfits that drop from Mama Tick and the Time Keeper give the beheaded a female body.
- While Conjunctivius is canonically female, her outfits do not have a female body.
References
- ↑ B. Reinier (2019), The Heart of Dead Cells: A Visual Making-Of Toulouse: Third Editions. ISBN: 2377840558
| Navigation wiki |
|---|