mNo edit summary Tag: Visual edit: Switched |
Gamerguy1801 (talk | contribs) m (Under the special lore area, the Knight armor and Magic bow are both references to a game called Soul Knight) Tags: Visual edit Mobile edit Mobile web edit |
||
| (46 intermediate revisions by 15 users not shown) | |||
| Line 11: | Line 11: | ||
| location = Above the Promenade of the Condemned |
| location = Above the Promenade of the Condemned |
||
| soundtrack = Prisoner's Awakening |
| soundtrack = Prisoner's Awakening |
||
| − | | exit_0 = [[Promenade of the Condemned]], [[Toxic Sewers]], [[Dilapidated Arboretum]] |
+ | | exit_0 = [[Promenade of the Condemned]], [[Toxic Sewers]], [[Dilapidated Arboretum]]{{DLC|tbs}} |
| scrolls_0 = 2 Scrolls of Power |
| scrolls_0 = 2 Scrolls of Power |
||
| gear_level_0 = I |
| gear_level_0 = I |
||
| Line 29: | Line 29: | ||
| enemy_hp_tier_3 = 5-9 |
| enemy_hp_tier_3 = 5-9 |
||
| enemy_hp_tier_4 = 6-12 |
| enemy_hp_tier_4 = 6-12 |
||
| − | | enemy_blueprints = 03 |
+ | | enemy_blueprints = 03[[Blood Sword]], 03[[Double Crossb-o-matic]], 13[[Outfits#Bobby Outfit|Bobby Outfit]], 04[[Rampart]], 04[[Bloodthirsty Shield]], 04[[Ice Shield]], 01[[Fire Grenade]], 01[[Magnetic Grenade]], 00[[Bow and Endless Quiver]], 00[[Infantry Bow]], 00[[Ice Bow]], 00[[Outfits#Skeleton Outfit|Skeleton Outfit]], 11[[Great Owl of War]], 14[[Porcupack]], 24[[Kill Rhythm]], 24[[Lightning Bolt]], 24[[Vampirism]], 24[[Outfits#Mage Outfit|Mage Outfit]], 24[[Acrobatipack]], 24[[Outfits#Arbalester's Outfit|Arbalester's Outfit]], 34[[Adrenaline]], 44[[Berserker]], 44[[Outfits#Desert Dweller Outfit|Desert Dweller Outfit]] |
| − | | secret_blueprints_0 = |
+ | | secret_blueprints_0 = [[Quick Bow]], [[Broadsword]], [[Disengagement]], [[Outfits#Golden Outfit|Golden Outfit]], [[Crowbar]], [[Outfits#HEV Outfit|HEV Outfit]], [[Outfits#The Royal Gardener's Outfit|The Royal Gardener's Outfit]]{{DLC|tbs}} |
| cursed_chests_0 = 1% |
| cursed_chests_0 = 1% |
||
| BSC_door_1 = |
| BSC_door_1 = |
||
| Line 42: | Line 42: | ||
| traps = Spikes, rotating spiked balls |
| traps = Spikes, rotating spiked balls |
||
| boss = |
| boss = |
||
| − | | wandering_elite = |
+ | | wandering_elite = |
| elite_room = 5% |
| elite_room = 5% |
||
}} |
}} |
||
| − | The '''Prisoners' Quarters''' is the |
+ | The '''Prisoners' Quarters''' is the first level [[biome]] in the game. It is the starting point of every run. A run-down stone dungeon with mossy bricks and prison cells visible in the background — most with broken bars. Torches line the walls. Decay is a reality for this prison, as any authority has long met their doom or fled. Some cells still house what prisoners were (un)lucky enough to have survived this long. |
| + | == General information == |
||
| − | A run-down stone dungeon with mossy bricks and prison cells visible in the background — most with broken bars. Torches line the walls. Decay is a reality for this prison, as any authority has long met their doom or fled. Some cells still house what prisoners were (un)lucky enough to have survived this long. |
||
| + | === Starting area === |
||
| − | |||
| − | == Starting Area == |
||
A glass chute drips water and muck from the ceiling. Beheaded prisoners are found underneath, either dropped from the chute or executed on the nearby chopping block. The Giant's skeleton rests in the back. |
A glass chute drips water and muck from the ceiling. Beheaded prisoners are found underneath, either dropped from the chute or executed on the nearby chopping block. The Giant's skeleton rests in the back. |
||
| − | In the next room over, large glass flasks for unlocked items hang from chains. [[The Scribe]] |
+ | In the next room over, large glass flasks for unlocked items hang from chains. [[The Scribe]] is nearby, sitting near the door to the [[Daily Challenge]] game mode. Below the bottles is a large glass tube for adjusting the difficulty with [[Boss Stem Cells]]. Below the tube is a small room with the doors to the [[The Tailor|Tailor's]] room and the [[Training Room]], as well as a tunnel one can roll through to meet [[The Doctor]]. The door to the right leads to the starting weapons area. |
| + | |||
| + | Once one enters the door to the starting weapons area, the current amount of active Boss Stem Cells can’t be changed and [[Aspects]] can no longer be selected from The Doctor. |
||
| − | == General information== |
||
=== Access and exit === |
=== Access and exit === |
||
The Prisoner's Quarters is the starting area of the run. After a completed or failed run the player will start back here. |
The Prisoner's Quarters is the starting area of the run. After a completed or failed run the player will start back here. |
||
| Line 63: | Line 63: | ||
=== Specialist's Showroom === |
=== Specialist's Showroom === |
||
| + | [[File:Specialist Showroom.png|right|thumb]] |
||
The '''Specialist's Showroom''' is a special shop that always appears in the Prisoners' Quarters once unlocked from the Collector for 150 cells. Access is locked by a button in front of the door, and a teleporter is always found at its end. |
The '''Specialist's Showroom''' is a special shop that always appears in the Prisoners' Quarters once unlocked from the Collector for 150 cells. Access is locked by a button in front of the door, and a teleporter is always found at its end. |
||
| Line 69: | Line 70: | ||
* The {{Item|Hunter's Grenade}}, which can be thrown to transform an enemy into an Elite and extract its blueprints. |
* The {{Item|Hunter's Grenade}}, which can be thrown to transform an enemy into an Elite and extract its blueprints. |
||
* The {{Item|Forgotten Map}}, which can be used once to reveal the layout of a biome. |
* The {{Item|Forgotten Map}}, which can be used once to reveal the layout of a biome. |
||
| − | * The blueprint for the |
+ | * The blueprint for the {{Outfit|Golden Outfit}} (if not yet turned in to the Collector). |
=== Level characteristics === |
=== Level characteristics === |
||
| Line 106: | Line 107: | ||
|} |
|} |
||
| − | + | === Loot and shops === |
|
| + | ==== Main level ==== |
||
| − | There is always either one weapon or skill shop, which cannot spawn behind the vine passage. |
||
| + | * 1 weapon or skill shop that is not behind a rune path |
||
| − | |||
| + | * 1 guaranteed [[treasure chest]] |
||
| − | ==== Chests and loot ==== |
||
| − | * 1 guaranteed [[Chests|Treasure chest]] |
||
* 1 item behind a {{Rune|tel|1}} |
* 1 item behind a {{Rune|tel|1}} |
||
* 1 item behind a {{Rune|vin|1}} |
* 1 item behind a {{Rune|vin|1}} |
||
| − | * There is a 1% chance that a [[ |
+ | * There is a 1% chance that a [[cursed chest]] will spawn in the stage. This is the lowest cursed chest spawn rate in the game. |
| − | * Chance for item to spawn behind a golden |
+ | * Chance for item to spawn behind a golden door |
== Exclusive blueprints == |
== Exclusive blueprints == |
||
| Line 120: | Line 120: | ||
* The blueprint for the {{Item|Quick Bow}} can be found up on the ledges behind the giant skeleton. ''This secret does not generate on the first two runs of a save file'', and it is only accessible through rolling. |
* The blueprint for the {{Item|Quick Bow}} can be found up on the ledges behind the giant skeleton. ''This secret does not generate on the first two runs of a save file'', and it is only accessible through rolling. |
||
* The blueprint for the {{Mutation|Disengagement}} mutation can be found above the hanging bottles. It can be obtained after killing the [[Hand of the King]] for the first time, as it requires the {{Rune|hom|1}}, but having the {{Rune|spi|1}} is also recommended. |
* The blueprint for the {{Mutation|Disengagement}} mutation can be found above the hanging bottles. It can be obtained after killing the [[Hand of the King]] for the first time, as it requires the {{Rune|hom|1}}, but having the {{Rune|spi|1}} is also recommended. |
||
| + | * The blueprint for {{Outfit|The Royal Gardener's Outfit}}{{DLC|tbs}} can be obtained from the Royal Gardener's corpse |
||
=== Specialist's Showroom === |
=== Specialist's Showroom === |
||
| − | The blueprint for the |
+ | The blueprint for the {{Outfit|Golden Outfit}} can be found in the Specialist's Showroom. The player must either pay 10,000 gold for it, or break the door and receive a 50-kill curse. |
=== Special lore === |
=== Special lore === |
||
* Starting with the third run, the {{Item|Broadsword}} blueprint can be looted from the [[Tutorial Knight|Tutorial Knight's]] corpse, by the exit to the [[Promenade of the Condemned]]. |
* Starting with the third run, the {{Item|Broadsword}} blueprint can be looted from the [[Tutorial Knight|Tutorial Knight's]] corpse, by the exit to the [[Promenade of the Condemned]]. |
||
| − | * The blueprints for the {{Item|Crowbar}} and the |
+ | * The blueprints for the {{Item|Crowbar}} and the {{Outfit|HEV Outfit}} can be found behind a special lore room of a scientist with a Headcrab. |
| + | * Special lore rooms containing references to other games can be found, containing an object that drops a piece of gear when interacted with. These items are unlocked as soon as you pick them up; no blueprints are required. Only one of these rooms can spawn in each run. |
||
| + | ** Prie Dieu: {{Item|Face Flask}}, from ''Blasphemous''. |
||
| + | ** Bench: {{Item|Pure Nail}}, from ''Hollow Knight''. |
||
| + | ** Altar: {{Item|Pollo Power}}, from ''Guacamelee''. |
||
| + | ** Cursed altar: {{Item|Machete and Pistol}}, from ''Curse of the Dead Gods'' (object also gives 1 curse). |
||
| + | ** Monolith: {{Item|Hard Light Sword}}, from ''Hyper Light Drifter''. |
||
| + | ** Pile of skulls: {{item|Bone}}, from ''Skul: The Hero Slayer''. |
||
| + | * A special room containing a [[Jerkshroom]] and a [[Yeeter]] drops a {{Item|Panchaku}} when defeated. It is automatically unlocked without needing a blueprint. |
||
| + | * Another special lore room containing a glitchy bug in a jar drops the {{Item|Magic Bow}} and the {{Outfit|Knight's Outfit}} blueprints when interacted with, both from ''Soul Knight'' |
||
== Enemies == |
== Enemies == |
||
| Line 132: | Line 142: | ||
* On the base difficulty, this level is full of [[Zombie]]s, [[Undead Archer]]s, [[Shieldbearer]]s and [[Grenadier]]s. |
* On the base difficulty, this level is full of [[Zombie]]s, [[Undead Archer]]s, [[Shieldbearer]]s and [[Grenadier]]s. |
||
| − | * On higher difficulties, Zombies, Undead Archers and Grenadiers are replaced with [[Failed Experiment]]s, [[Knife Thrower]]s, and [[Bombardier]]s, respectively. |
+ | * On higher difficulties, shieldbearers, Zombies, Undead Archers and Grenadiers are replaced with [[Failed Experiment]]s, [[Oven Knight]]s, [[Knife Thrower]]s, and [[Bombardier]]s, respectively. |
* On Very Hard, [[Inquisitor]]s, [[Oven Knight]]s and [[Demolisher]]s appear. |
* On Very Hard, [[Inquisitor]]s, [[Oven Knight]]s and [[Demolisher]]s appear. |
||
* On Expert, [[Rampager]]s also appear. |
* On Expert, [[Rampager]]s also appear. |
||
| Line 147: | Line 157: | ||
|- |
|- |
||
|[[Zombie]] |
|[[Zombie]] |
||
| − | | colspan="4" style="background-color:#0c0c0b; text-align: center;" |[[Blood Sword]], [[Double Crossb-o-matic]], [[Outfits|Bobby Outfit]] (1+ BSC) |
+ | | colspan="4" style="background-color:#0c0c0b; text-align: center;" |[[Blood Sword]], [[Double Crossb-o-matic]], [[Outfits#Bobby Outfit|Bobby Outfit]] (1+ BSC) |
| |
| |
||
|- |
|- |
||
|[[Shieldbearer]] |
|[[Shieldbearer]] |
||
| − | | colspan=" |
+ | | colspan="2" style="background-color:#0c0c0b; text-align: center;" |[[Rampart]], [[Bloodthirsty Shield]], [[Ice Shield]] |
| + | | colspan="3" | |
||
|- |
|- |
||
|[[Grenadier]] |
|[[Grenadier]] |
||
| Line 158: | Line 169: | ||
|- |
|- |
||
|[[Undead Archer]] |
|[[Undead Archer]] |
||
| − | | style="background-color:#0c0c0b; text-align: center;" |[[Bow and Endless Quiver]], [[Infantry Bow]], [[Ice Bow]] |
+ | | style="background-color:#0c0c0b; text-align: center;" |[[Bow and Endless Quiver]], [[Infantry Bow]], [[Ice Bow]], [[Outfits#Skeleton Outfit|Skeleton Outfit]] |
| colspan="4" | |
| colspan="4" | |
||
|- |
|- |
||
|[[Knife Thrower]] |
|[[Knife Thrower]] |
||
| |
| |
||
| − | | |
+ | | style="background-color:#0c0c0b; text-align: center;" |[[Great Owl of War]] |
| + | | colspan="3" | |
||
|- |
|- |
||
|[[Rancid Rat]] |
|[[Rancid Rat]] |
||
| Line 175: | Line 187: | ||
|[[Inquisitor]] |
|[[Inquisitor]] |
||
| colspan="2" | |
| colspan="2" | |
||
| − | | colspan="3" style="background-color:#0c0c0b; text-align: center;" |[[Lightning Bolt]], [[Vampirism]], [[Outfits|Mage Outfit]] |
+ | | colspan="3" style="background-color:#0c0c0b; text-align: center;" |[[Lightning Bolt]], [[Vampirism]], [[Outfits#Mage Outfit|Mage Outfit]] |
|- |
|- |
||
|[[Demolisher]] |
|[[Demolisher]] |
||
| colspan="2" | |
| colspan="2" | |
||
| − | | colspan="3" style="background-color:#0c0c0b; text-align: center;" |[[Acrobatipack]], [[Outfits|Arbalester's Outfit]] |
+ | | colspan="3" style="background-color:#0c0c0b; text-align: center;" |[[Acrobatipack]], [[Outfits#Arbalester's Outfit|Arbalester's Outfit]] |
|- |
|- |
||
|[[Rampager]] |
|[[Rampager]] |
||
| Line 191: | Line 203: | ||
== Lore == |
== Lore == |
||
| − | === |
+ | === Flooded cell === |
| + | [[File:PQ Loreroom Floodedcell.png|right|thumb]] |
||
| − | {{Main|Malaise}} |
||
| + | A cell door can be found with water halfway up the room. |
||
| − | * A prisoner managed to escape from their cell and left a messy message. The legible parts of the writing read: "Don't want... contaminated... out of here... see you again. I hope. The 'Malaise'. ...not infected. won't die"<ref>https://gfycat.com/PalatableVioletHatchetfish</ref> |
||
| + | * "''Hey, you there! There's water running through my cell! |
||
| − | * An unfinished message on the wall of an empty cell reads: "Why... filling the prison with innoc".<ref>https://imgur.com/a/FAocAvD</ref> |
||
| + | The Beheaded gives a thumbs up. |
||
| − | === Hanged prisoner === |
||
| + | * "''Errrr... I think something in the water touched my leg.''" |
||
| − | This prisoner can be found hanged inside their cell in the Prisoners' Quarters<ref name=":0">https://gfycat.com/ImaginativeInbornBallpython</ref>, the [[Promenade of the Condemned]], or the [[Ramparts]]. |
||
| + | Then, a loud noise and bang come from the cell door. |
||
| − | === Other rooms === |
||
| + | * "''HELP!!''" |
||
| − | * A prisoner locked in a cell can be encountered here or in the [[Promenade of the Condemned]]. The prisoner first calls out to the [[Beheaded]], only to realize who they are speaking to. They jest about the fact that they are on "the right side of the door for once", before speaking to himself about how "they" didn't mess around. Kicking the door afterwards yields no response.<ref>https://imgur.com/a/hoHQerh</ref> |
||
| + | |||
| − | * A prisoner locked in a flooded cell can be found here or the [[Ramparts]]. They get the Beheaded's attention and complain about the water. He then exclaims that he felt something touch his leg, and then calls for help. Sounds of their murder by some creature are heard, before they are rendered unresponsive.<ref>https://imgur.com/a/6Jbq0Ub</ref> |
||
| + | After the prisoner's cry for help, multiple bangs come from the cell door. |
||
| − | * Tom the Mushroomologist, a drug dealer, dealt psychotropic mushrooms to the other prisoners. He was able to turn a pretty good profit, but no signs of his current whereabouts exist.<ref>https://gfycat.com/UglyVapidFruitbat</ref> |
||
| + | |||
| − | * A scientist with a Headcrab on his head can be found as a Half-Life Reference. Behind it is a secret room with the Blueprint of the HEV Outfit and the {{Item|Crowbar}}. After these two are turned in to the collector, this room stops spawning. |
||
| + | === Suffering prisoner === |
||
| − | * A lore room requiring the {{Rune|tel|1}} to access contains the corpse of the Royal Gardener with a Letter from Castaing ([[The Concierge]]) to him prior to the events of the game. It contains numerous wall spikes and a {{Pickup|Dilapidated Arboretum Key}} found on the body of the Gardener. |
||
| + | [[File:PQ Loreroom Groaner.png|right|thumb]] |
||
| + | * "''Someone's groaning on the other side''" |
||
| + | |||
| + | After inspecting the cell door, the Beheaded knocks on the door. |
||
| + | * "''No answer.''" |
||
| + | |||
| + | The Beheaded then begins to kick the door. |
||
| + | * "''Get out of here , you freak!''" |
||
| + | |||
| + | Despite the prisoner's complaining, the Beheaded kicks the door again. |
||
| + | * "''Leave me alone!''" |
||
| + | |||
| + | Finally, a large food item comes out of the door. |
||
| + | |||
| + | === Rude prisoner === |
||
| + | [[File:PQ Loreroom Rudedude.png|right|thumb]] |
||
| + | A cell door can be found with a prisoner still inside and untouched meal tray outside. |
||
| + | * "''Hey, you there!''" |
||
| + | * "''Oh. It's... "you".''" |
||
| + | * "''Looks like I'm on the right side of the door for once!''" |
||
| + | * "''HA HA HA!''" |
||
| + | * "''Damn, they didn't mess around...''" |
||
| + | |||
| + | After this interaction, the Beheaded knocks on the door again, but the prisoner no longer responds. |
||
| + | * "''No answer.''" |
||
| + | |||
| + | ==== Meal tray ==== |
||
| + | Right next to the cell door, there is a meal tray that drops a large food when examined. |
||
| + | * "''Been abandoned here for some time.''" |
||
| + | |||
| + | === Escaped prisoner === |
||
| + | [[File:PQ_Loreroom_counting.png|right|thumb]] |
||
| + | [[File:PQ_Loreroom_countingsecret.png|right|thumb]] |
||
| + | A cell with a broken door can be found, inside there is a bed and the wall has scratches counting something and some writing. There is a secret room with a bag inside. |
||
| + | |||
| + | ==== Forced door ==== |
||
| + | * "''Hmm, looks like the prisoner managed to get out of prison early. |
||
| + | |||
| + | ==== Writing ==== |
||
| + | * "''It sure is convenient finding all these messages on the walls!''" |
||
| + | * "''Lore on a shoestring...''" |
||
| + | * "''The writing is barely legible:''" |
||
| + | * "''Don't want... contaminated... out of here... see you again. I hope...''" |
||
| + | * "''The "Malaise"...''" |
||
| + | * "''...not infected...''" |
||
| + | * "''won't die.''" |
||
| + | |||
| + | ==== Bag ==== |
||
| + | Inspecting the bag will drop a gem worth 100 gold. |
||
| + | * "''... Left his bag behind him... must have been in quite a panic.''" |
||
| + | {{clear}} |
||
| + | |||
| + | === Castaing's office === |
||
| + | [[File:PQ_Loreroom_Castaignoffice.png|right|thumb]] |
||
| + | A room can be found with a desk, an order note on the wall and some books. Using the bookshelf, a secret room can be accessed. |
||
| + | |||
| + | ==== Order ==== |
||
| + | * "''An order stamped with the king's seal.''" |
||
| + | * "''Castaing, this is a direct order that must remain between you and me...''" |
||
| + | * "''Stop checking the prison entrances until further notice.''" |
||
| + | |||
| + | ==== Desk ==== |
||
| + | * "''All these papers are signed by Castaing.''" |
||
| + | * "''A high-ranking prison officer, no doubt about it.''" |
||
| + | |||
| + | Upon checking the desk, gold drops onto the ground. |
||
| + | * "''Did he set aside a few pennies for a rainy day?''" |
||
| + | |||
| + | ==== Books ==== |
||
| + | * "''Some books on a shelf.''" |
||
| + | * "''Prison managment for dummies.''" |
||
| + | * "''Bridge building from antiquity to the present day.''" |
||
| + | * "''Managing soldiers: How to earn their respect without using torture.''" |
||
| + | * "''Managing prison entrances in 10 easy lessons (lesson 8 will shock you!)''" |
||
| + | |||
| + | ==== Secret room ==== |
||
| + | [[File:PQ_Loreroom_Castaigncrate.png|right|thumb]] |
||
| + | In the secret room there is a crate. Upon inspecting it, the Beheaded comments the following: |
||
| + | * "''In any case, the warden was prepared for combat.''" |
||
| + | |||
| + | After his inspection, a random piece of gear is dropped. |
||
| + | {{clear}} |
||
| + | |||
| + | === Hole room === |
||
| + | [[File:PQ_Loreroom_Twoholesonefood.png|right|thumb]] |
||
| + | A secret room can be found with two holes in the wall and a canvas bag. |
||
| + | |||
| + | ==== Tunnel ==== |
||
| + | * "''This tunnel was cleared out very roughly.''" |
||
| + | * "''Doesn't look too solid.''" |
||
| + | |||
| + | ==== Canvas bag ==== |
||
| + | * "''A dusty old bag that someone left here a long time ago.''" |
||
| + | |||
| + | After inspecting the bag, a large food item drops. |
||
| + | |||
| + | ==== Tight passage ==== |
||
| + | * "''The hole in this wall is extremely small.''" |
||
| + | * "''Except maybe for a child.''" |
||
| + | |||
| + | === Tom, Doctor of Mushroomology === |
||
| + | A room with a sign at the entrance can be found. It contains a bed and a small hole in the wall. |
||
| + | |||
| + | ==== Sign ==== |
||
| + | Reading the sign reveals the following: |
||
| + | * "''Tom's Place''" |
||
| + | * "''Prisoner and Doctor of Mushroomology''" |
||
| + | |||
| + | ==== Bed ==== |
||
| + | Upon examining the bed, the Beheaded comments the following: |
||
| + | * "''Abandoned ages ago.''" |
||
| + | * "''Oh.''" |
||
| + | * "''Actually, a family of rats seems to call the place home these days.''" |
||
| + | |||
| + | ==== Small hole ==== |
||
| + | Upon inspecting the small whole before entering it, the Beheaded comments the following: |
||
| + | * "''The devious little fellow made a passage for himself through the wall...''" |
||
| + | |||
| + | In the secret room there are various mushrooms planted in the ground. Jars with ground-up mushrooms can be found along with a cash register. Inspecting the cash register will drop some gold, and the Beheaded will say the following about it: |
||
| + | * "''Seems to be where the Mushroomologist stashed the profits from his little business.''" |
||
| + | |||
| + | Upon inspecting the jars, the Beheaded says the following: |
||
| + | * "''A variety of differently shaped mushrooms are proliferating in these jars.''" |
||
| + | * "''By the looks of them, they should have some interesting psychotropic properties.''" |
||
| + | * "''Good ol' Doctor Tom here must have been supplying the whole prison.''" |
||
| + | |||
| + | Furthermore, the mushrooms can also be inspected. |
||
| + | * "''All kinds of mushrooms have been carefully ground down into fine multicolored powders.''" |
||
| + | * "''Pretty sure they weren't using these to flavor the soup.''" |
||
| + | |||
| + | === Dark Souls room === |
||
| + | [[File:PQ Loreroom GitGud.png|right|thumb]] |
||
| + | On rare occasions, a door can be found leading to a room with a corpse and a bonfire from the game dark souls. |
||
| + | |||
| + | ==== Writing on the wall ==== |
||
| + | * "''Words written on the wall:''" |
||
| + | * "''GIT GUD.''" |
||
| + | * "''Must be some sort of incantation.''" |
||
| + | |||
| + | ==== Body ==== |
||
| + | Searching the body will drops some gold and a random gear item. The Beheaded will also comment the following about it: |
||
| + | * "''A guy in armor, been dead for a while.''" |
||
| + | |||
| + | ==== Campfire ==== |
||
| + | * "''This campfire was abandoned by an earlier visitor...''" |
||
| + | * "''I'm sure it couldn't hurt to take a little rest.''" |
||
| + | |||
| + | Immediately afterwards, everything will begin to shake. |
||
| + | * "''Hmm. Something's changed.''" |
||
| + | |||
| + | Most of the time this lore room appears, a Zombie or an Undead Archer will spawn at the entrance of the room. When killed, it always drops 50 cells. |
||
| + | |||
| + | === Royal Gardener === |
||
| + | [[File:Dead Gardener.png|right|thumb]] |
||
| + | A lore room requiring the {{Rune|tel|1}} to access contains numerous wall spikes and the Royal Gardener's corpse alongside a letter from Castaing to him. The {{Pickup|Dilapidated Arboretum Key}}{{DLC|tbs}} and {{Outfit|The Royal Gardener's Outfit}}{{DLC|tbs}} blueprint are found on the body of the Gardener. |
||
| + | |||
| + | * "''Oh ho! A new arrival...''" |
||
| + | * "''And the rats haven't even got to him yet.''" |
||
| + | * "''...I bet there's still some good stuff to scavenge!''" |
||
| + | * "''Meh, just some rusty old key...''" |
||
| + | * "''And a torn up letter.''" |
||
| + | * "''Royal Gardener, with all the due respect that I owe you... OBEY YOUR ORDERS or you will find yourself in the stomach of one of the ticks!''" |
||
| + | * "''For all our sakes, this is your last warning.''" |
||
| + | * "''Signed: Commander Castaing.''" |
||
| + | * "''Ergh, Nothing of interest at all...''" |
||
| + | * "''Except for this jacket!''" |
||
| + | |||
| + | === Half-life room === |
||
| + | [[File:Head crab.png|right|thumb]] |
||
| + | [[File:Half life bp.png|right|thumb]] |
||
| + | A scientist with a Headcrab on his head can be found as a Half-Life reference. Behind it is a secret room with the Blueprint of the {{Outfit|HEV Outfit}} and the {{Item|Crowbar}}. After these two are turned in to the Collector, this lore room stops spawning. |
||
| + | |||
| + | * "''What is this strange creature stuck to his face?''" |
||
| + | * "''He still spasms a bit, as if he was half alive...''" |
||
| + | * "''Better not linger.''" |
||
| + | * "''Staying too long could have unforeseen consequences!''" |
||
| + | {{clear}} |
||
== Gallery == |
== Gallery == |
||
| Line 210: | Line 399: | ||
File:PQ full map.jpg|Fully explored map of Prisoner's Quarters showing general generation of the level. |
File:PQ full map.jpg|Fully explored map of Prisoner's Quarters showing general generation of the level. |
||
</gallery> |
</gallery> |
||
| + | |||
| + | == History == |
||
| + | {{History |
||
| + | |collapsed = yes |
||
| + | |0.0: Introduced. |
||
| + | |0.4: Scrolls changed from 1 random and 1 power to 2 power scrolls. |
||
| + | * Specialists showroom added. |
||
| + | |0.5: [[Undead Archer]] appearance changed to min 0/ max 0 BSC. |
||
| + | * [[Inquisitor]] now appear on min 1/ max 4 BSC. |
||
| + | |0.6: [[Grenadier]] appearance changed from min 0/ max 4 BSC to min 0/ max 3 BSC. |
||
| + | * [[Bombardier]]s now appear on 4 BSC. |
||
| + | * [[Zombie]] quantity increased. |
||
| + | * Lore quotes added. |
||
| + | |1.2: [[Grenadier]] quantity decreased. |
||
| + | * [[Inquisitor]] appearance changed from min 1/ max 4 BSC to min 2/ max 2 BSC. |
||
| + | * [[Inquisitor]] quantity decreased. |
||
| + | * [[Arbiter]]s now appear on min 3/ max 3 BSC. |
||
| + | * [[Knife Thrower]]s now appear on min 1/ max 4 BSC. |
||
| + | * [[zombie]] appearance changed from min 0/ max 4 to min 0/ max 3 BSC. |
||
| + | * [[Failed Experiment]]s now appear on 4 BSC. |
||
| + | |1.3: [[Bombardier]] quantity decreased. |
||
| + | * [[Arbiter]]s removed. |
||
| + | * [[zombie]] appearance changed from min 0/ max 3 BSC to min 0/ max 4. |
||
| + | * [[Inquisitor]] quantity decreased. |
||
| + | * [[Inquisitor]] appearance changed from min 2/ max 2 to min 2/ max 4. |
||
| + | * [[Failed Experiment]] quantity decreased. |
||
| + | * [[Rampager]]s now appear on min 3/ max 4 BSC. |
||
| + | |1.5: [[Zombie]] appearance changed from min 0/ max 4 BSC to min 0/ max 3 BSC. |
||
| + | * [[Bombardier]]s removed. |
||
| + | * [[Knife Thrower]] appearance changed from min 1/ max 4 BSC to min 1/ max 1 BSC. |
||
| + | * [[Failed Experiment]] quantity increased. |
||
| + | * [[Bomber]]s now appear on min 2/ max 2 BSC. |
||
| + | |1.6: [[Failed Experiment]] quanity decreased. |
||
| + | * [[Rampager]] quantity decreased. |
||
| + | * [[Inquisitor]] quantity increased on 2 and 3 BSC. |
||
| + | * [[Inquisitor]] quantity decreased on 4 BSC. |
||
| + | * [[Bomber]] appearance changed from min 2/ max 2 BSC to min 2/ max 4 BSC. |
||
| + | |1.8: [[Rancid Rat]]s now appear on min 1/ max 2 BSC. |
||
| + | * [[Oven Knight]]s now appear on min 2/ max 4 BSC. |
||
| + | * [[Inquisitor]] quantity decreased on 2 and 3 BSC. |
||
| + | * [[Knife Thrower]] quantity decreased. |
||
| + | |1.9: [[Oven Knight]] quantity decreased slightly on 2 to 3 BSC and majorly on 4 BSC. |
||
| + | * [[Shieldbearer]] quantity decreased on 4 BSC. |
||
| + | * Now spawns with a free amulet on 1+ BSC. |
||
| + | |2.0: [[Rancid Rat]] density decreased. |
||
| + | |2.1: [[Knife Thrower]] appearance changed from min 1/ max 4 BSC to min 1/ max 1 BSC. |
||
| + | * [[Demolisher]]s now appear on min 2/ max 4 BSC. |
||
| + | * [[Shieldbearer]] appearance changed from min 0/ max 4 BSC to min 0/ max 1 BSC. |
||
| + | * [[Rancid Rat]] quantity decreased. |
||
| + | |2.2: [[Knife Thrower]] appearance changed from min 1/ max 1 BSC to min 1/ max 4 BSC. |
||
| + | * [[Shieldbearer]] appearance changed from min 0/ max 1 BSC to min 0/ max 4 BSC. |
||
| + | |2.3: [[Shieldbearer]] appearance changed from min 0/ max 4 BSC to min 0/ max 1 BSC. |
||
| + | |2.5: Training room added. |
||
| + | * [[The Doctor]] NPC added. |
||
| + | }} |
||
== References == |
== References == |
||
| Line 215: | Line 459: | ||
{{Biomes Nav}} |
{{Biomes Nav}} |
||
| + | |||
| + | [[Category:Update 0.0]] |
||
[[ru:Тюремные камеры]] |
[[ru:Тюремные камеры]] |
||
| + | |||
| + | |||
| + | Information about the lore room were the "trowable objects" can be find, is missing here!!! |
||
Latest revision as of 20:02, 30 March 2024
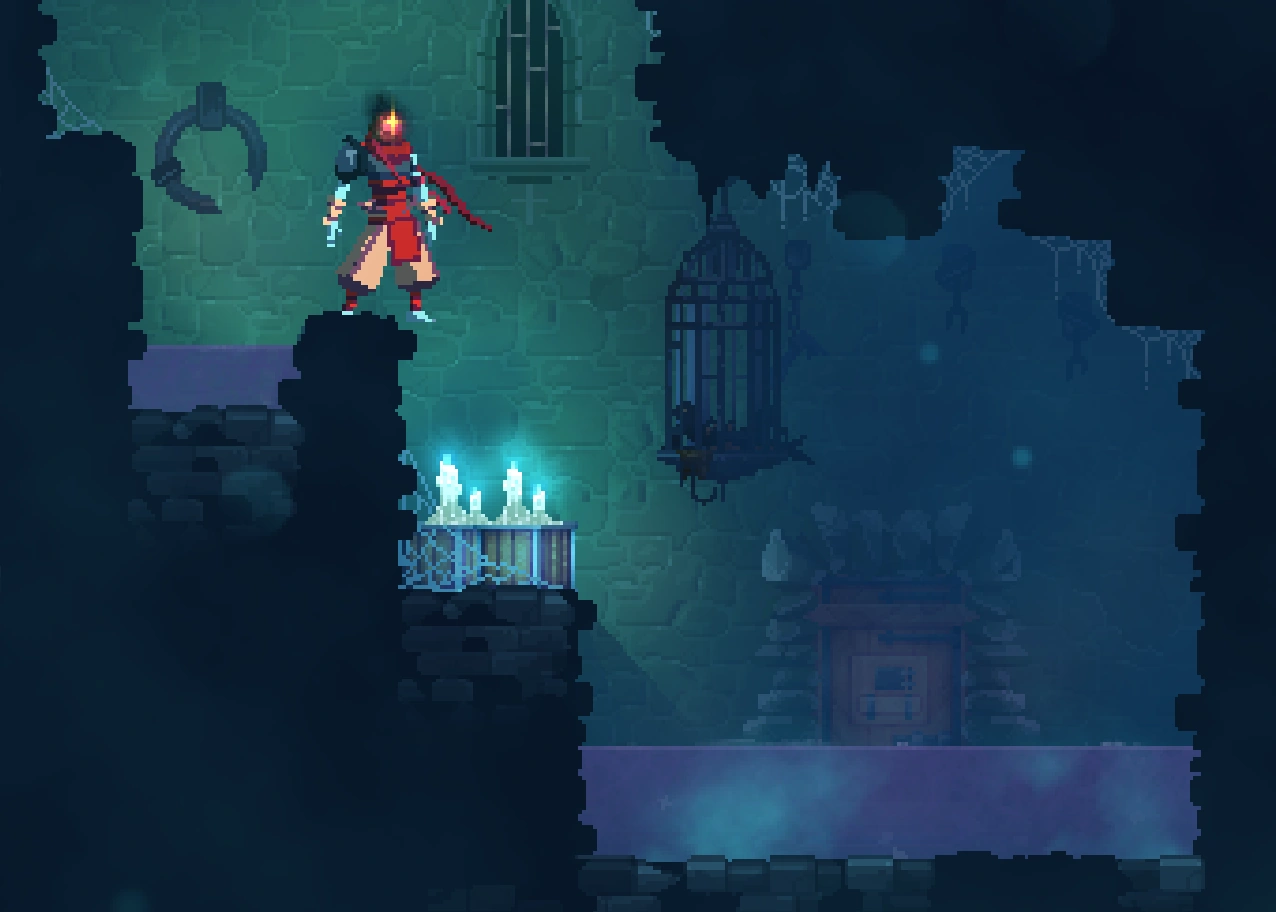
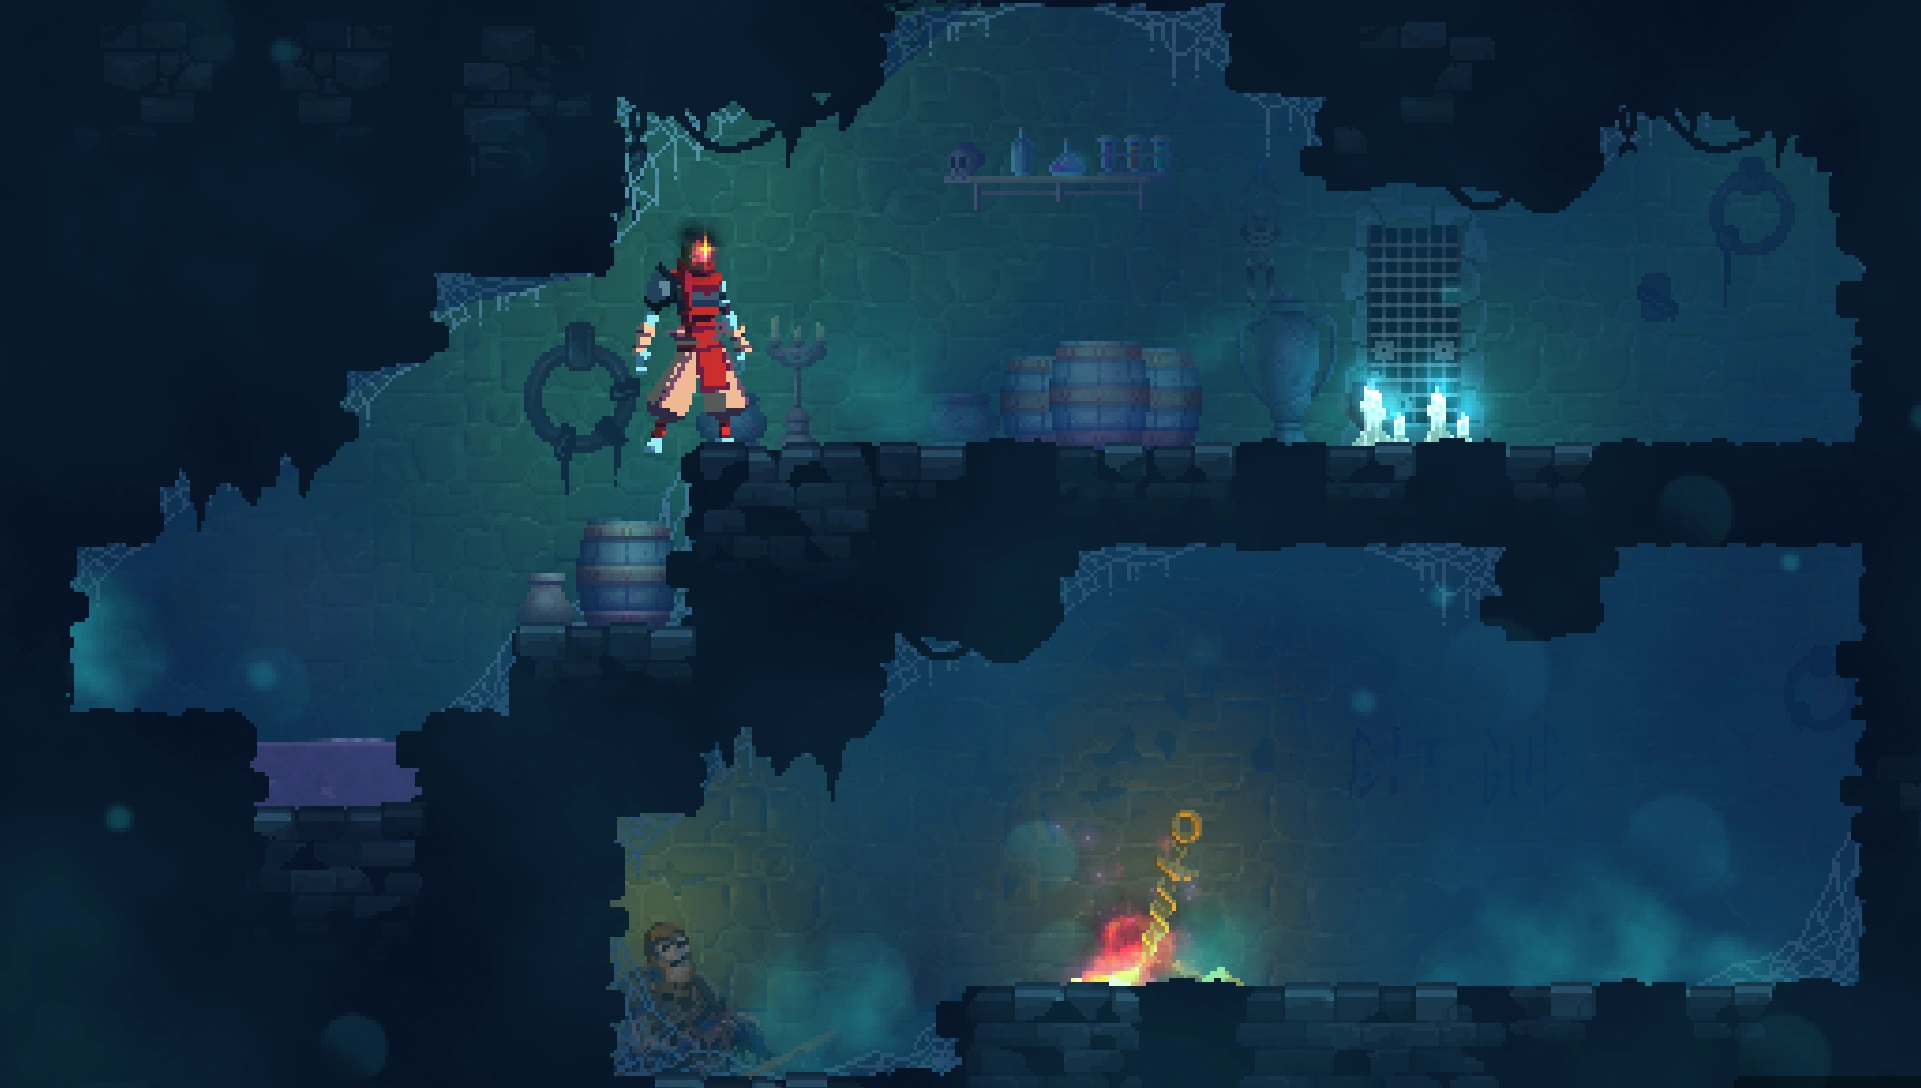
The Prisoners' Quarters is the first level biome in the game. It is the starting point of every run. A run-down stone dungeon with mossy bricks and prison cells visible in the background — most with broken bars. Torches line the walls. Decay is a reality for this prison, as any authority has long met their doom or fled. Some cells still house what prisoners were (un)lucky enough to have survived this long.
General information
Starting area
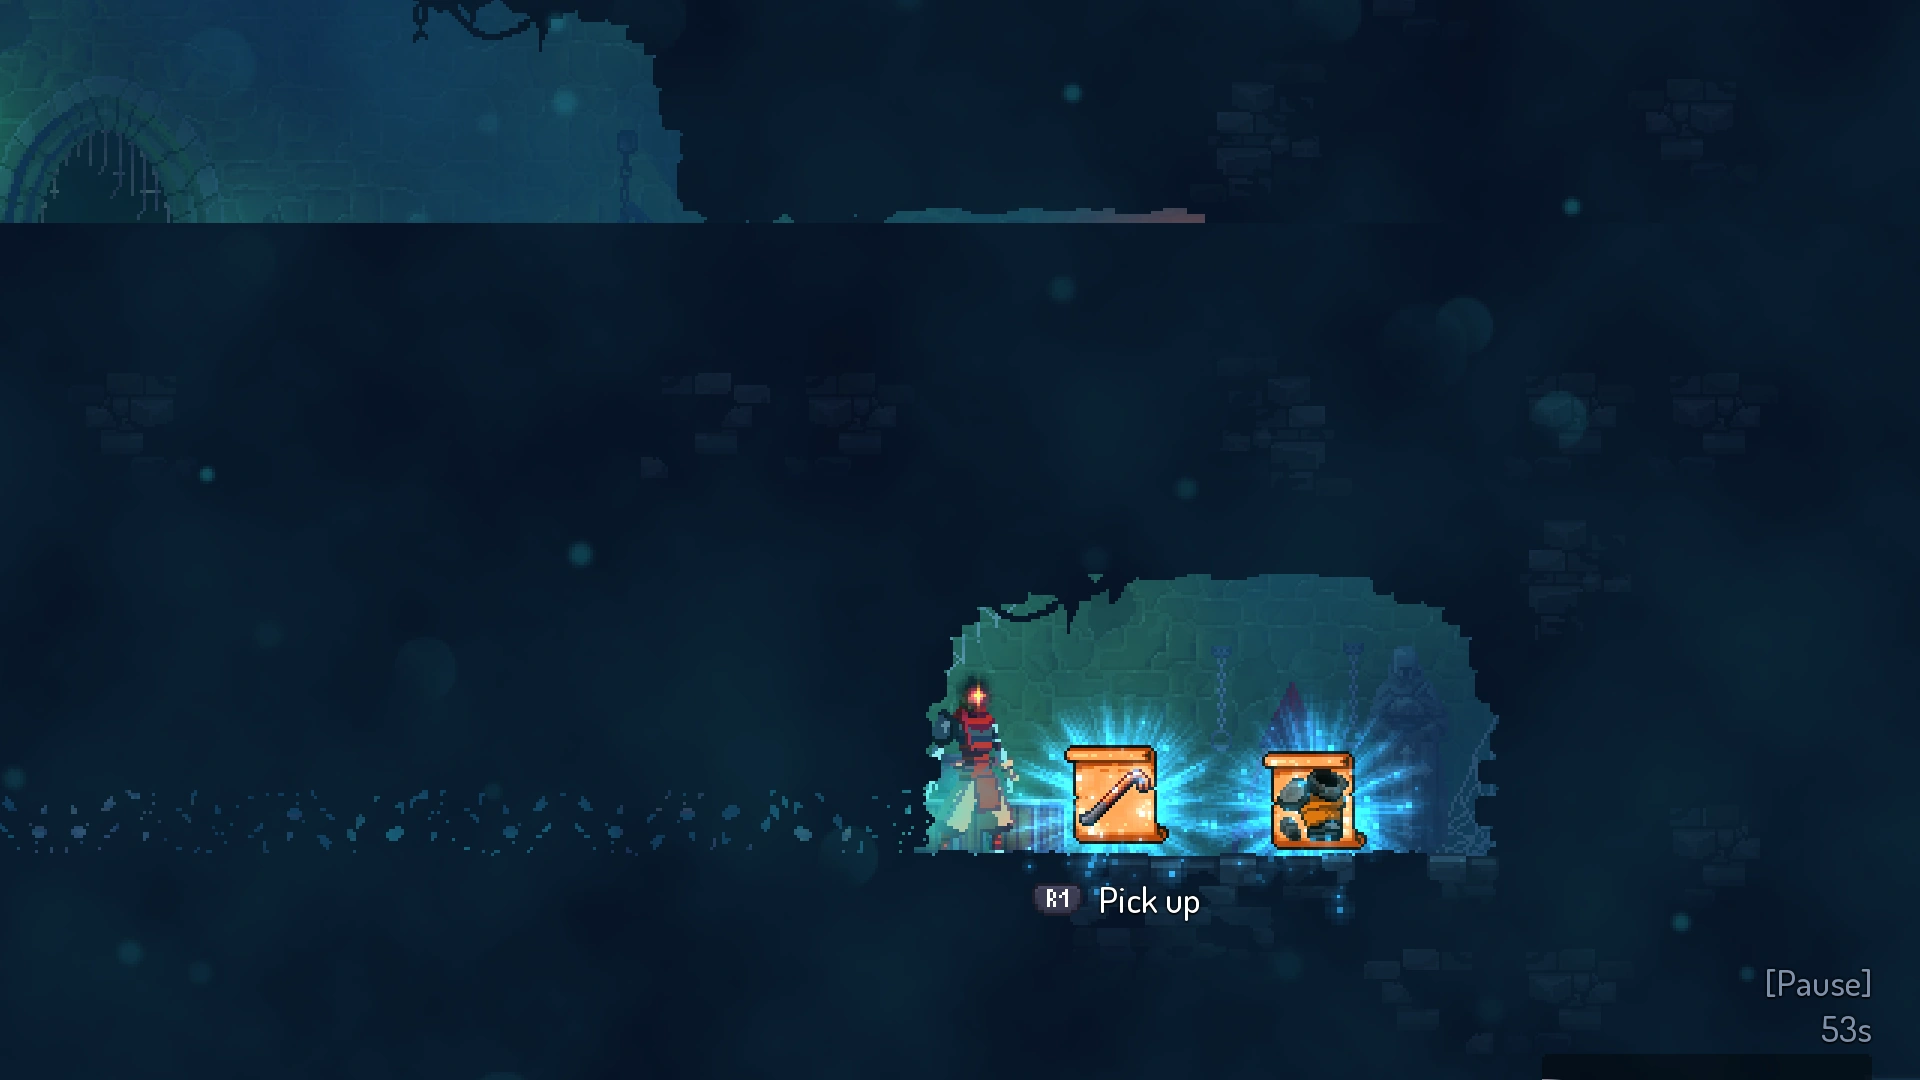
A glass chute drips water and muck from the ceiling. Beheaded prisoners are found underneath, either dropped from the chute or executed on the nearby chopping block. The Giant's skeleton rests in the back.
In the next room over, large glass flasks for unlocked items hang from chains. The Scribe is nearby, sitting near the door to the Daily Challenge game mode. Below the bottles is a large glass tube for adjusting the difficulty with Boss Stem Cells. Below the tube is a small room with the doors to the Tailor's room and the Training Room, as well as a tunnel one can roll through to meet The Doctor. The door to the right leads to the starting weapons area.
Once one enters the door to the starting weapons area, the current amount of active Boss Stem Cells can’t be changed and Aspects can no longer be selected from The Doctor.
Access and exit
The Prisoner's Quarters is the starting area of the run. After a completed or failed run the player will start back here. The entrance to the Daily Run is also located here. It's possible to exit the Daily Run back into the Prisoners' Quarters.
There are three exits, the Promenade of the Condemned, the Toxic Sewers which requires the ![]() Vine Rune and the Dilapidated Arboretum (from The Bad Seed DLC) which requires the
Vine Rune and the Dilapidated Arboretum (from The Bad Seed DLC) which requires the ![]() Teleportation Rune.
Teleportation Rune.
Specialist's Showroom
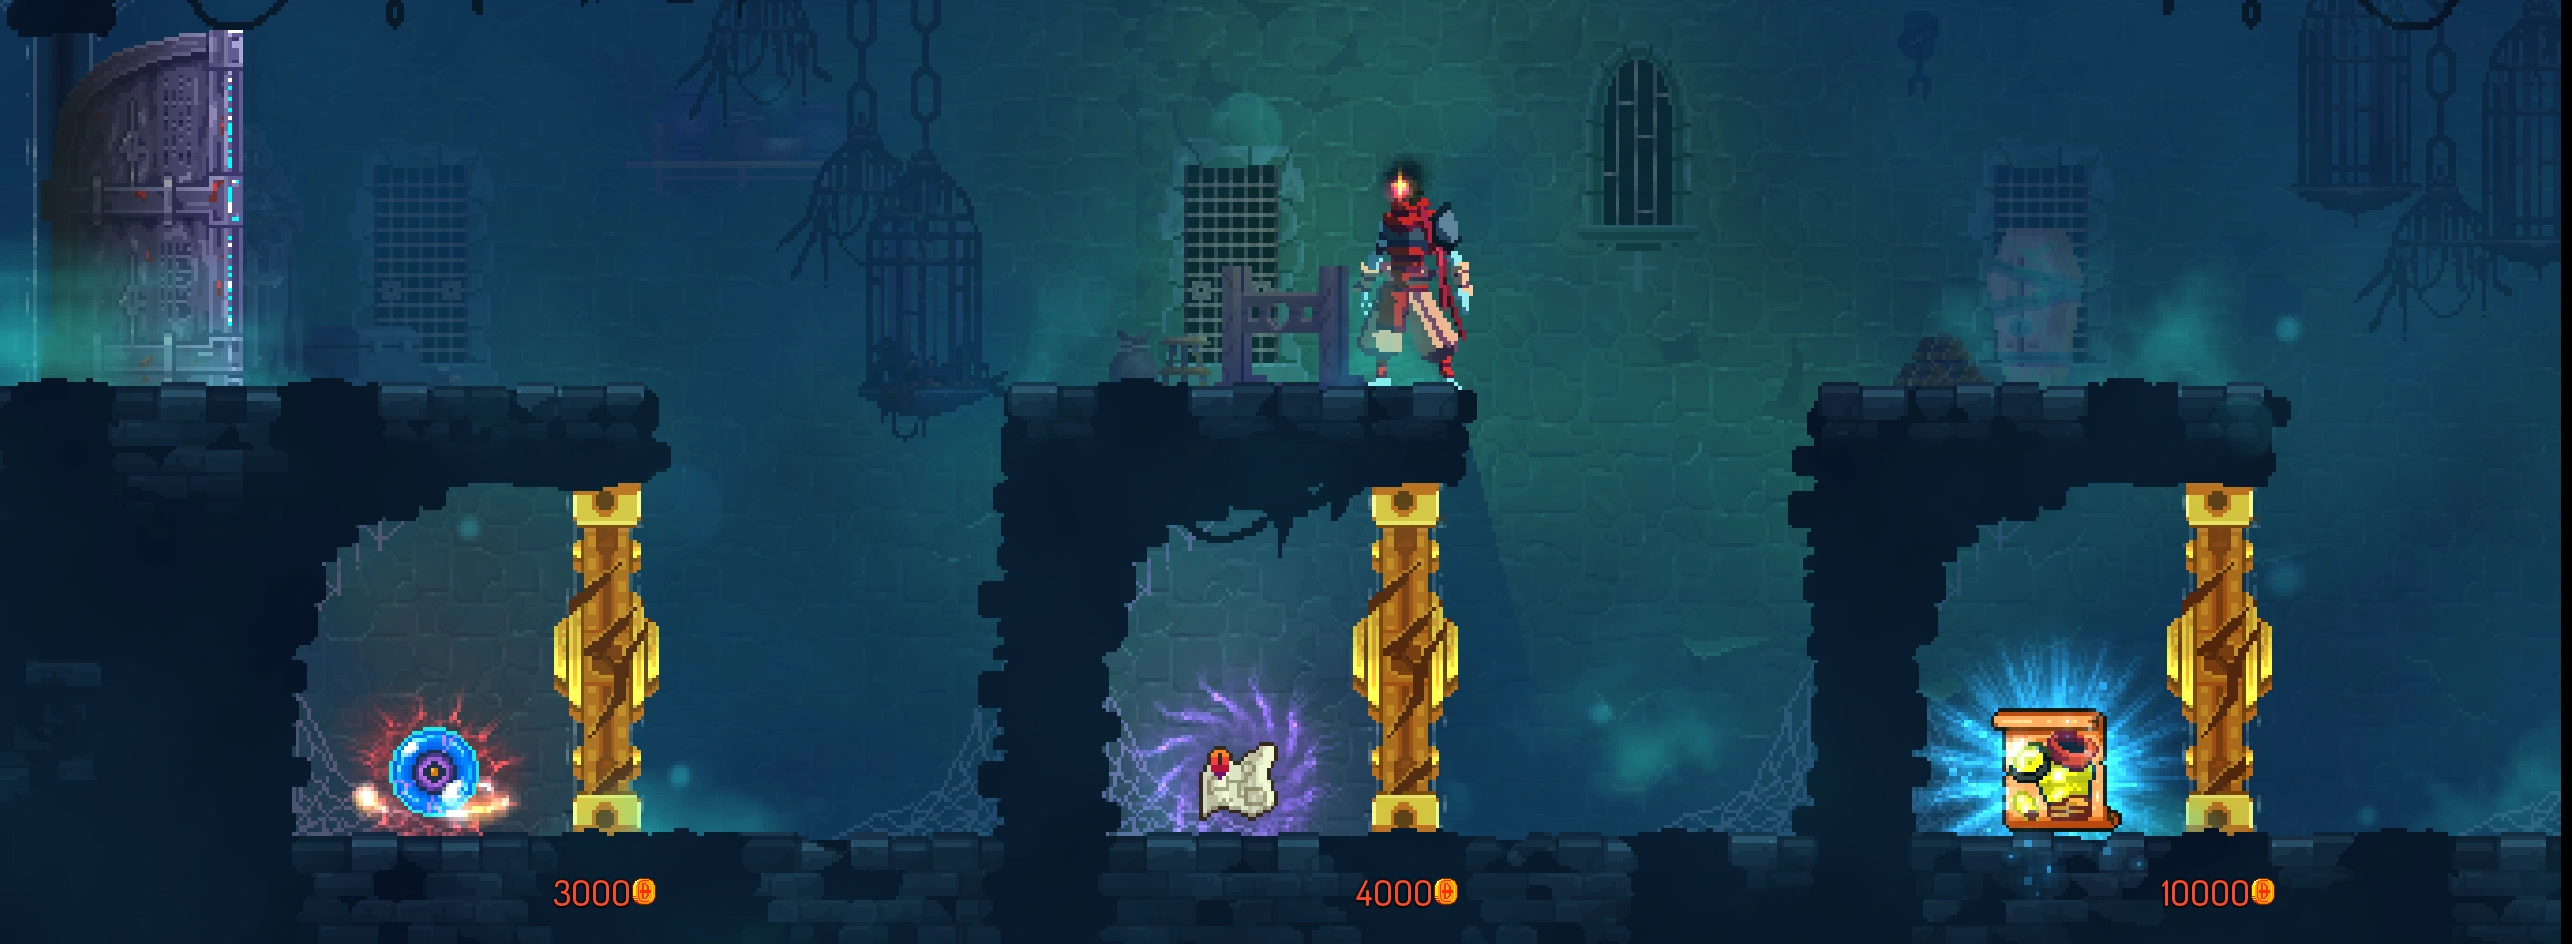

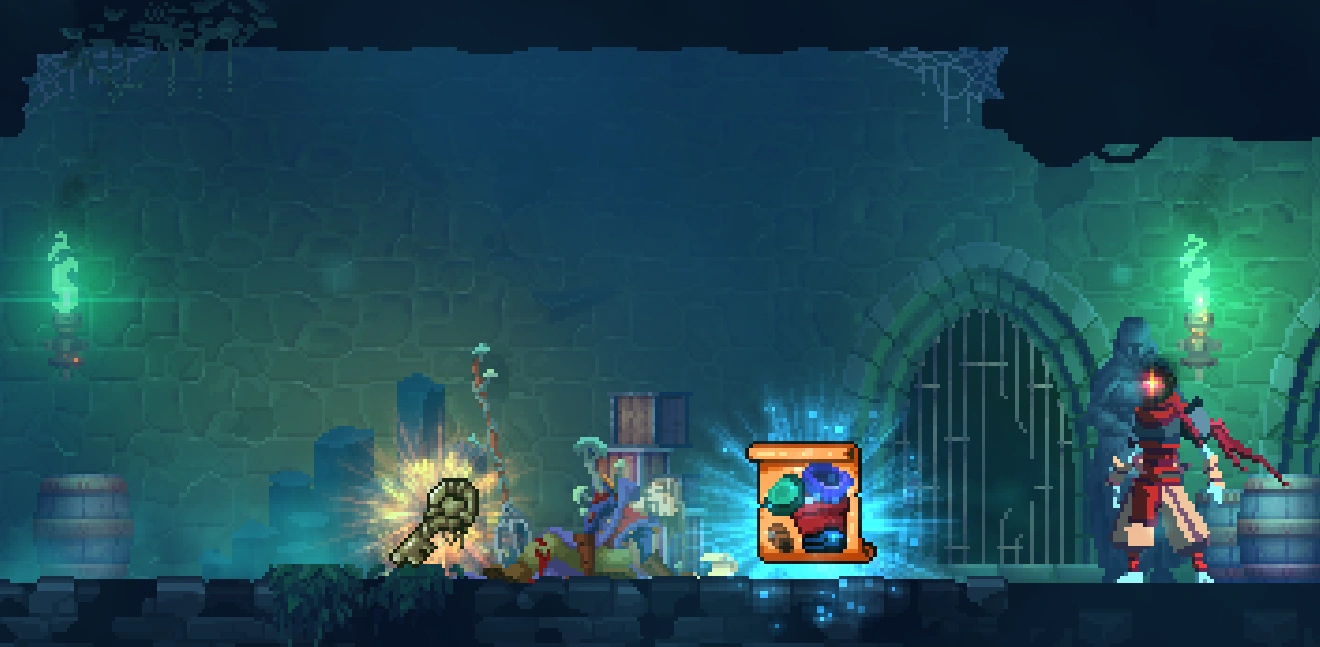
The Specialist's Showroom is a special shop that always appears in the Prisoners' Quarters once unlocked from the Collector for 150 cells. Access is locked by a button in front of the door, and a teleporter is always found at its end.
The Specialist's Showroom holds items locked behind golden doors, which must be opened either by paying Gold or breaking them, suffering 50 curses.
- The
 Hunter's Grenade, which can be thrown to transform an enemy into an Elite and extract its blueprints.
 - The Forgotten Map, which can be used once to reveal the layout of a biome.
- The blueprint for the Golden Outfit (if not yet turned in to the Collector).
Level characteristics
Scrolls
The Prisoners' Quarters contain 2 Scrolls of Power, neither of which can spawn in the route behind the vine leading to the Toxic Sewers.
Enemy tier and gear level scaling
| Difficulty | Normal | Hard | Very Hard | Expert | Nightmare/Hell |
|---|---|---|---|---|---|
| Gear level | I | I | I | II | IV |
| Enemy lvl tier | 1 - 3 | 2 - 5 | 2 - 5 | 3 - 7 | 4 - 8 |
| Enemy Health tier | Base | 2 - 4 | 4 - 7 | 5 - 9 | 6 - 12 |
Loot and shops
Main level
- 1 weapon or skill shop that is not behind a rune path
- 1 guaranteed treasure chest
- 1 item behind a Teleportation Rune
- 1 item behind a Vine Rune
- There is a 1% chance that a cursed chest will spawn in the stage. This is the lowest cursed chest spawn rate in the game.
- Chance for item to spawn behind a golden door
Exclusive blueprints
Secret areas
- The blueprint for the Quick Bow can be found up on the ledges behind the giant skeleton. This secret does not generate on the first two runs of a save file, and it is only accessible through rolling.
- The blueprint for the Disengagement mutation can be found above the hanging bottles. It can be obtained after killing the Hand of the King for the first time, as it requires the Homunculus Rune, but having the Spider Rune is also recommended.
- The blueprint for The Royal Gardener's OutfitTBS can be obtained from the Royal Gardener's corpse
Specialist's Showroom
The blueprint for the ![]() Golden Outfit can be found in the Specialist's Showroom. The player must either pay 10,000 gold for it, or break the door and receive a 50-kill curse.
Golden Outfit can be found in the Specialist's Showroom. The player must either pay 10,000 gold for it, or break the door and receive a 50-kill curse.
Special lore
- Starting with the third run, the Broadsword blueprint can be looted from the Tutorial Knight's corpse, by the exit to the Promenade of the Condemned.
- The blueprints for the Crowbar and the HEV Outfit can be found behind a special lore room of a scientist with a Headcrab.
- Special lore rooms containing references to other games can be found, containing an object that drops a piece of gear when interacted with. These items are unlocked as soon as you pick them up; no blueprints are required. Only one of these rooms can spawn in each run.
- Prie Dieu: Face Flask, from Blasphemous.
- Bench: Pure Nail, from Hollow Knight.
- Altar: Pollo Power, from Guacamelee.
- Cursed altar: Machete and Pistol, from Curse of the Dead Gods (object also gives 1 curse).
- Monolith: Hard Light Sword, from Hyper Light Drifter.
- Pile of skulls: Bone, from Skul: The Hero Slayer.
- Prie Dieu:
- A special room containing a Jerkshroom and a Yeeter drops a Panchaku when defeated. It is automatically unlocked without needing a blueprint.
- Another special lore room containing a glitchy bug in a jar drops the Magic Bow and the Knight's Outfit blueprints when interacted with, both from Soul Knight
Enemies
The Prisoners' Quarters has no unique enemies; all of them can be found in other biomes.
- On the base difficulty, this level is full of Zombies, Undead Archers, Shieldbearers and Grenadiers.
- On higher difficulties, shieldbearers, Zombies, Undead Archers and Grenadiers are replaced with Failed Experiments, Oven Knights, Knife Throwers, and Bombardiers, respectively.
- On Very Hard, Inquisitors, Oven Knights and Demolishers appear.
- On Expert, Rampagers also appear.
In the table below, you will find which enemies are present in the Prisoners' Quarters depending on difficulty level. For each enemy, any common, uncommon, rare or legendary blueprints they carry are indicated. When applicable, the minimum difficulty level for blueprint acquisition is specified in brackets.
| Enemy | Normal | Hard | Very Hard | Expert | Nightmare/Hell |
|---|---|---|---|---|---|
| Zombie | Blood Sword, Double Crossb-o-matic, Bobby Outfit (1+ BSC) | ||||
| Shieldbearer | Rampart, Bloodthirsty Shield, Ice Shield | ||||
| Grenadier | Fire Grenade, Magnetic Grenade | ||||
| Undead Archer | Bow and Endless Quiver, Infantry Bow, Ice Bow, Skeleton Outfit | ||||
| Knife Thrower | Great Owl of War | ||||
| Rancid Rat | Porcupack | ||||
| Oven Knight | Kill Rhythm, Oven Axe | ||||
| Inquisitor | Lightning Bolt, Vampirism, Mage Outfit | ||||
| Demolisher | Acrobatipack, Arbalester's Outfit | ||||
| Rampager | Adrenaline | ||||
| Failed Experiment | Berserker | ||||
Lore
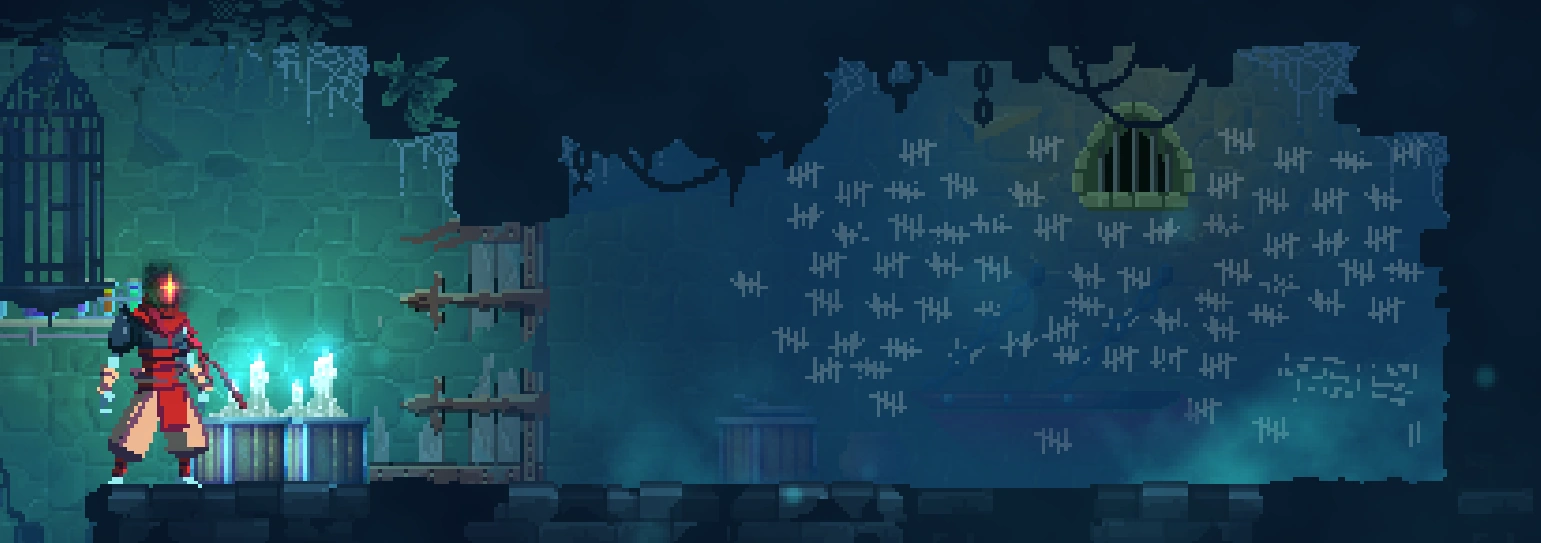
Flooded cell

A cell door can be found with water halfway up the room.
- "Hey, you there! There's water running through my cell!
The Beheaded gives a thumbs up.
- "Errrr... I think something in the water touched my leg."
Then, a loud noise and bang come from the cell door.
- "HELP!!"
After the prisoner's cry for help, multiple bangs come from the cell door.
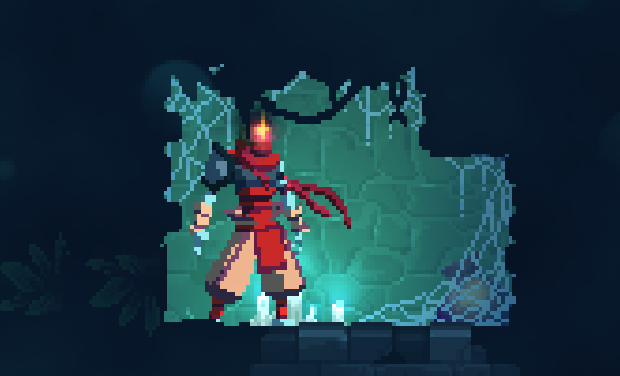
Suffering prisoner

- "Someone's groaning on the other side"
After inspecting the cell door, the Beheaded knocks on the door.
- "No answer."
The Beheaded then begins to kick the door.
- "Get out of here , you freak!"
Despite the prisoner's complaining, the Beheaded kicks the door again.
- "Leave me alone!"
Finally, a large food item comes out of the door.
Rude prisoner

A cell door can be found with a prisoner still inside and untouched meal tray outside.
- "Hey, you there!"
- "Oh. It's... "you"."
- "Looks like I'm on the right side of the door for once!"
- "HA HA HA!"
- "Damn, they didn't mess around..."
After this interaction, the Beheaded knocks on the door again, but the prisoner no longer responds.
- "No answer."
Meal tray
Right next to the cell door, there is a meal tray that drops a large food when examined.
- "Been abandoned here for some time."
Escaped prisoner


A cell with a broken door can be found, inside there is a bed and the wall has scratches counting something and some writing. There is a secret room with a bag inside.
Forced door
- "Hmm, looks like the prisoner managed to get out of prison early.
Writing
- "It sure is convenient finding all these messages on the walls!"
- "Lore on a shoestring..."
- "The writing is barely legible:"
- "Don't want... contaminated... out of here... see you again. I hope..."
- "The "Malaise"..."
- "...not infected..."
- "won't die."
Bag
Inspecting the bag will drop a gem worth 100 gold.
- "... Left his bag behind him... must have been in quite a panic."
Castaing's office
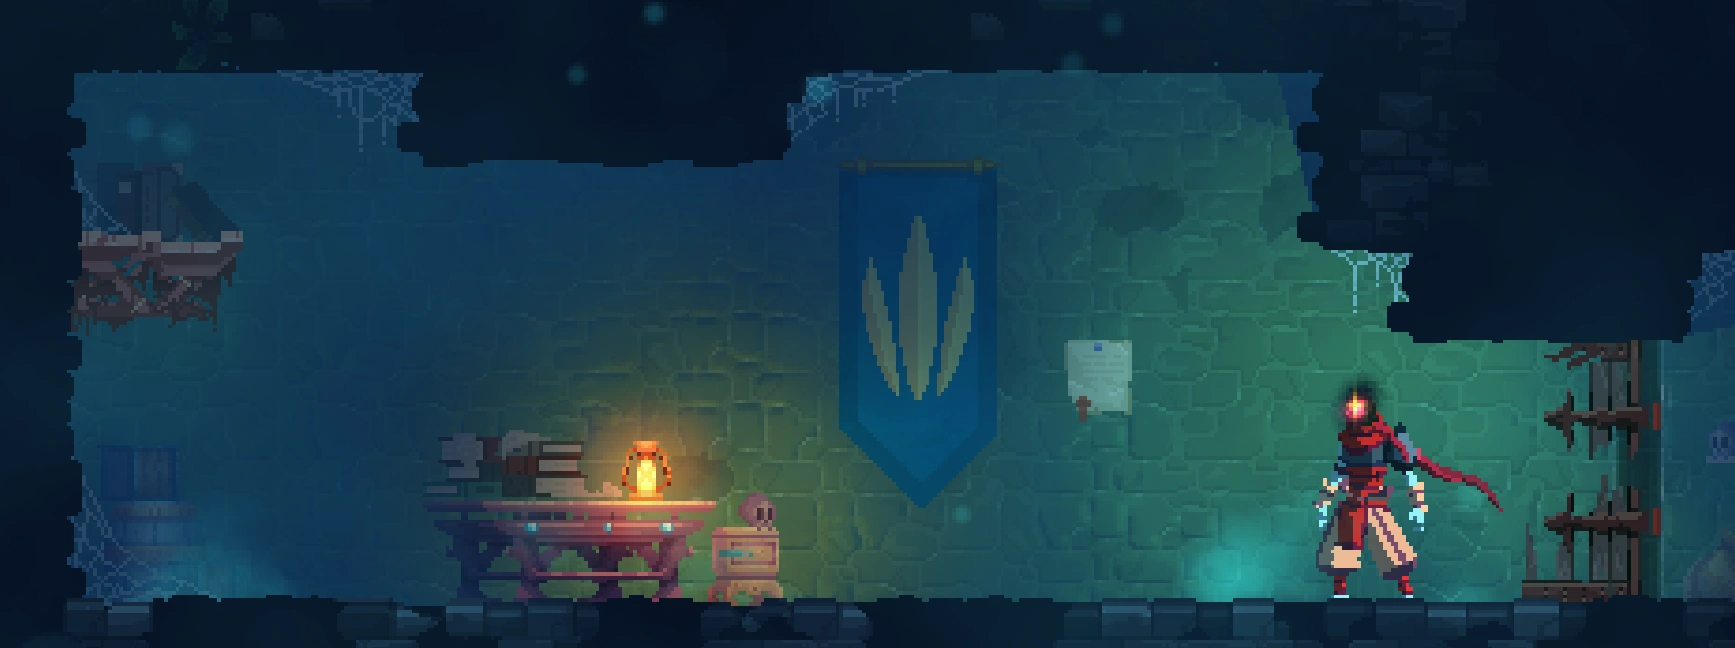

A room can be found with a desk, an order note on the wall and some books. Using the bookshelf, a secret room can be accessed.
Order
- "An order stamped with the king's seal."
- "Castaing, this is a direct order that must remain between you and me..."
- "Stop checking the prison entrances until further notice."
Desk
- "All these papers are signed by Castaing."
- "A high-ranking prison officer, no doubt about it."
Upon checking the desk, gold drops onto the ground.
- "Did he set aside a few pennies for a rainy day?"
Books
- "Some books on a shelf."
- "Prison managment for dummies."
- "Bridge building from antiquity to the present day."
- "Managing soldiers: How to earn their respect without using torture."
- "Managing prison entrances in 10 easy lessons (lesson 8 will shock you!)"
Secret room

In the secret room there is a crate. Upon inspecting it, the Beheaded comments the following:
- "In any case, the warden was prepared for combat."
After his inspection, a random piece of gear is dropped.
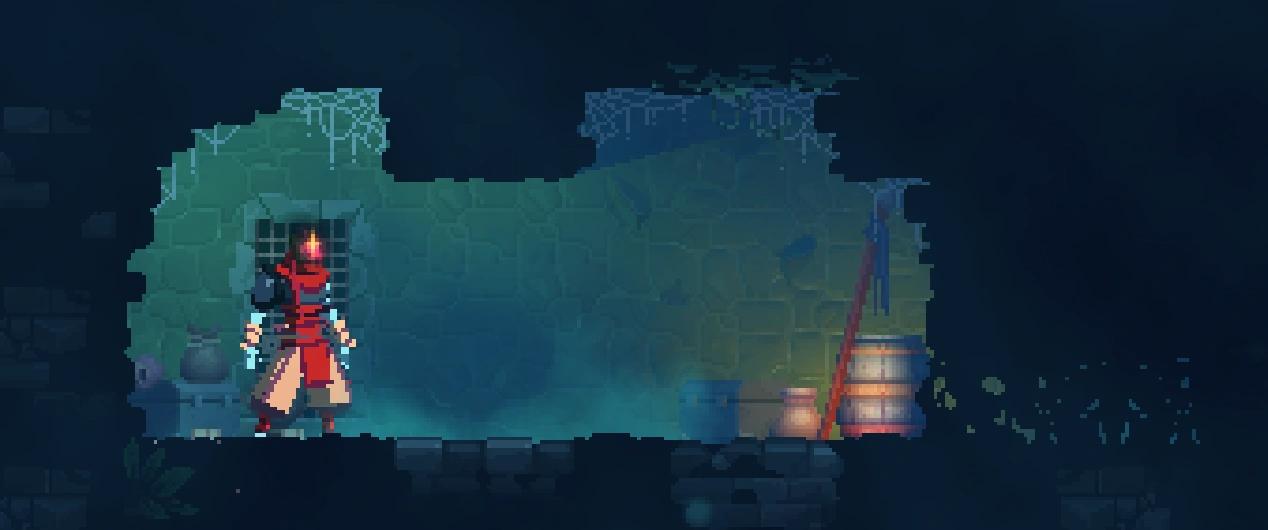
Hole room


A secret room can be found with two holes in the wall and a canvas bag.
Tunnel
- "This tunnel was cleared out very roughly."
- "Doesn't look too solid."
Canvas bag
- "A dusty old bag that someone left here a long time ago."
After inspecting the bag, a large food item drops.
Tight passage
- "The hole in this wall is extremely small."
- "Except maybe for a child."
Tom, Doctor of Mushroomology
A room with a sign at the entrance can be found. It contains a bed and a small hole in the wall.
Sign
Reading the sign reveals the following:
- "Tom's Place"
- "Prisoner and Doctor of Mushroomology"
Bed
Upon examining the bed, the Beheaded comments the following:
- "Abandoned ages ago."
- "Oh."
- "Actually, a family of rats seems to call the place home these days."
Small hole
Upon inspecting the small whole before entering it, the Beheaded comments the following:
- "The devious little fellow made a passage for himself through the wall..."
In the secret room there are various mushrooms planted in the ground. Jars with ground-up mushrooms can be found along with a cash register. Inspecting the cash register will drop some gold, and the Beheaded will say the following about it:
- "Seems to be where the Mushroomologist stashed the profits from his little business."
Upon inspecting the jars, the Beheaded says the following:
- "A variety of differently shaped mushrooms are proliferating in these jars."
- "By the looks of them, they should have some interesting psychotropic properties."
- "Good ol' Doctor Tom here must have been supplying the whole prison."
Furthermore, the mushrooms can also be inspected.
- "All kinds of mushrooms have been carefully ground down into fine multicolored powders."
- "Pretty sure they weren't using these to flavor the soup."
Dark Souls room

On rare occasions, a door can be found leading to a room with a corpse and a bonfire from the game dark souls.
Writing on the wall
- "Words written on the wall:"
- "GIT GUD."
- "Must be some sort of incantation."
Body
Searching the body will drops some gold and a random gear item. The Beheaded will also comment the following about it:
- "A guy in armor, been dead for a while."
Campfire
- "This campfire was abandoned by an earlier visitor..."
- "I'm sure it couldn't hurt to take a little rest."
Immediately afterwards, everything will begin to shake.
- "Hmm. Something's changed."
Most of the time this lore room appears, a Zombie or an Undead Archer will spawn at the entrance of the room. When killed, it always drops 50 cells.
Royal Gardener
A lore room requiring the ![]() Teleportation Rune to access contains numerous wall spikes and the Royal Gardener's corpse alongside a letter from Castaing to him. The
Teleportation Rune to access contains numerous wall spikes and the Royal Gardener's corpse alongside a letter from Castaing to him. The ![]() Dilapidated Arboretum KeyTBS and
Dilapidated Arboretum KeyTBS and ![]() The Royal Gardener's OutfitTBS blueprint are found on the body of the Gardener.
The Royal Gardener's OutfitTBS blueprint are found on the body of the Gardener.
- "Oh ho! A new arrival..."
- "And the rats haven't even got to him yet."
- "...I bet there's still some good stuff to scavenge!"
- "Meh, just some rusty old key..."
- "And a torn up letter."
- "Royal Gardener, with all the due respect that I owe you... OBEY YOUR ORDERS or you will find yourself in the stomach of one of the ticks!"
- "For all our sakes, this is your last warning."
- "Signed: Commander Castaing."
- "Ergh, Nothing of interest at all..."
- "Except for this jacket!"
Half-life room


A scientist with a Headcrab on his head can be found as a Half-Life reference. Behind it is a secret room with the Blueprint of the ![]() HEV Outfit and the
HEV Outfit and the ![]() Crowbar. After these two are turned in to the Collector, this lore room stops spawning.
Crowbar. After these two are turned in to the Collector, this lore room stops spawning.
- "What is this strange creature stuck to his face?"
- "He still spasms a bit, as if he was half alive..."
- "Better not linger."
- "Staying too long could have unforeseen consequences!"
Gallery
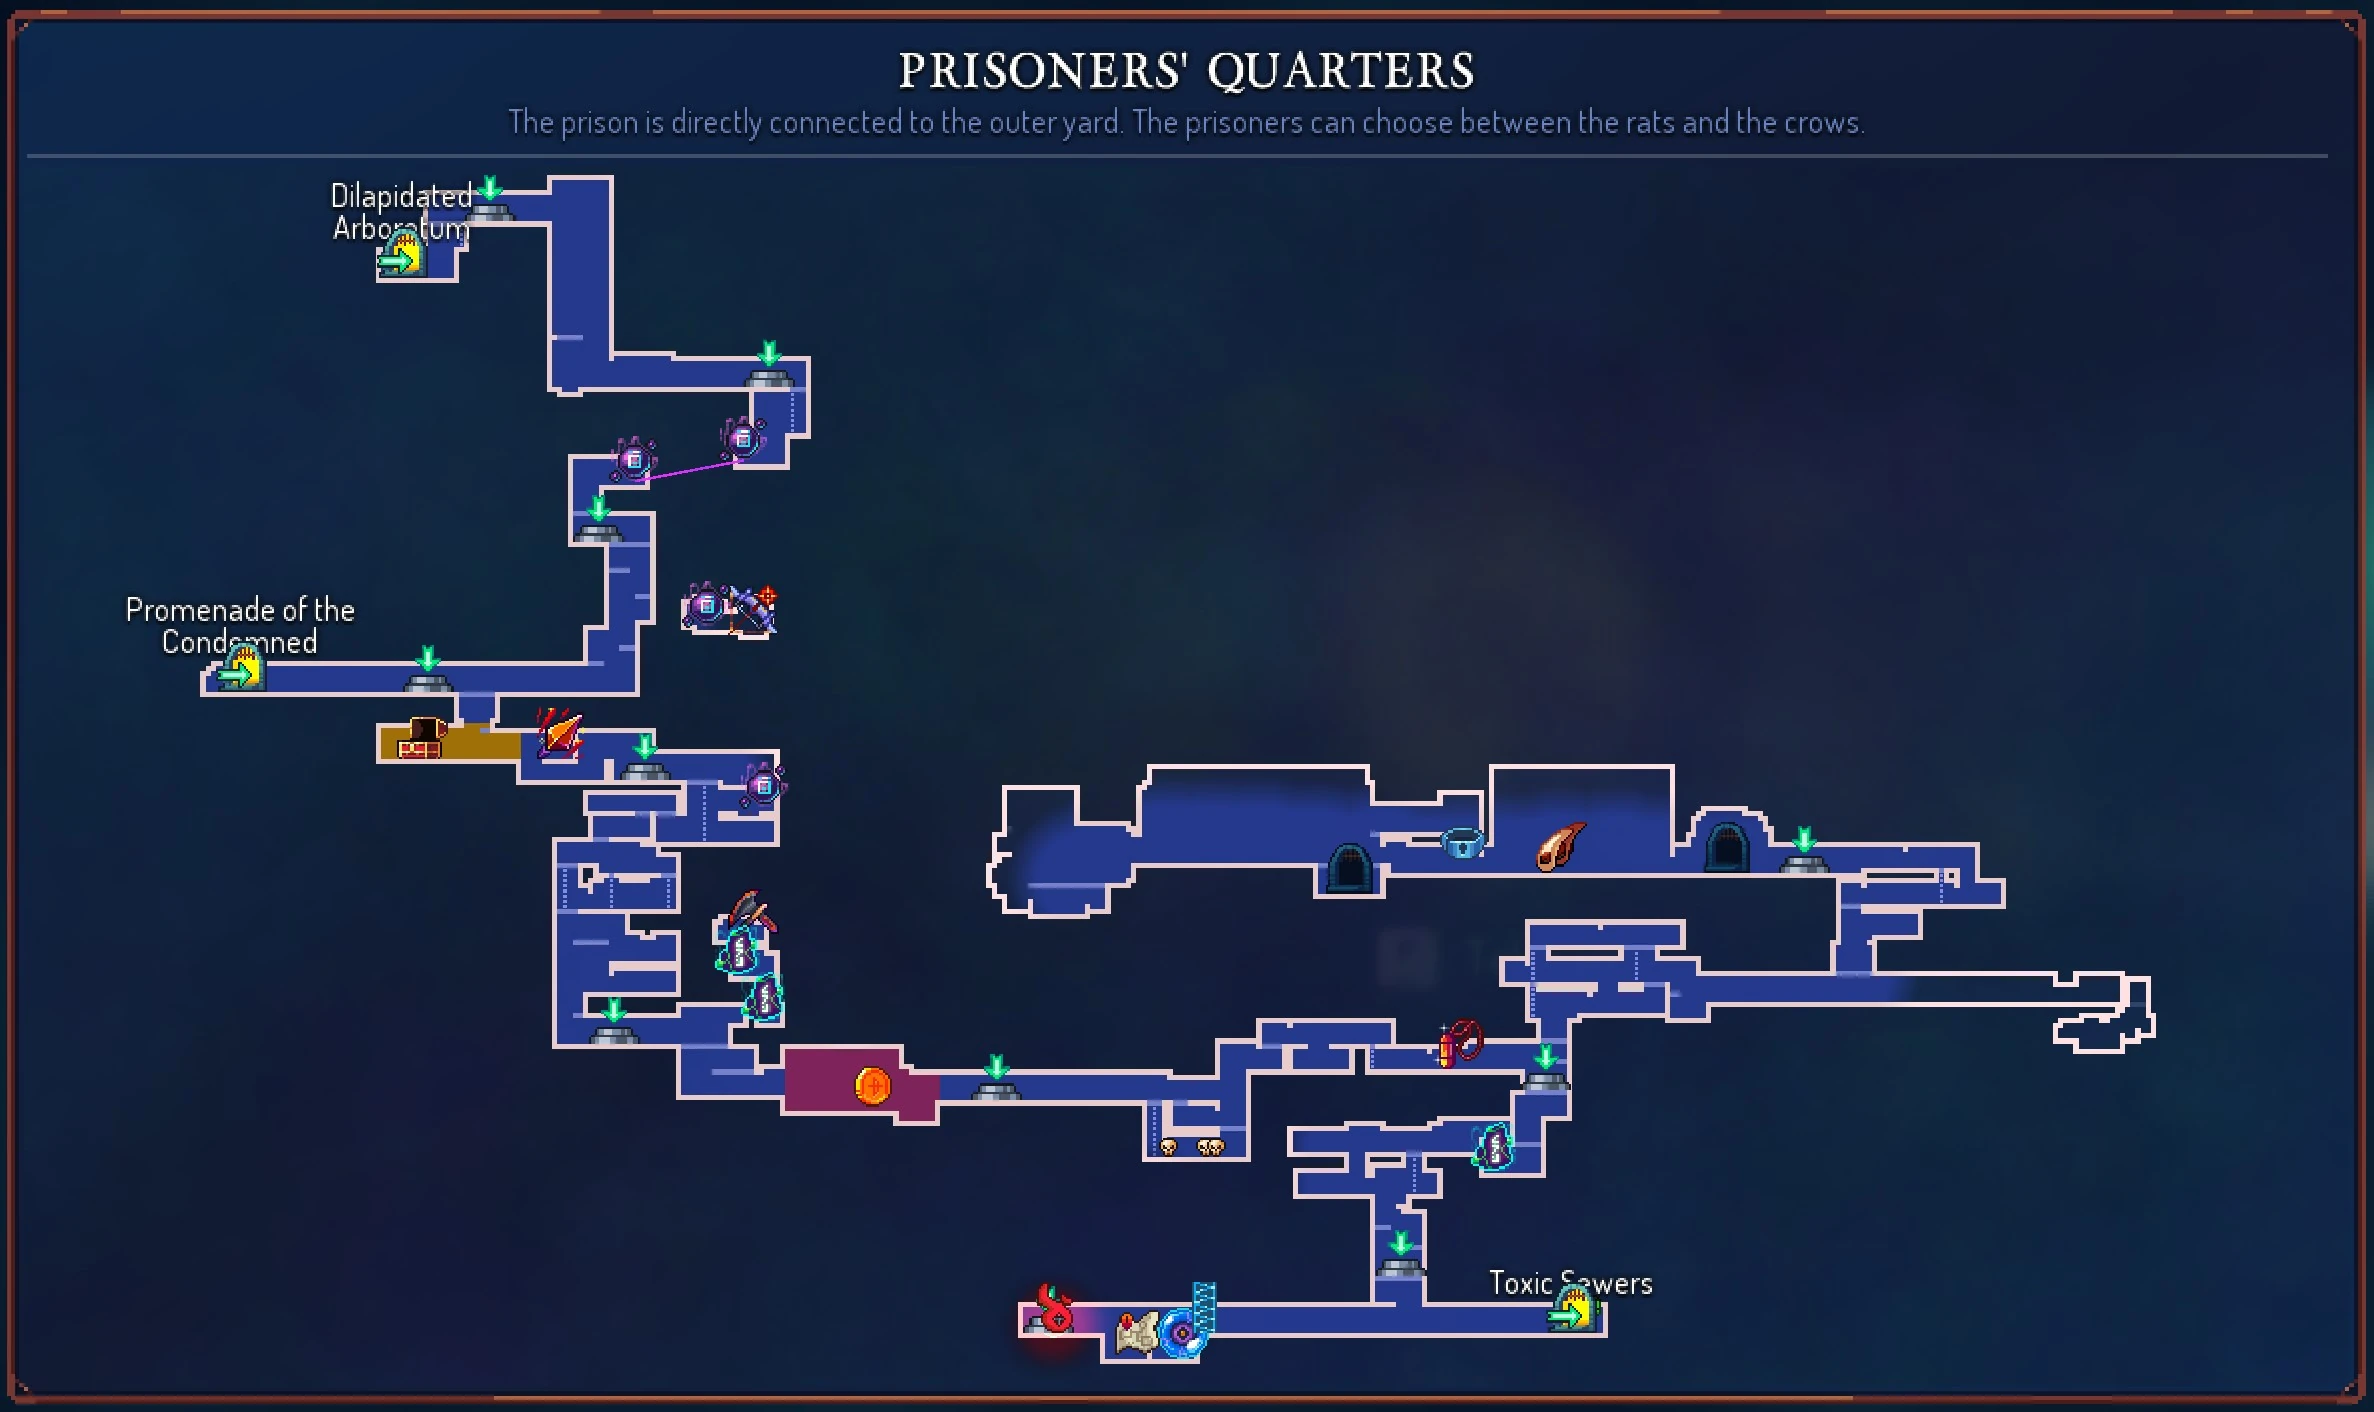
Fully explored map of Prisoner's Quarters showing general generation of the level.
History
|
References
| ||||||||||||||||||||||||||||||||||||||||||||||
Information about the lore room were the "trowable objects" can be find, is missing here!!!