No edit summary |
AlternateRT (talk | contribs) No edit summary Tag: Source edit |
||
| (26 intermediate revisions by 10 users not shown) | |||
| Line 1: | Line 1: | ||
| − | {{Stub|Lore section is missing multiple lore rooms}} |
||
{{Quotes |
{{Quotes |
||
| To keep things exciting, the guards sometimes threw condemned prisoners from the Ramparts. There's definitely nothing worse than the screams of someone who knows they're headed for the edge. |
| To keep things exciting, the guards sometimes threw condemned prisoners from the Ramparts. There's definitely nothing worse than the screams of someone who knows they're headed for the edge. |
||
| Line 25: | Line 24: | ||
| gear_level_3 = IV |
| gear_level_3 = IV |
||
| gear_level_4 = VI |
| gear_level_4 = VI |
||
| − | | enemies = 00[[Undead Archer]]s, 01[[Shieldbearer]]s, 04[[Buzzcutter]]s, 04[[Inquisitor]]s, 04[[Sweeper]]s, |
+ | | enemies = 00[[Undead Archer]]s, 01[[Shieldbearer]]s, 04[[Buzzcutter]]s, 04[[Inquisitor]]s, 04[[Sweeper]]s, 24[[Slasher]]s, 14[[Demolisher]]s, 14[[Weirded Warrior]]s, 24[[Oven Knight]]s, 34[[Rampager]]s |
| enemy_tier_0 = 7-13 |
| enemy_tier_0 = 7-13 |
||
| enemy_tier_1 = 11-17 |
| enemy_tier_1 = 11-17 |
||
| Line 36: | Line 35: | ||
| enemy_hp_tiers_3 = 16-21 |
| enemy_hp_tiers_3 = 16-21 |
||
| enemy_hp_tiers_4 = 17-22 |
| enemy_hp_tiers_4 = 17-22 |
||
| − | | enemy_blueprints = 00[[Bow and Endless Quiver]], 00[[Infantry Bow]], 00[[Ice Bow]], 00[[Rampart]], 00[[Bloodthirsty Shield]], 00[[Ice Shield]], 04[[Spite Sword]], 04[[Frost Blast]], 04[[Lightning Bolt]], 04[[Vampirism]], 24[[Outfits|Mage Outfit]], 04[[ |
+ | | enemy_blueprints = 00[[Bow and Endless Quiver]], 00[[Infantry Bow]], 00[[Ice Bow]], 00[[Rampart]], 00[[Bloodthirsty Shield]], 00[[Ice Shield]], 04[[Spite Sword]], 04[[Frost Blast]], 04[[Lightning Bolt]], 04[[Vampirism]], 24[[Outfits#Mage Outfit|Mage Outfit]], 04[[Scheme]], 14[[Cluster Grenade]], 14[[Heavy Turret]], 34[[Outfits#Demon Outfit|Demon Outfit]], 14[[Acrobatipack]], 14[[Outfits#Arbalester's Outfit|Arbalester's Outfit]], 14[[Hattori's Katana]], 14[[Outfits#Blade Master's Outfit|Blade Master's Outfit]], 24[[Kill Rhythm]], 34[[Adrenaline]] |
| secret_blueprints_0 = [[Stun Grenade]], [[Nerves of Steel]] |
| secret_blueprints_0 = [[Stun Grenade]], [[Nerves of Steel]] |
||
| ⚫ | |||
| − | | secret_blueprints_0 = [[Stun Grenade]], [[Nerves of Steel]] |
||
| ⚫ | |||
| BSC_door_1 = |
| BSC_door_1 = |
||
| BSC_door_2 = Food Shop |
| BSC_door_2 = Food Shop |
||
| Line 62: | Line 60: | ||
== General information == |
== General information == |
||
=== Access and exit === |
=== Access and exit === |
||
| − | The Ramparts can be accessed from the [[Promenade of the Condemned]], [[Toxic Sewers]], or the [[Dilapidated Arboretum]]. In the case of the first two, the {{Rune|vin|1}} is required. When playing with 1 or more [[BSC]] active, a door in the [[Corrupted Prison]] can also lead to this biome, which itself requires having the Spider |
+ | The Ramparts can be accessed from the [[Promenade of the Condemned]], [[Toxic Sewers]], or the [[Dilapidated Arboretum]]. In the case of the first two, the {{Rune|vin|1}} is required. When playing with 1 or more [[BSC]] active, a door in the [[Corrupted Prison]] can also lead to this biome, which itself requires having the {{Rune|Spider|1}}. |
| − | There are two exits out of the Ramparts. The main exit leads to the [[Black Bridge]] where the [[ |
+ | There are two exits out of the Ramparts. The main exit leads to the [[Black Bridge]] where the [[Concierge]] awaits. This exit can spawn either at the bottom of any underground tower section, or in a specific tower located at the far right end of the level. A hint on the surface of the Ramparts indicates which of these options has been generated: the presence of a wooden platform, as seen in the [[#Gallery|Gallery]], indicates that the exit is in an underground section to the right, but not at the far end of the level. Conversely, the absence of this structure guarantees that the exit is located at the far right. |
With at least 3 BSC active, a door which leads to the [[Insufferable Crypt]] can be accessed, where [[Conjunctivius]] awaits. Additionally, this door can spawn behind rune-locked areas. |
With at least 3 BSC active, a door which leads to the [[Insufferable Crypt]] can be accessed, where [[Conjunctivius]] awaits. Additionally, this door can spawn behind rune-locked areas. |
||
| − | === Customization |
+ | === Customization Rune === |
[[File:Rampartsrune.jpg|left|thumb|The Elite Zombie holding the Customization rune.]] |
[[File:Rampartsrune.jpg|left|thumb|The Elite Zombie holding the Customization rune.]] |
||
| − | An Elite [[Zombie]] can be found here which drops the |
+ | An Elite [[Zombie]] can be found here which drops the {{Rune|cus|1}}, which unlocks [[Custom Mode]] in the main menu. This Elite disappears after being defeated once. |
{{Clear}} |
{{Clear}} |
||
| + | |||
=== Level characteristics === |
=== Level characteristics === |
||
==== Scrolls ==== |
==== Scrolls ==== |
||
| − | The Ramparts contains 5 scrolls, including 3 Power Scroll and 2 Dual-stat scrolls, which cannot spawn in areas requiring the Teleport, Ram or Spider [[runes]]. On (2+ [[BSC]]) there is a bonus Power scroll. When 3 Boss Stem Cells are active, this biome has 1 guaranteed [[ |
+ | The Ramparts contains 5 scrolls, including 3 Power Scroll and 2 Dual-stat scrolls, which cannot spawn in areas requiring the Teleport, Ram or Spider [[runes]]. On (2+ [[BSC]]) there is a bonus Power scroll. When 3 Boss Stem Cells are active, this biome has 1 guaranteed [[Scroll Fragment]], and when 4/5 Boss Stem Cells are active, this biome has 2 guaranteed [[Scroll Fragments]]. |
==== Enemy tier and gear level scaling ==== |
==== Enemy tier and gear level scaling ==== |
||
| Line 124: | Line 123: | ||
== Exclusive blueprints == |
== Exclusive blueprints == |
||
=== Secret areas === |
=== Secret areas === |
||
| − | The blueprints for the |
+ | The blueprints for the {{Item|Stun Grenade}} and {{Item|Nerves of Steel}} bow are found in secret areas located at the far right end of the Ramparts (see [[#Gallery|Gallery]] for details). The structures that hold these blueprints are not guaranteed to spawn, therefore it may require a number of runs to get them. Note that if any of these blueprints are present, the exit to the Black bridge will not be located at the end of the level, but rather at the bottom of one of the underground sections. The first {{Pickup|Moonflower Key}} can also be found here in a secret room, which is needed to access the 3+ BSC {{Mutation|Acceptance}} and requires a {{Pickup|Gardener's Key}} to reach. |
=== Enemies === |
=== Enemies === |
||
| − | The blueprint for the |
+ | The blueprint for the mutation {{Mutation|Scheme}} can be looted from [[Sweeper]]s. |
| − | |||
| − | The blueprint for [[Mutations#Brutality Mutations|Scheme]] can be looted from [[Sweeper]]s. |
||
== Enemies == |
== Enemies == |
||
| Line 163: | Line 160: | ||
|[[Slasher]] |
|[[Slasher]] |
||
| |
| |
||
| − | | colspan="4" style="background-color:#0c0c0b; text-align: center;" |[[Cluster Grenade]], [[Heavy Turret]], [[Outfits|Demon Outfit]] (3+ BSC) |
+ | | colspan="4" style="background-color:#0c0c0b; text-align: center;" |[[Cluster Grenade]], [[Heavy Turret]], [[Outfits|Demon Outfit]] (3+ BSC), [[No Mercy]] |
|- |
|- |
||
|[[Demolisher]] |
|[[Demolisher]] |
||
| |
| |
||
| colspan="4" style="background-color:#0c0c0b; text-align: center;" |[[Mutations#Tactics Mutation|Acrobatipack]], [[Outfits|Arbalester's Outfit]] |
| colspan="4" style="background-color:#0c0c0b; text-align: center;" |[[Mutations#Tactics Mutation|Acrobatipack]], [[Outfits|Arbalester's Outfit]] |
||
| − | |- |
||
| − | |[[Weirded Warrior]] |
||
| − | | |
||
| − | | colspan="4" style="background-color:#0c0c0b; text-align: center;" |[[Hattori's Katana]], [[Outfits|Blade Master's Outfit]] |
||
|- |
|- |
||
|[[Oven Knight]] |
|[[Oven Knight]] |
||
| colspan="2" | |
| colspan="2" | |
||
| − | | colspan="3" style="background-color:#0c0c0b; text-align: center;" |[[Mutations#Survival Mutations|Kill Rhythm]] |
+ | | colspan="3" style="background-color:#0c0c0b; text-align: center;" |[[Mutations#Survival Mutations|Kill Rhythm]], [[Oven Axe]] |
|- |
|- |
||
|[[Rampager]] |
|[[Rampager]] |
||
| Line 183: | Line 176: | ||
== Lore == |
== Lore == |
||
| − | === Alchemist |
+ | === Alchemist grimoires === |
| − | + | {{Main|The Alchemist}} |
|
| ⚫ | |||
| ⚫ | |||
| ⚫ | |||
| ⚫ | |||
| ⚫ | |||
| − | |||
| ⚫ | |||
[[The Beheaded]] also mentions how the drawings on the walls, of each bug, are sorted in a very specific order: |
[[The Beheaded]] also mentions how the drawings on the walls, of each bug, are sorted in a very specific order: |
||
| − | + | * "''A whole collection of insects carefully classified and lined up in nice straight rows.''" |
|
| + | * "''And classified by type.''" |
||
| − | |||
| − | + | * "''And by size.''" |
|
| + | * "''...''" |
||
| − | |||
| ⚫ | |||
| − | <q> And by size. |
||
| ⚫ | |||
| − | |||
| − | <q> ... |
||
| − | |||
| ⚫ | |||
| − | |||
| ⚫ | |||
<gallery widths="320" heights="180"> |
<gallery widths="320" heights="180"> |
||
| − | File:Bug Tower Bottom.png |
+ | File:Bug Tower Bottom.png |
File:Bug Tower Middle.png |
File:Bug Tower Middle.png |
||
File:Bug Tower Middle 2.png |
File:Bug Tower Middle 2.png |
||
| Line 211: | Line 198: | ||
</gallery> |
</gallery> |
||
| − | === |
+ | === Prisoners === |
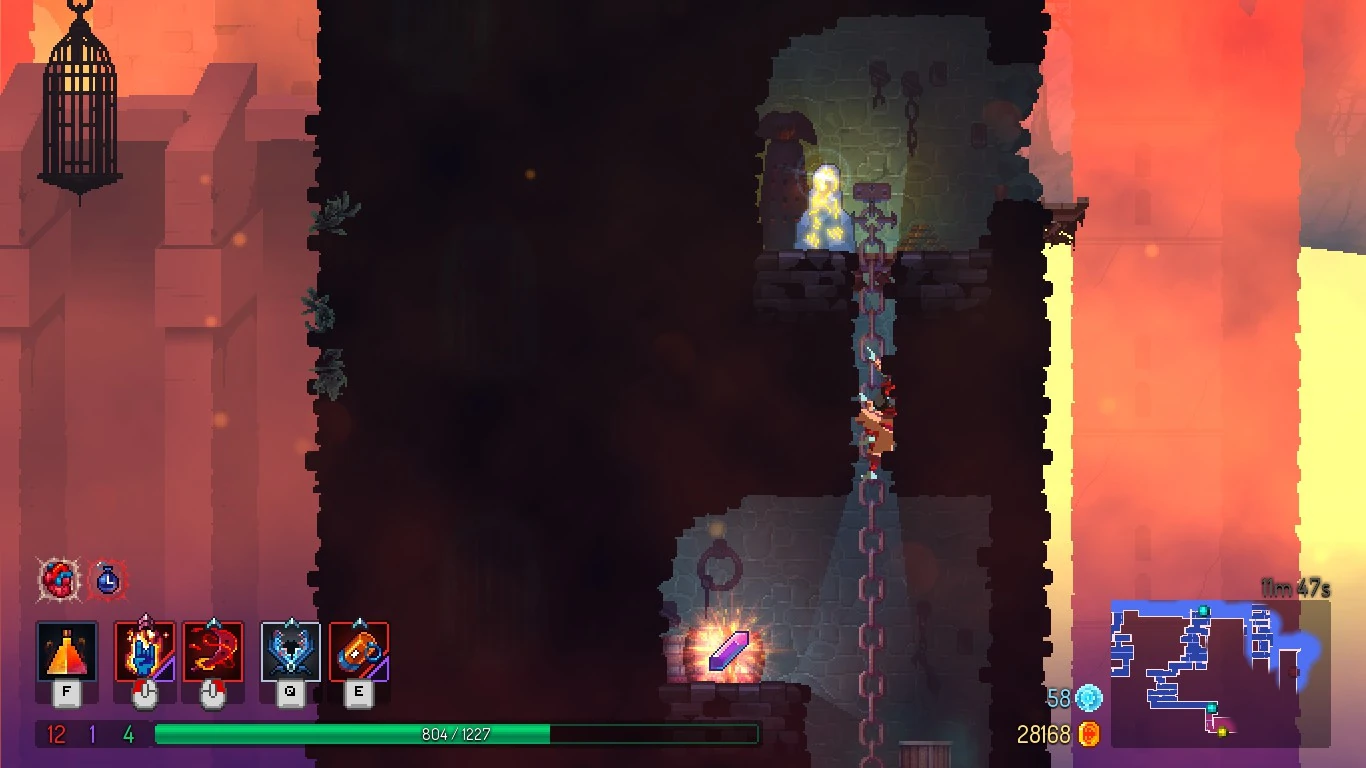
| − | A dead woman can occasionally be found hanging from a gallows by a chain. [[The Beheaded]] makes note of this as well as an amulet she is still clutching |
+ | A dead woman can occasionally be found hanging from a gallows by a chain. [[The Beheaded]] makes note of this as well as an amulet she is still clutching, and then takes it: |
| + | |||
| ⚫ | |||
| ⚫ | |||
| ⚫ | |||
| + | |||
| + | A row of three hanged prisoners, suspected of infection, from a gallows by a chain can be found: |
||
| + | |||
| + | * "''A man, about forty years old.''" |
||
| + | * "''Can't really be sure.''" |
||
| + | * "''Suspected infection''" |
||
| + | |||
| + | The second: |
||
| + | |||
| + | * "''Suspected infection''" |
||
| + | |||
| + | The third: |
||
| + | |||
| + | * "''This one was either a dwarf, or she was no more than 10 or 12 years old.''" |
||
| + | * "''Let's just say she was a dwarf.''" |
||
| + | * "''suspected infection''" |
||
| + | |||
| + | Their personal belongings can also be found: |
||
| + | |||
| + | * "''It was supposed to burn, but a few things seem to have survived.''" |
||
| + | * "''Oh, interesting.''" |
||
| + | |||
| + | A sign can be found with the writing: |
||
| + | |||
| + | * "''Live target training''" |
||
| + | |||
| + | Next to the sign, is a bag of arrows: |
||
| + | |||
| + | * "''A supply of bows and arrows.''" |
||
| + | * "''Hmm?''" |
||
| + | |||
| + | Across from the sign and bag of arrows is a prisoner, dead with an arrow through their head: |
||
| + | |||
| + | * "''Only one arrow hit the target.''" |
||
| + | * "''Right in the head.''" |
||
| + | |||
| + | Behind the prisoner are many arrows: |
||
| + | |||
| + | * "''The prison's archers were really useless...''" |
||
| + | === Orders of the King === |
||
| ⚫ | |||
| + | An order from the [[King]] to the guards says to imprison anyone showing signs of the [[Malaise#Lore|Malaise]]. This can also be found in the [[Promenade of the Condemned]]. |
||
| + | Another order from the King says to the guards: |
||
| ⚫ | |||
| + | * "''If the cells are overpopulated, use the outdoor jails or the oubliettes. Leave no suspects unsupervised.''" |
||
| + | This implies prison cells were becoming full from too many imprisonments. This can also be found in the Promenade of the Condemned. |
||
| ⚫ | |||
== Gallery == |
== Gallery == |
||
| Line 226: | Line 258: | ||
File:StunGrenade.jpg|The secret tower containing the [[Stun Grenade]] blueprint (here, an amethyst spawned in its place). |
File:StunGrenade.jpg|The secret tower containing the [[Stun Grenade]] blueprint (here, an amethyst spawned in its place). |
||
File:Rampartshint.png|Hint structure indicating that the exit is in an underground section to the right, and not at the far end of the Ramparts. |
File:Rampartshint.png|Hint structure indicating that the exit is in an underground section to the right, and not at the far end of the Ramparts. |
||
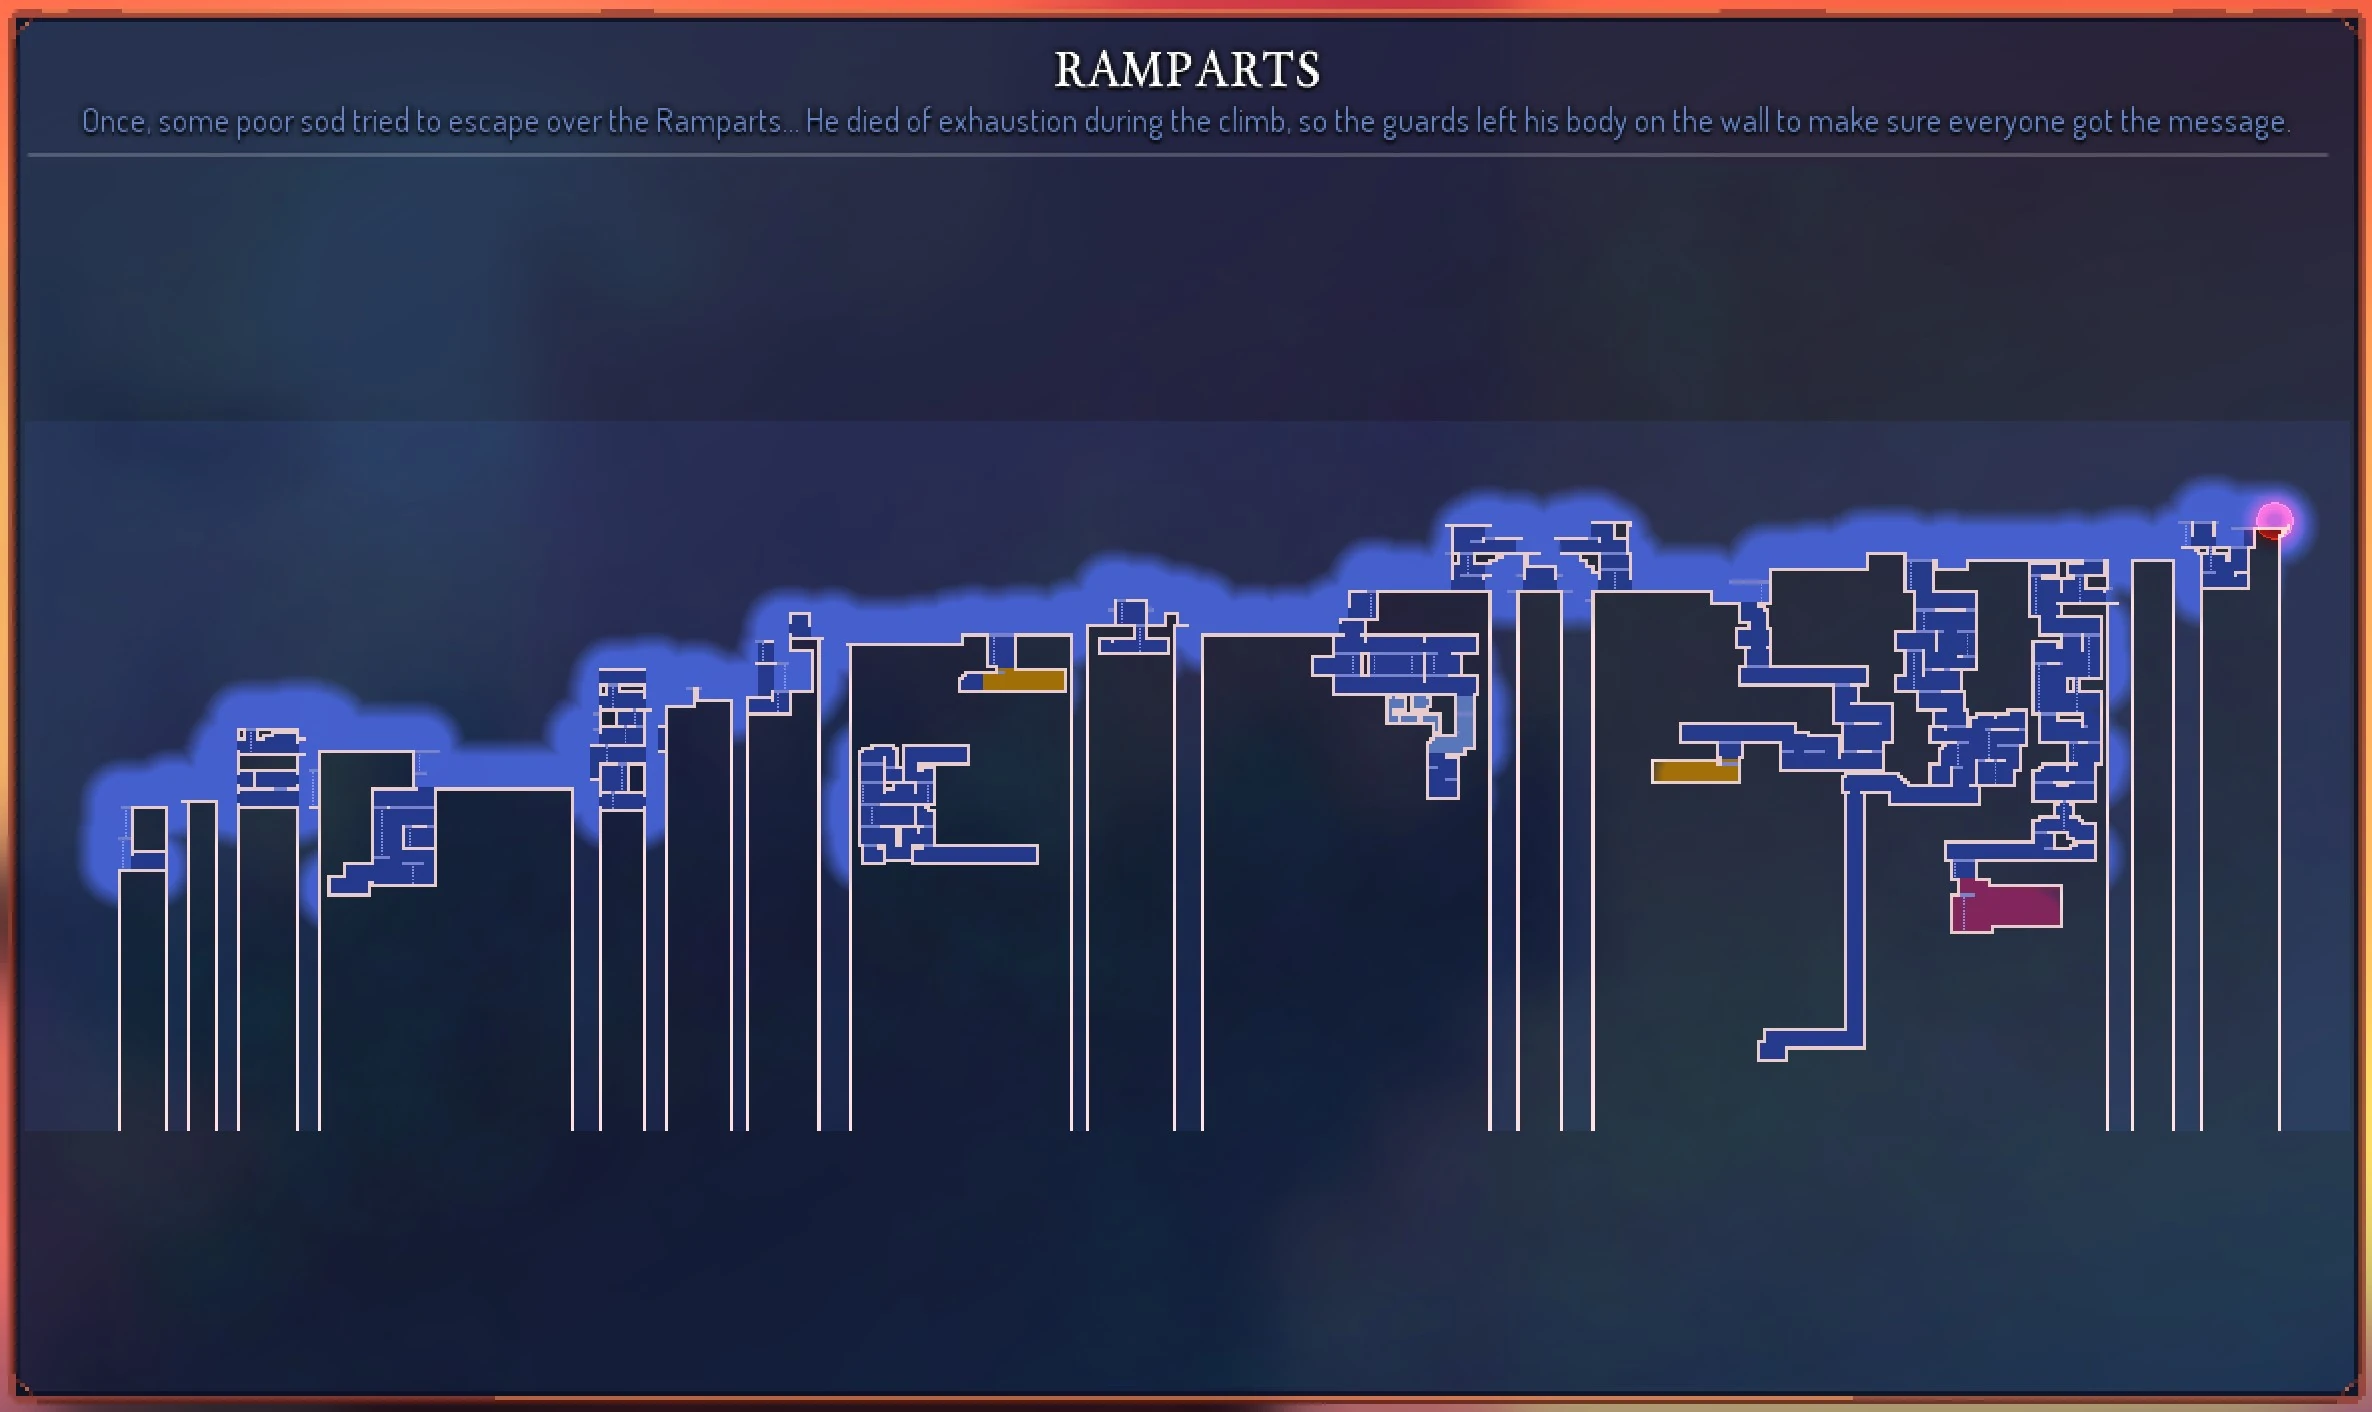
| + | File:Ramparts full map.jpg|Fully explored map of Ramparts showing general generation of the level. |
||
</gallery> |
</gallery> |
||
Revision as of 11:24, 10 June 2021
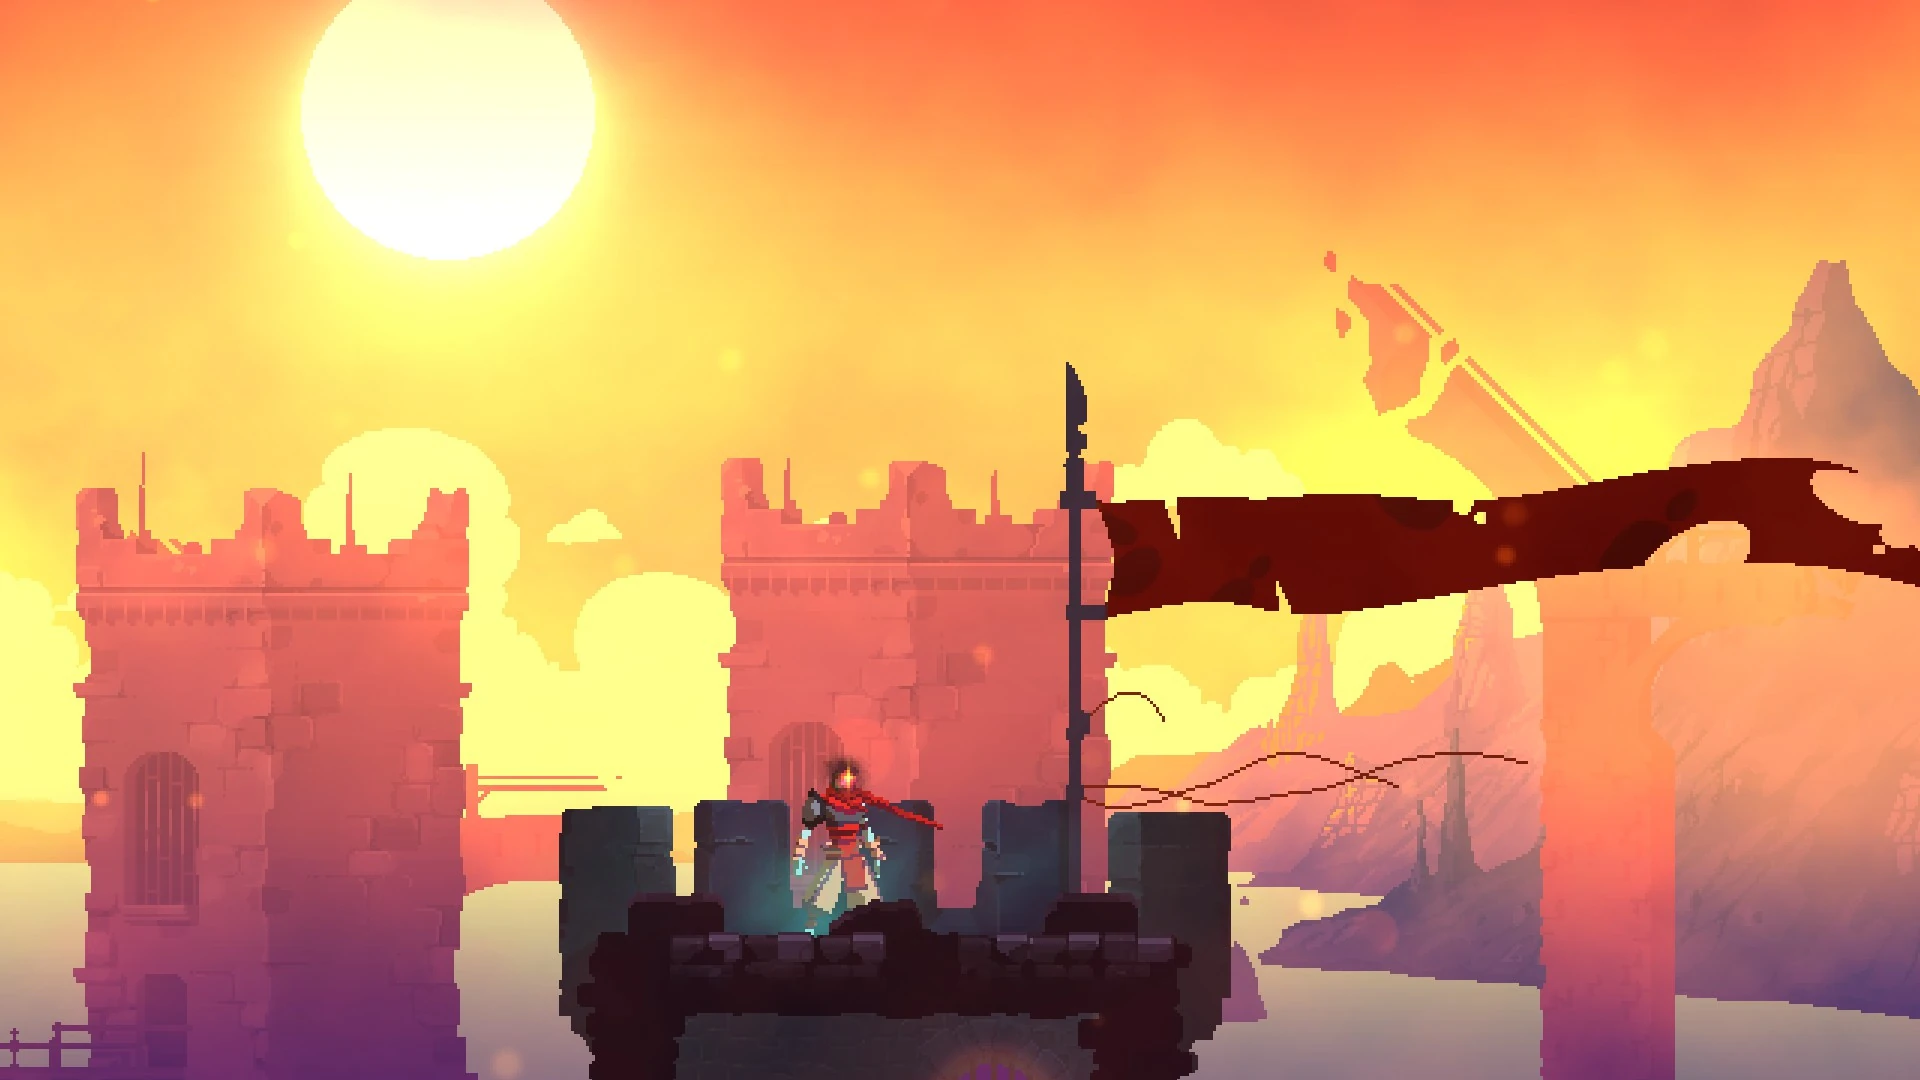
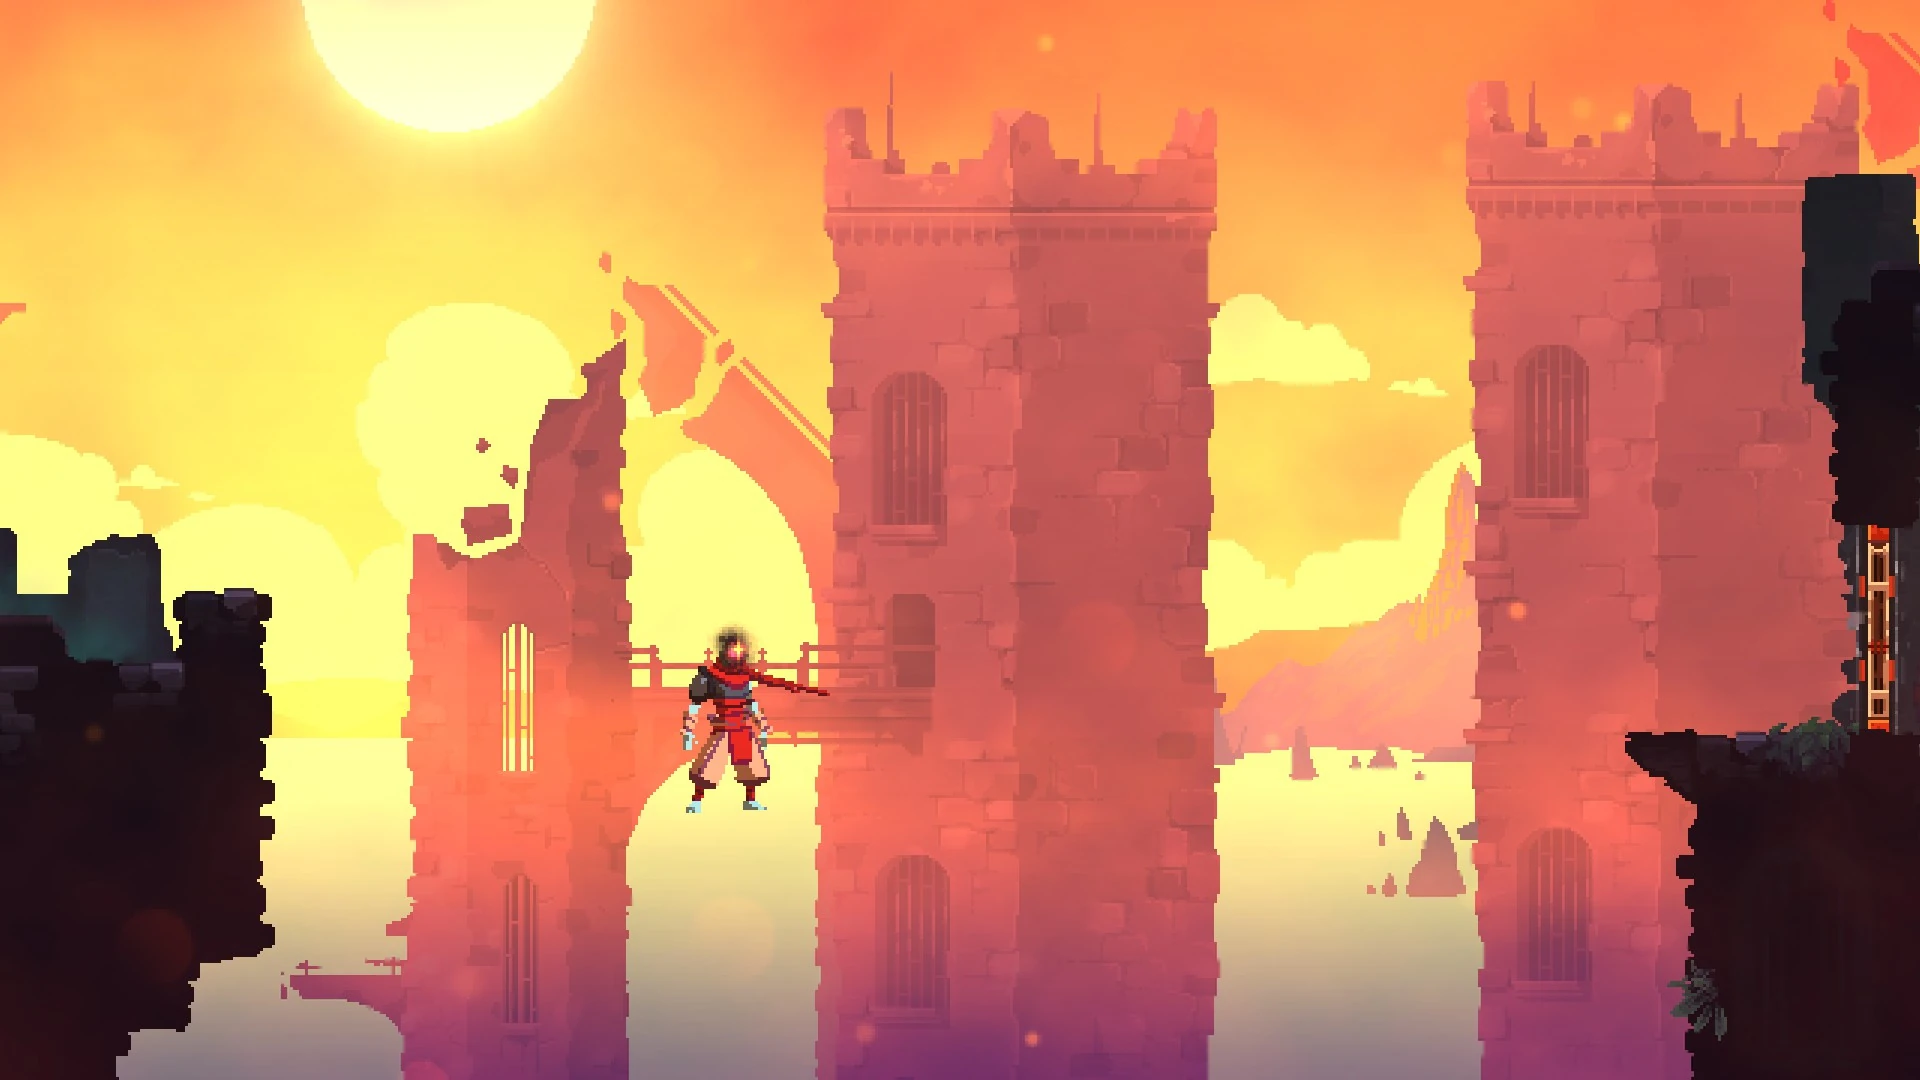
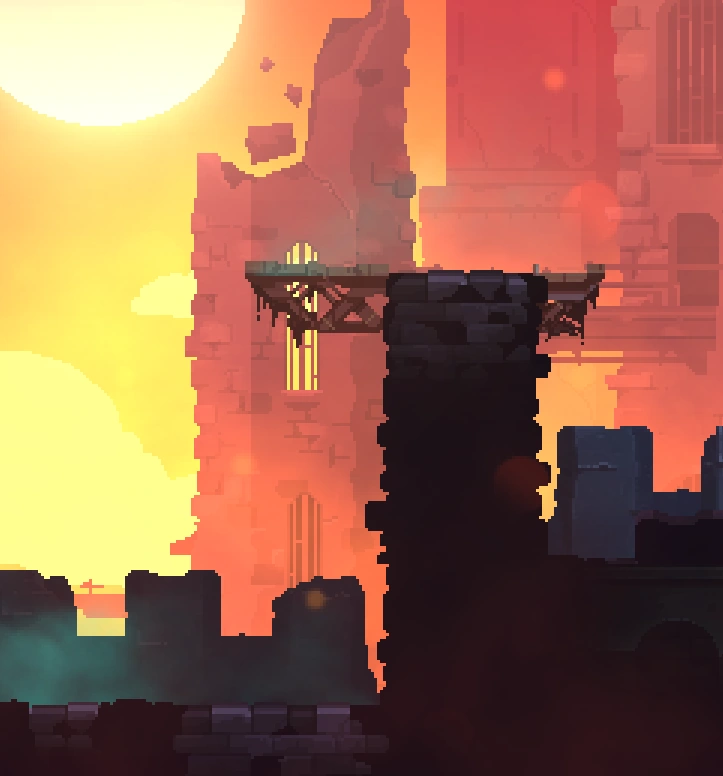
The Ramparts is a third level biome.
This series of towers lays high within the sky of the island, rising into the air. The glow of a beautiful sunset does not match the current state of these towers, sadly. After they no longer could hold the prisons, the guards retreated to the Ramparts. Now, however, the current state of disrepair is a telltale sign that this retreat did not work. When they still held these towers, sometimes prisoners would be thrown from the Ramparts, and the devices would be used for mindless torture. Even if one had made it through that horrible prison, or through the sewers and the yard, the climb would be the one to introduce them to their doom.General information
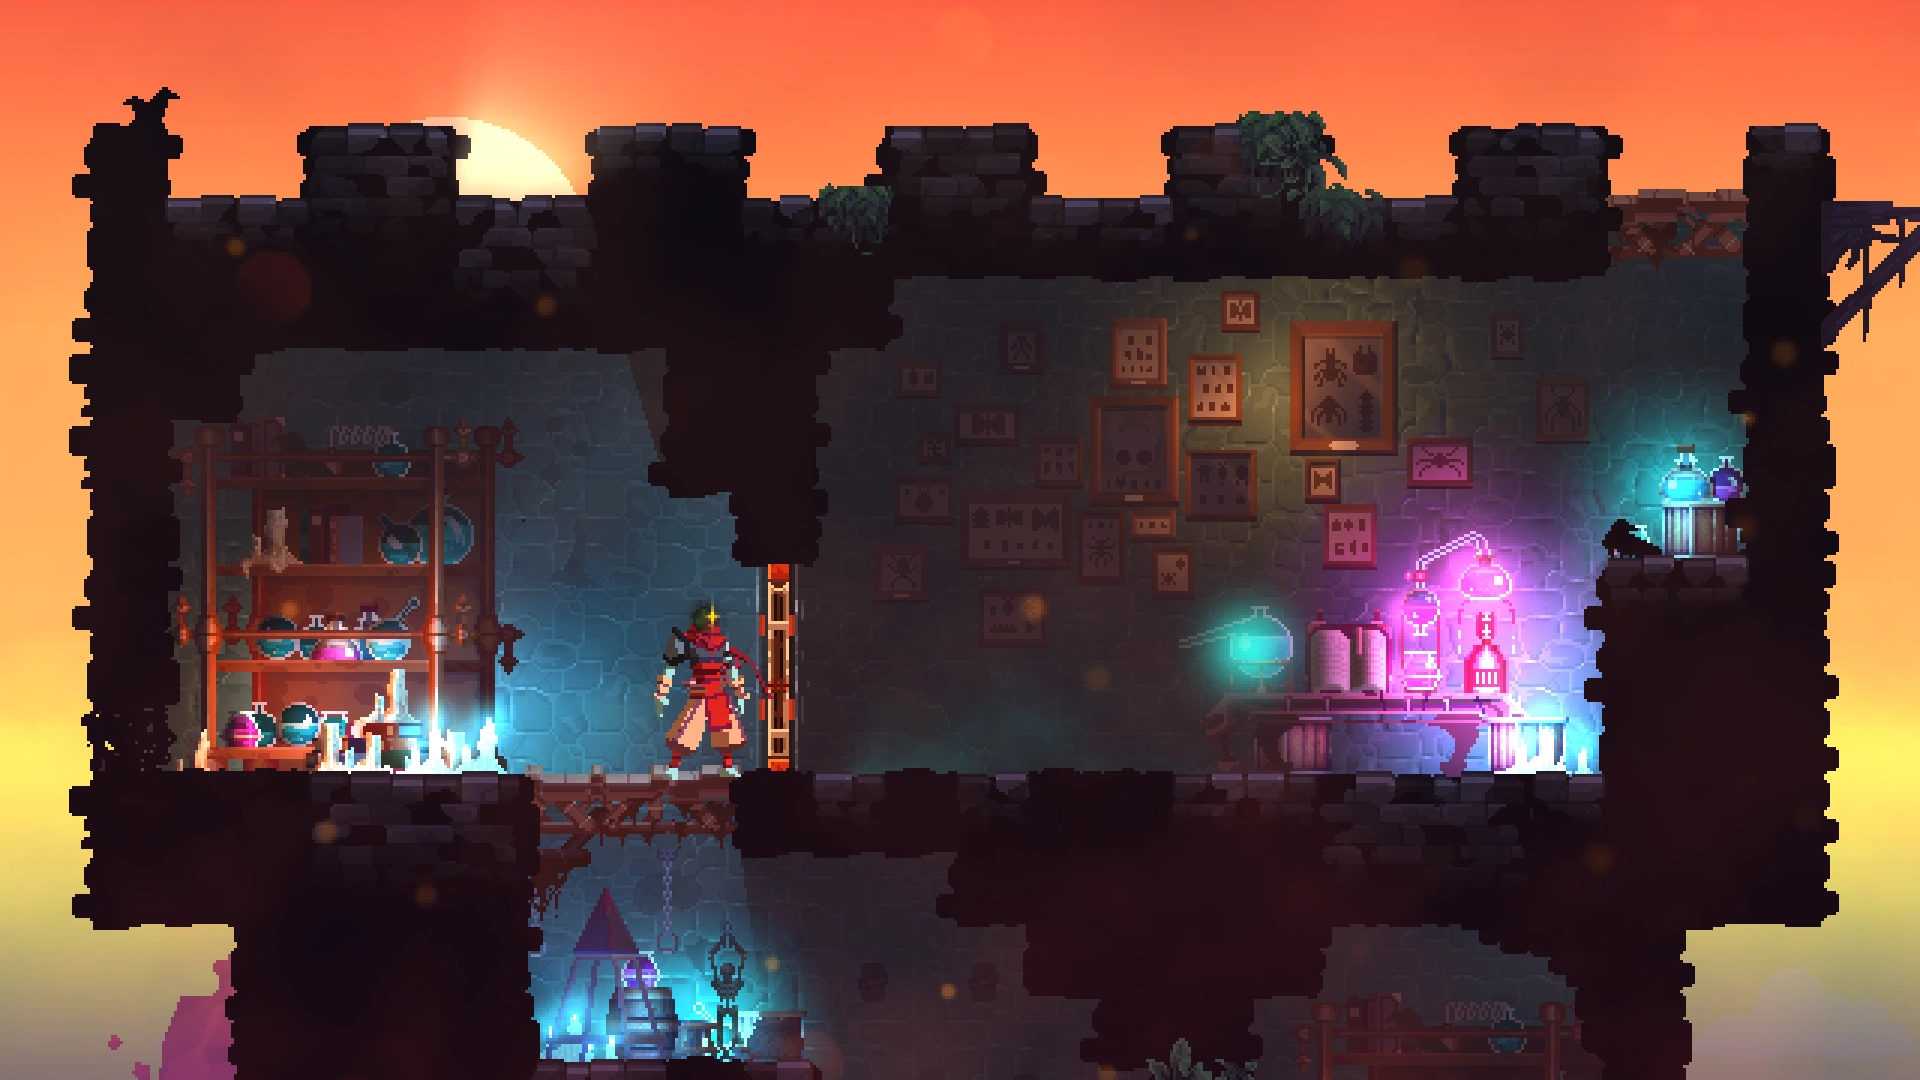
Access and exit
The Ramparts can be accessed from the Promenade of the Condemned, Toxic Sewers, or the Dilapidated Arboretum. In the case of the first two, the ![]() Vine Rune is required. When playing with 1 or more BSC active, a door in the Corrupted Prison can also lead to this biome, which itself requires having the
Vine Rune is required. When playing with 1 or more BSC active, a door in the Corrupted Prison can also lead to this biome, which itself requires having the ![]() Spider Rune.
Spider Rune.
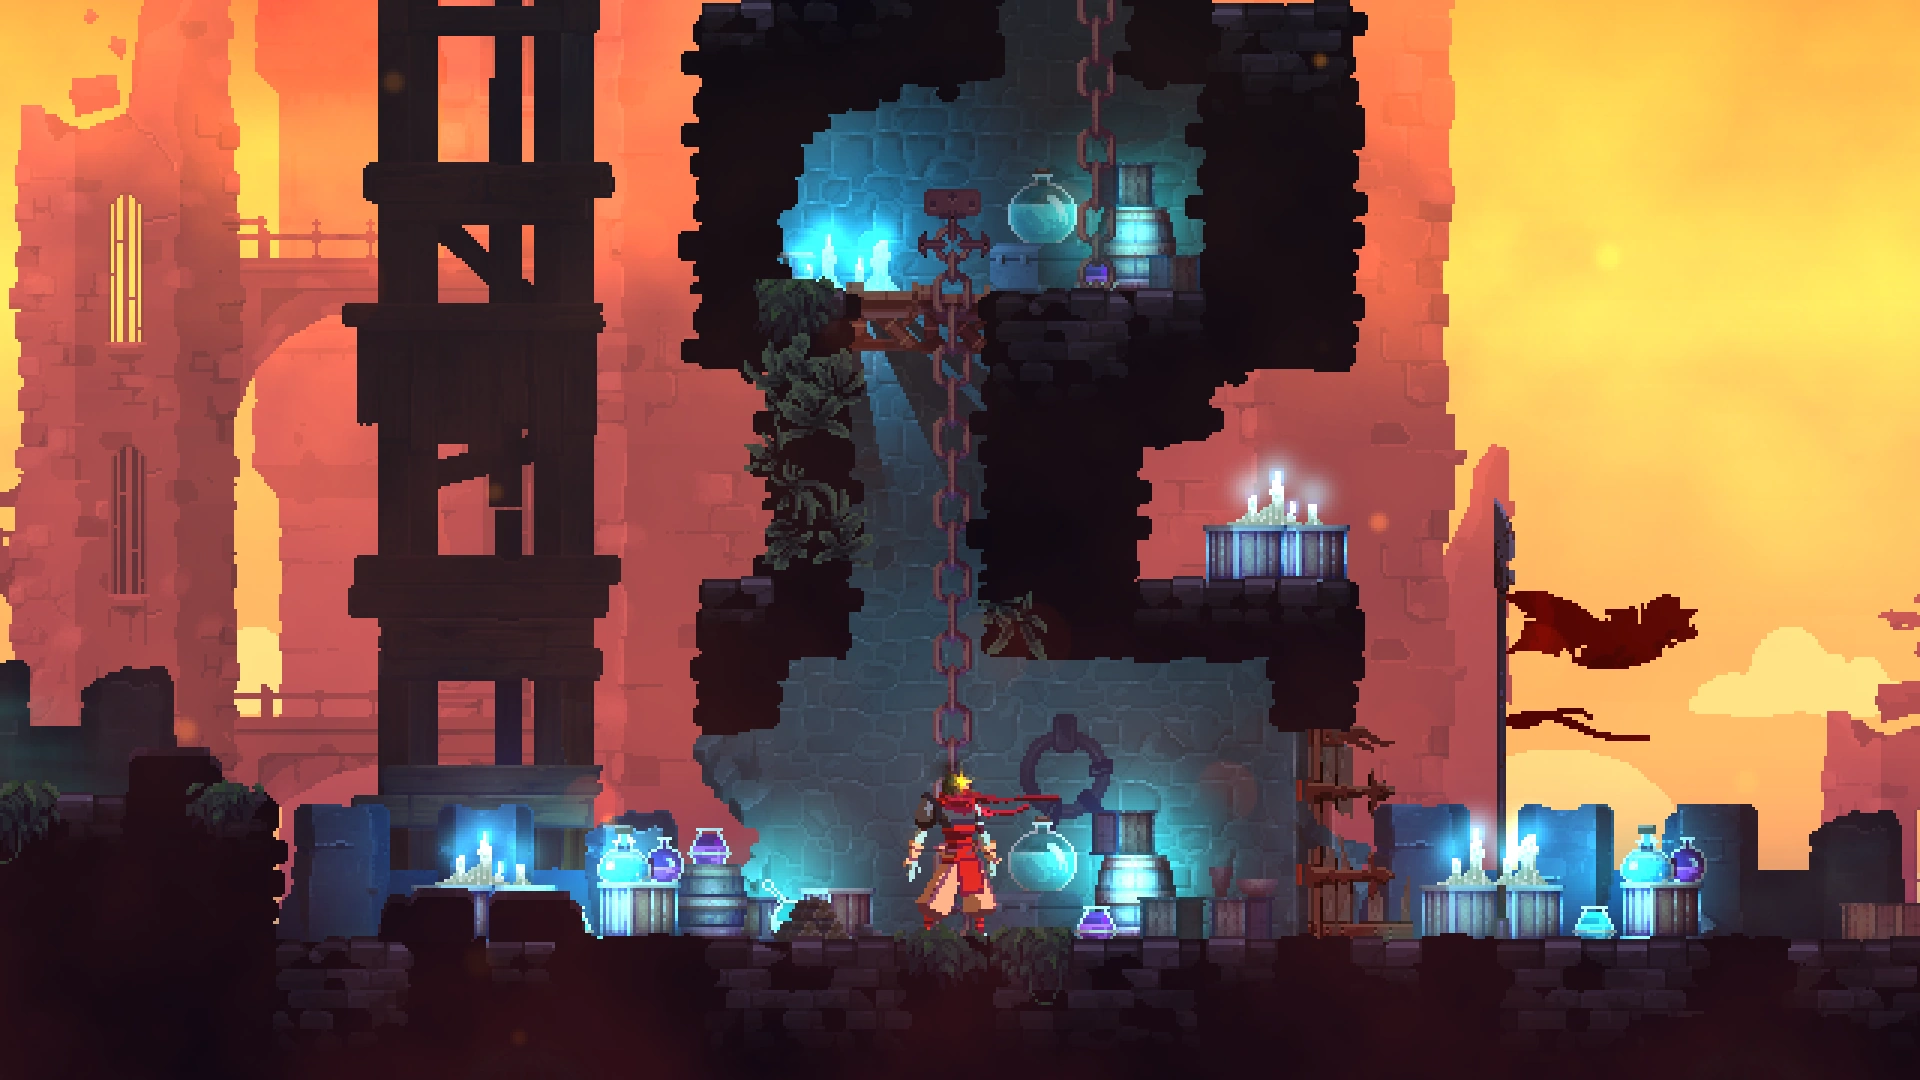
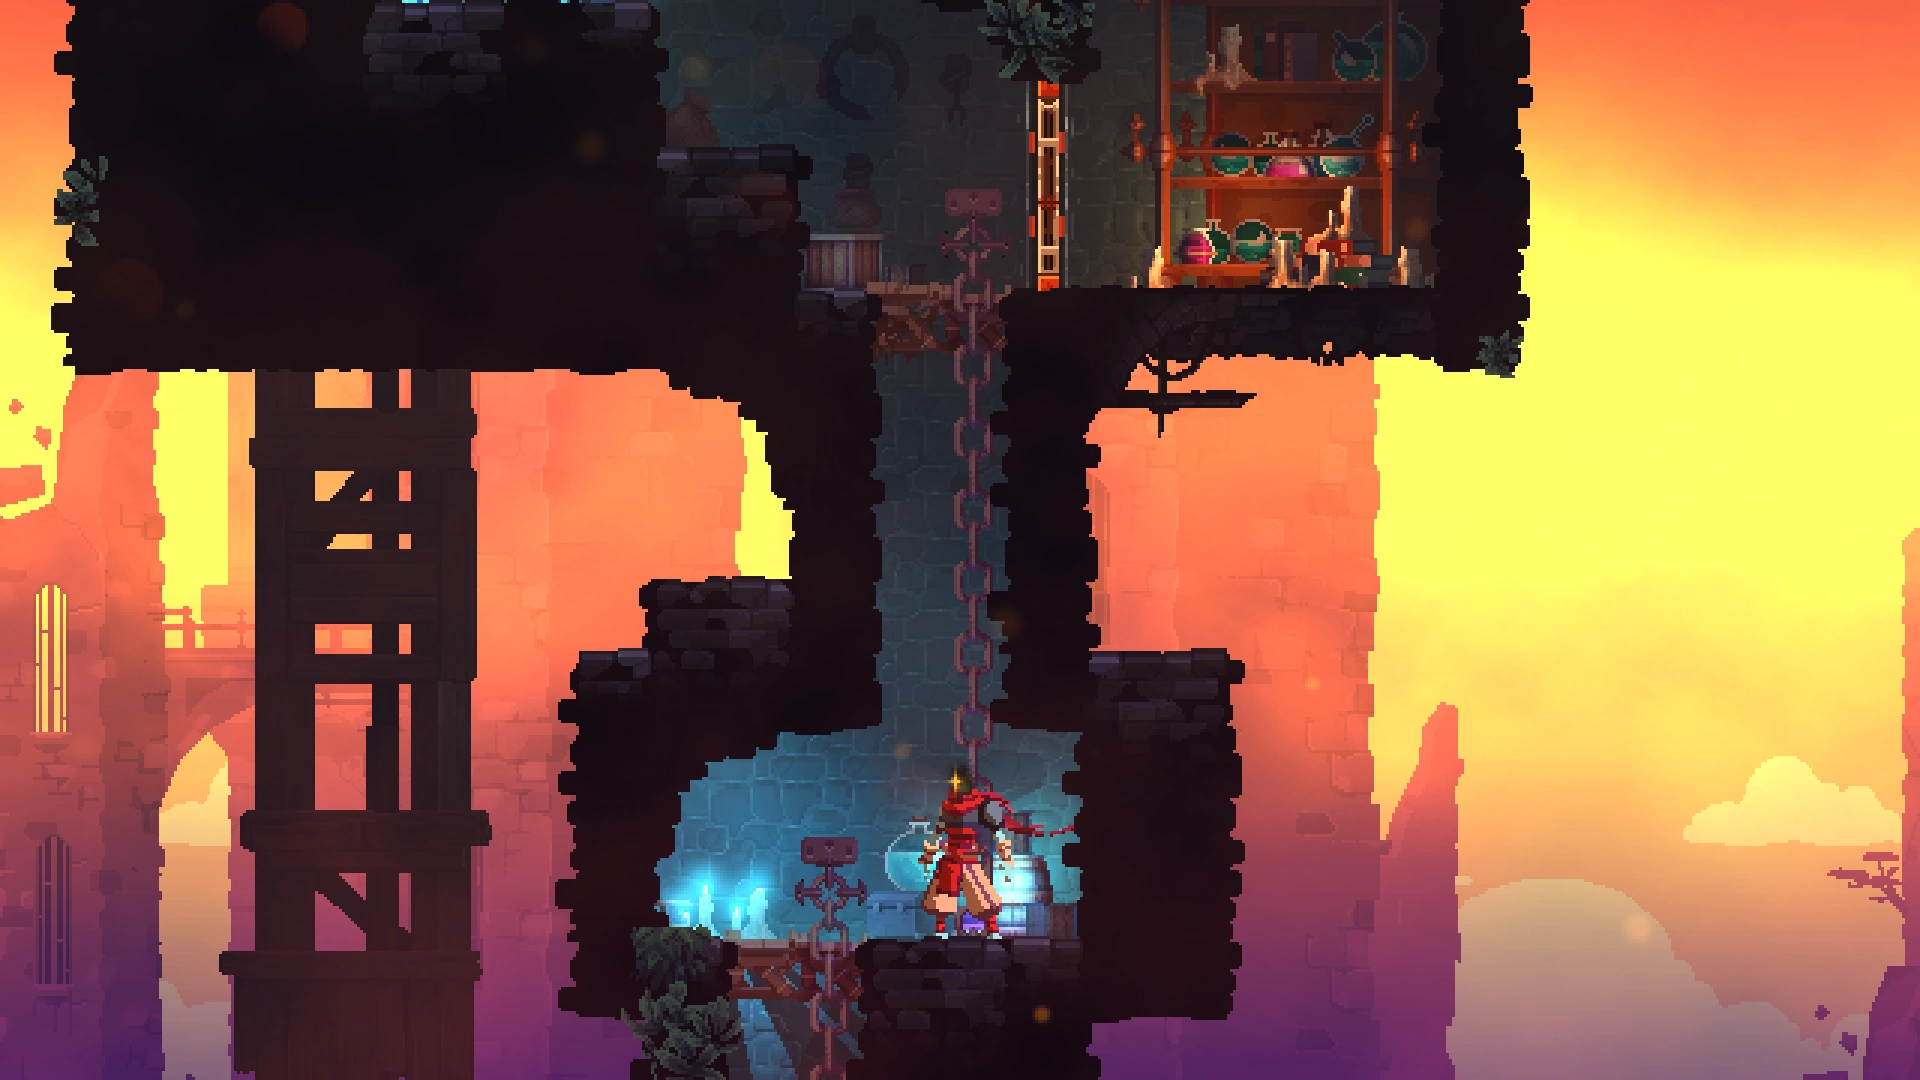
There are two exits out of the Ramparts. The main exit leads to the Black Bridge where the Concierge awaits. This exit can spawn either at the bottom of any underground tower section, or in a specific tower located at the far right end of the level. A hint on the surface of the Ramparts indicates which of these options has been generated: the presence of a wooden platform, as seen in the Gallery, indicates that the exit is in an underground section to the right, but not at the far end of the level. Conversely, the absence of this structure guarantees that the exit is located at the far right.
With at least 3 BSC active, a door which leads to the Insufferable Crypt can be accessed, where Conjunctivius awaits. Additionally, this door can spawn behind rune-locked areas.
Customization Rune
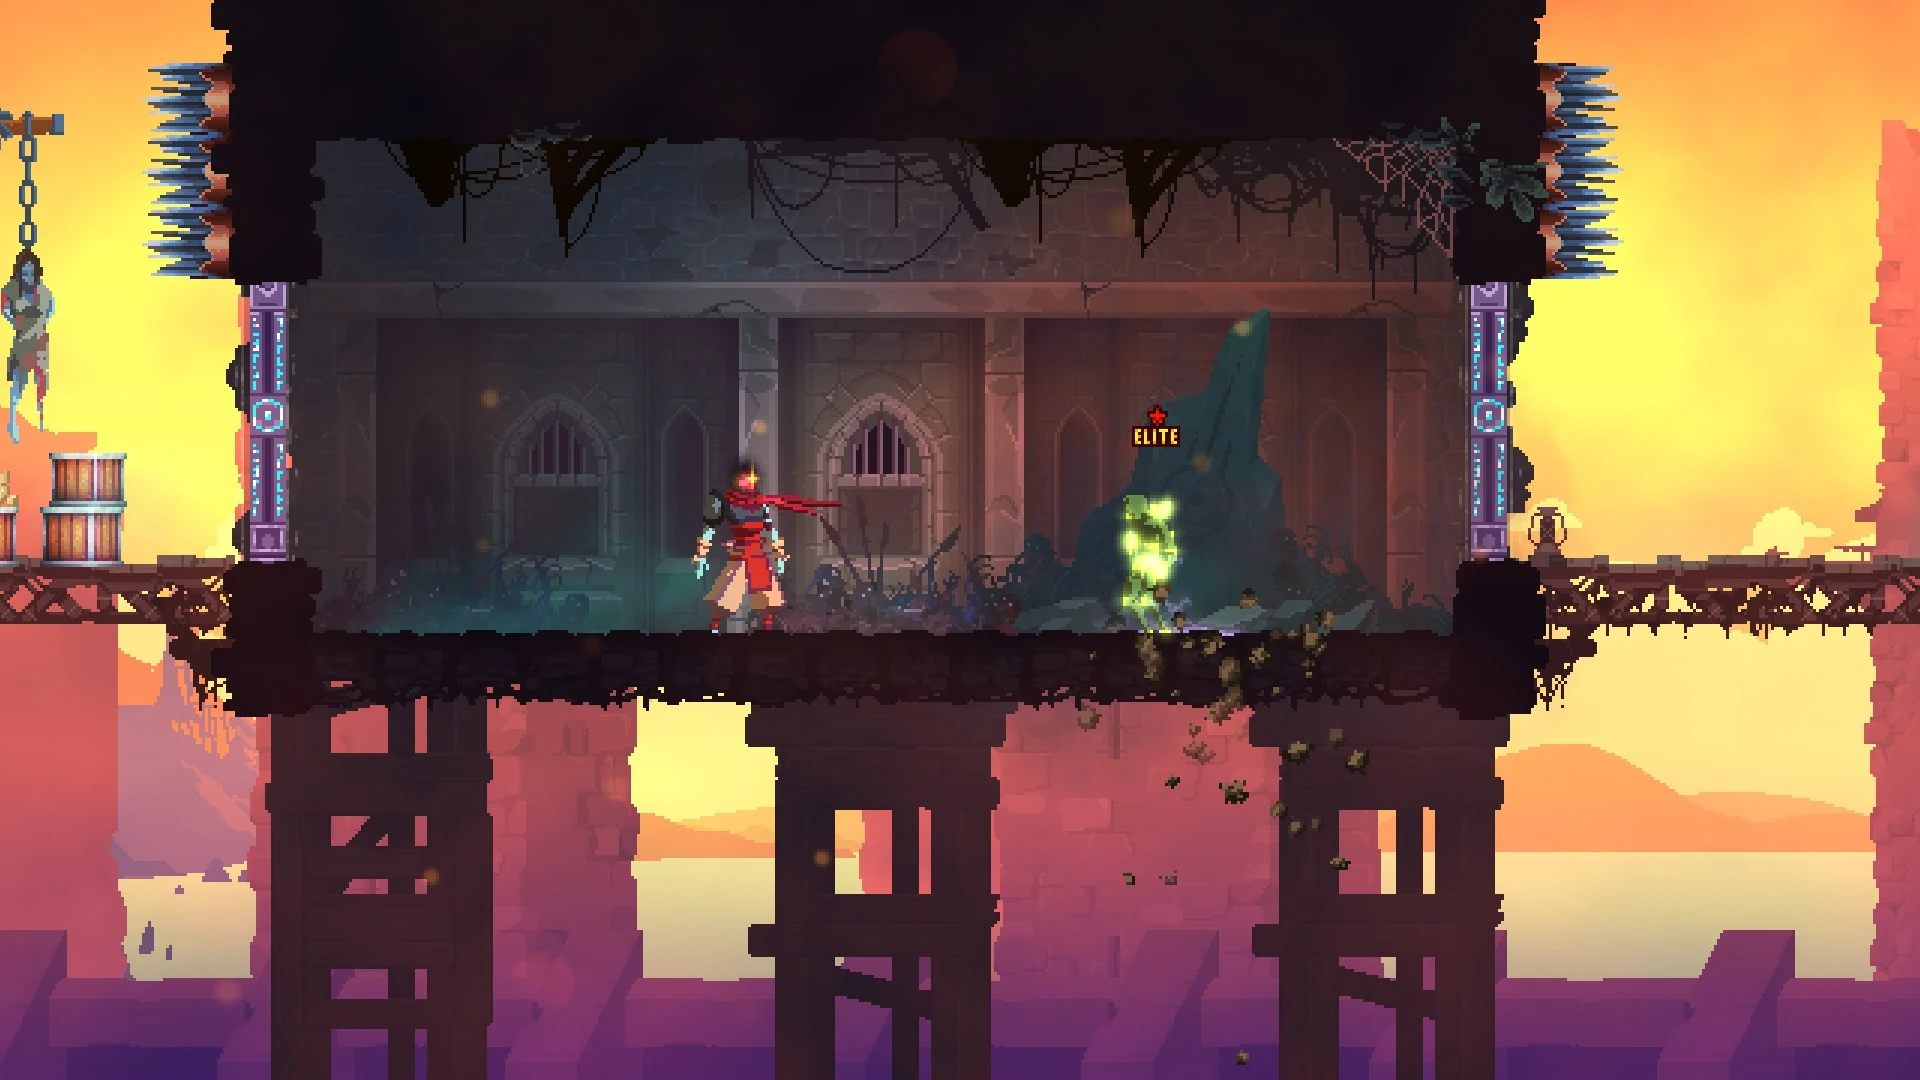
The Elite Zombie holding the Customization rune.
An Elite Zombie can be found here which drops the ![]() Customization Rune, which unlocks Custom Mode in the main menu. This Elite disappears after being defeated once.
Customization Rune, which unlocks Custom Mode in the main menu. This Elite disappears after being defeated once.
Level characteristics
Scrolls
The Ramparts contains 5 scrolls, including 3 Power Scroll and 2 Dual-stat scrolls, which cannot spawn in areas requiring the Teleport, Ram or Spider runes. On (2+ BSC) there is a bonus Power scroll. When 3 Boss Stem Cells are active, this biome has 1 guaranteed Scroll Fragment, and when 4/5 Boss Stem Cells are active, this biome has 2 guaranteed Scroll Fragments.
Enemy tier and gear level scaling
In the table below, you will find the gear level and enemy tier of the Ramparts based on difficulty.
| Difficulty | Normal | Hard | Very Hard | Expert | Nightmare/Hell |
|---|---|---|---|---|---|
| Gear level | III | III | III | IV | VI |
| Enemy lvl tier | 7 - 13 | 11 - 17 | 12 - 17 | 14 - 19 | 16 - 21 |
| Enemy Health tier | Base | 9 - 12 | 14 - 18 | 16 - 21 | 17 - 22 |
Loot and shops
Main level
- There is a 10% chance of finding a cursed chest in the level.
- 1 Treasure chest
- 1 Treasure chest behind
 Ram Rune
 - A weapon or skill shop
Boss Stem Cells rewards
- 2 BSC: Food Shop
- 3 BSC: Treasure Chest
- 3 BSC: Insufferable Crypt exit
- 4 BSC: Treasure Chest
Exclusive blueprints
Secret areas
The blueprints for the ![]() Stun Grenade and
Stun Grenade and ![]() Nerves of Steel bow are found in secret areas located at the far right end of the Ramparts (see Gallery for details). The structures that hold these blueprints are not guaranteed to spawn, therefore it may require a number of runs to get them. Note that if any of these blueprints are present, the exit to the Black bridge will not be located at the end of the level, but rather at the bottom of one of the underground sections. The first
Nerves of Steel bow are found in secret areas located at the far right end of the Ramparts (see Gallery for details). The structures that hold these blueprints are not guaranteed to spawn, therefore it may require a number of runs to get them. Note that if any of these blueprints are present, the exit to the Black bridge will not be located at the end of the level, but rather at the bottom of one of the underground sections. The first ![]() Moonflower Key can also be found here in a secret room, which is needed to access the 3+ BSC
Moonflower Key can also be found here in a secret room, which is needed to access the 3+ BSC ![]() Acceptance and requires a
Acceptance and requires a ![]() Gardener's Key to reach.
Gardener's Key to reach.
Enemies
The blueprint for the mutation ![]() Scheme can be looted from Sweepers.
Scheme can be looted from Sweepers.
Enemies
In the Ramparts, you will find plenty of Undead Archers, Inquisitors, Shieldbearers, Zombies and Buzzcutters, Sweepers, the last of these being unique to this biome. On higher difficulties, Knife Throwers, Bombers, Rampagers and Cannibals respectively replace Archers, Zombies, Inquisitors and Slashers. From 2-3 BSC onwards, the Ramparts therefore become a particularly dangerous place.
In the table below, you will find which enemies are present in the Ramparts depending on difficulty level. For each enemy, any common, uncommon, rare or legendary blueprints they carry are indicated. When applicable, the minimum difficulty level for blueprint acquisition is specified in brackets.
| Enemy | Normal | Hard | Very Hard | Expert | Nightmare/Hell |
|---|---|---|---|---|---|
| Undead Archer | Bow and Endless Quiver, Infantry Bow, Ice Bow | ||||
| Shieldbearer | Rampart, Bloodthirsty Shield, Ice Shield | ||||
| Buzzcutter | Spite Sword, Frostbite | ||||
| Inquisitor | Lightning Bolt, Vampirism, Mage Outfit (2+ BSC) | ||||
| Sweeper | Scheme | ||||
| Slasher | Cluster Grenade, Heavy Turret, Demon Outfit (3+ BSC), No Mercy | ||||
| Demolisher | Acrobatipack, Arbalester's Outfit | ||||
| Oven Knight | Kill Rhythm, Oven Axe | ||||
| Rampager | Adrenalin | ||||
Lore
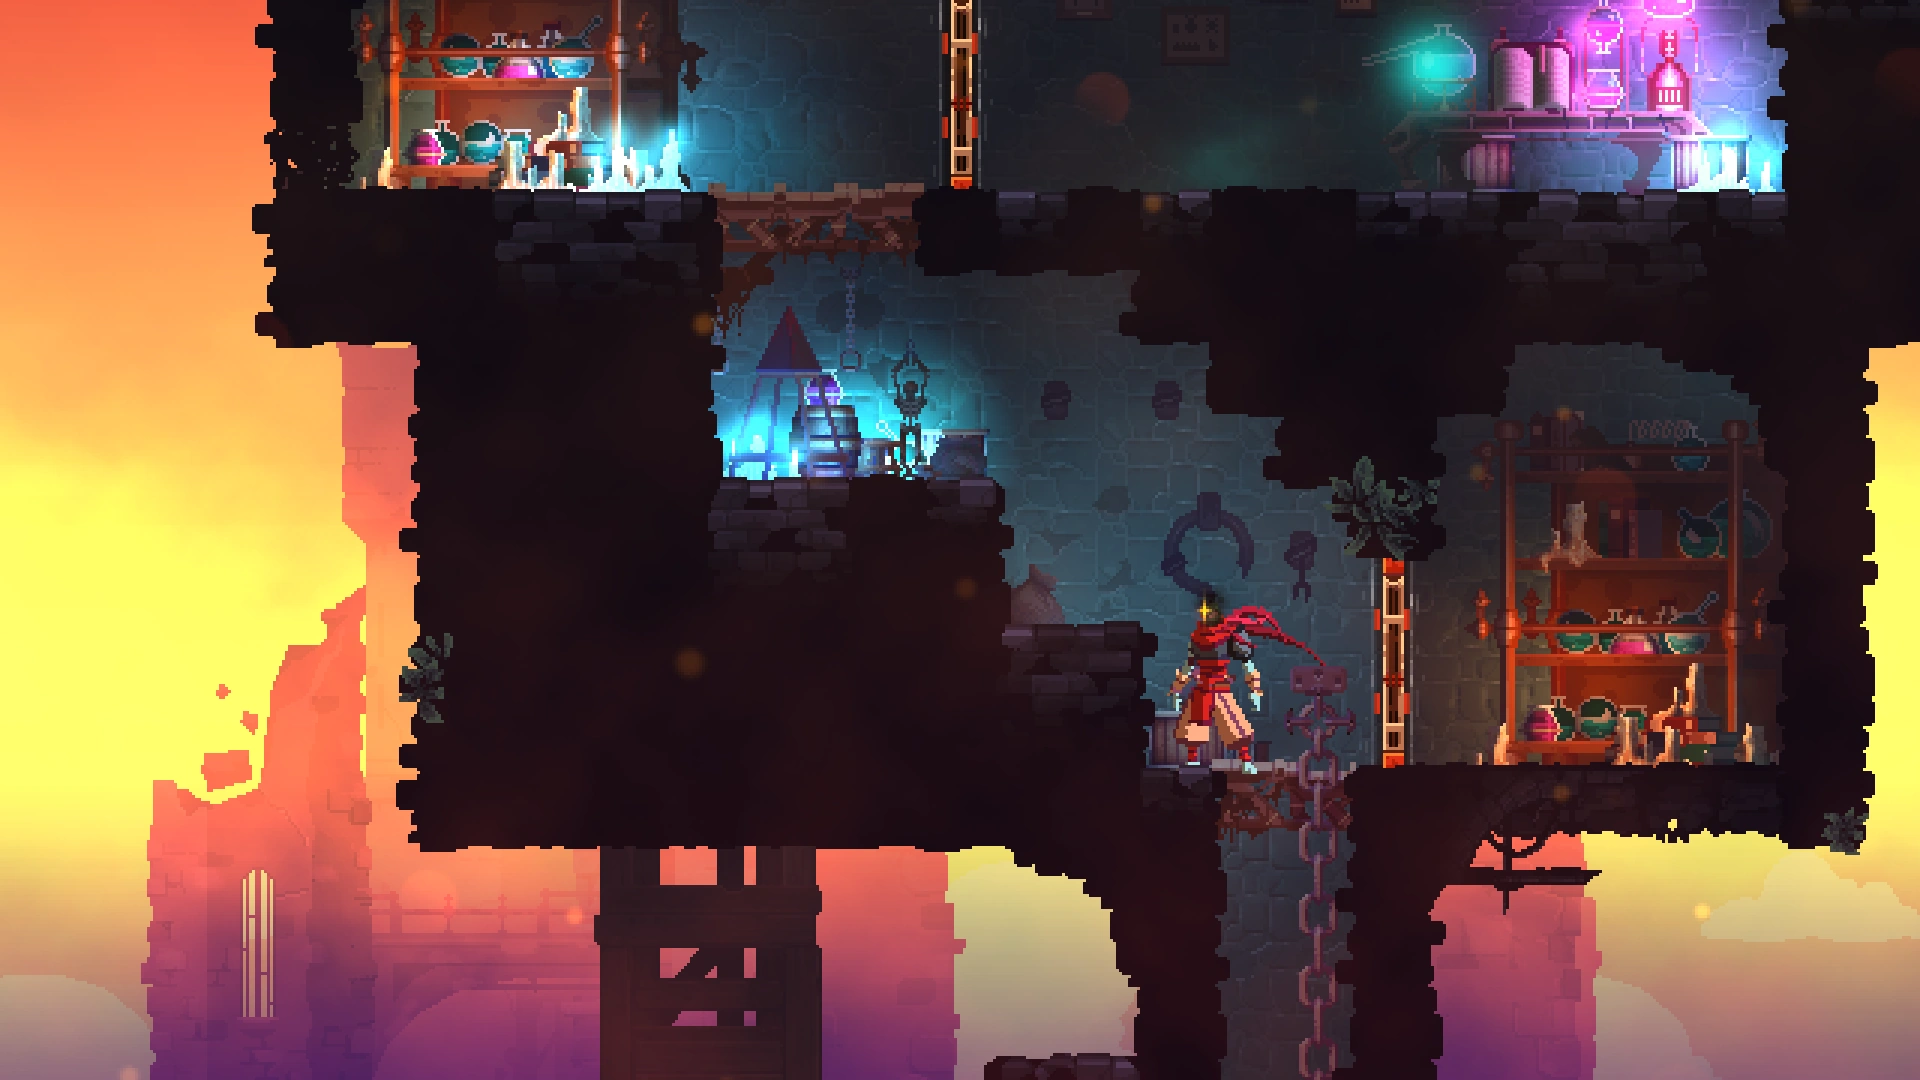
Alchemist grimoires
The Alchemist grimoire in this area reads:
- "All the species found in these areas seem changed."
- "Was it insects that spread the Malaise all over the island?"
The Beheaded also mentions how the drawings on the walls, of each bug, are sorted in a very specific order:
- "A whole collection of insects carefully classified and lined up in nice straight rows."
- "And classified by type."
- "And by size."
- "..."
- "And in alphabetical order."
- "The person who worked in this office was certainly... thorough."
Prisoners
A dead woman can occasionally be found hanging from a gallows by a chain. The Beheaded makes note of this as well as an amulet she is still clutching, and then takes it:
- "A young woman."
- "Prisoner 6541."
- "She’s clutching something in her fist."
A row of three hanged prisoners, suspected of infection, from a gallows by a chain can be found:
- "A man, about forty years old."
- "Can't really be sure."
- "Suspected infection"
The second:
- "Suspected infection"
The third:
- "This one was either a dwarf, or she was no more than 10 or 12 years old."
- "Let's just say she was a dwarf."
- "suspected infection"
Their personal belongings can also be found:
- "It was supposed to burn, but a few things seem to have survived."
- "Oh, interesting."
A sign can be found with the writing:
- "Live target training"
Next to the sign, is a bag of arrows:
- "A supply of bows and arrows."
- "Hmm?"
Across from the sign and bag of arrows is a prisoner, dead with an arrow through their head:
- "Only one arrow hit the target."
- "Right in the head."
Behind the prisoner are many arrows:
- "The prison's archers were really useless..."
Orders of the King
An order from the King to the guards says to imprison anyone showing signs of the Malaise. This can also be found in the Promenade of the Condemned.
Another order from the King says to the guards:
- "If the cells are overpopulated, use the outdoor jails or the oubliettes. Leave no suspects unsupervised."
This implies prison cells were becoming full from too many imprisonments. This can also be found in the Promenade of the Condemned.
Gallery
The Beheaded standing next to a flag atop the Ramparts.
The secret passage leading to the Nerves of Steel blueprint.
The secret tower containing the Stun Grenade blueprint (here, an amethyst spawned in its place).
Hint structure indicating that the exit is in an underground section to the right, and not at the far end of the Ramparts.
Fully explored map of Ramparts showing general generation of the level.
| ||||||||||||||||||||||||||||||||||||||||||||||